
Puppet Pin is one of After Effects’ most powerful tools. With just a few clicks and keyframes, you can transform a static image into a lively animation! The tool has its own idiosyncrasies and methods, but with this tutorial, we’ll help you learn the ins and outs of this great tool.
The Puppet Pin tool will work on any visual layer, this includes Shape, Image and even Video layers. We’ll repeat this information later on to remind you but before we get started, just keep that in mind.
Getting the Project Files
- Download the project files.
- After the download has finished, be sure to unzip the file if it hasn’t been done for you. You should end up with an After Effects Puppet Pin folder.
Project Overview
We’ll be setting up the Shape Layers in the file for the Puppet Pin first, as the tool requires some minor setup. Next we’ll be using the tool to animate a jellyfish swimming, then make a few Precomps so we can easily duplicate and add some more animation to the figure. With just a few minor aesthetic adjustments at the end, we’ll have you creating a soothing underwater scene based around one powerful tool.
Let’s get to it!

Animation Setup
1. Upon opening the file, you’ll see a few layers already in place. You don’t have to worry about them, they’re just there to visually support the animation you’ll be making in this tutorial. We’ll be focusing on the jellyfish layers in the middle, labeled pink.

2. Select the layer left tentacle shape layer.
3. ClickY on your keyboard to activate the (Pan Behind) Anchor Point tool. 
4. You’ll see a little circular icon on your selected layer.  This is the Anchor Point, the point that After Effects uses to reference where your object is on the canvas. We’ll need the program to know which point the object “hinges” from to create believable movement with our later tool. With the Anchor Point tool, you can either drag the Anchor Point up to the top of the tentacle.
5. With the layer still selected, you can click A on your keyboard to open up the Anchor Point options. This will show the Anchor Point coordinates, which should read about 120,60.
6. Select the layer middle tentacleshape layer.
7. Move the Anchor Point of the middle tentacle shape layer to its topmost point.
8. Check the coordinates to see it read about 110,33.
9. Select the right tentacle shape layer.
10. Move the Anchor Point to its topmost point.
11. Check the coordinates to see them read about78,57.
12. Now you have your Anchor Point s all in the correct Position for our animation to look real. Onto the main event, the Puppet Pin tool! Close all your open layer attributes by first hitting Cmnd-A (Mac)/Cntrl-A (PC) to Select All.
13. Press U on your keyboard to swivel shut all your layer attributes.
Puppet Pin Tool
Before we get into the thick of it, just a reminder that this tool can be used on just about any visual layer; shape layers, nested comps, images, etc. We’ve created Shape Layers for you in this tutorial so you can focus solely on learning the Puppet PinTool, but for your own projects, you'll be able to work with any media you like.
1. Select the left tentacle shape layer.
2. Click on the Puppet Pin tool in the toolbar. 
3. Now, the way Puppet Pin works is that by inserting pins into your object layer, After Effects can then animate those pins with the keyframes you put in. Let’s try it out. Make sure your Playhead is at 00;00;00;00 so when we put the pins in, they don’t appear in middle of your Timeline and are there from the beginning.
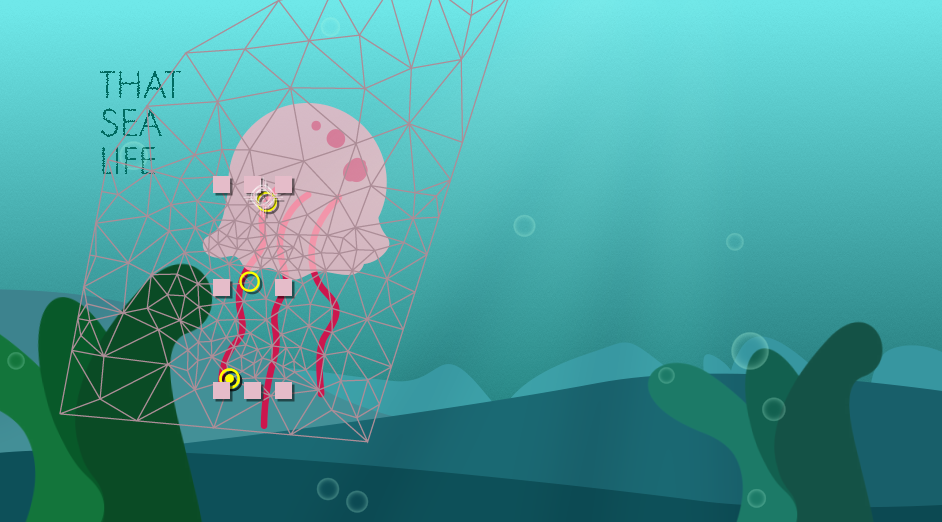
4. Click on the top of the tentacle in the left tentacle shape layer to insert your first pin.
5. Click the middle of the tentacle to insert the second pin.
6. Click the bottom of the tentacle to insert the third and final pin. Your pin layout should look something like this. The mesh over the object shows how far the program will deform its appearance. This can be manipulated in the Mesh options in the toolbar but this will work fine as is.
7. To avoid putting in more pins than we need to, select the Selection Tool. 
8. With the left tentacle shape layer selected, pressE on your keyboard to open up the Effects on the layer.
9. Click the toggle icon  to open up the Puppet options.
10. Click the toggle icon to open up the Mesh 1 options.
11. Click the toggle icon to open up the Deform options. Almost there, honest.
12. You’ll see all three of your Puppet Pin s in the layer stack. Shift-Click to select all three.
13. Click the toggle icon to open up the pins.
14. Each pin layer corresponds to a pin placed on the object layer. By clicking and dragging the yellow pins on the object, a keyframe is placed on the Timeline that lets After Effects know how to move the pin and by extension, the object itself. The order you insert pins is the order they’ll be in the layer stack.
Move the Playhead to the end of the clip, 00;00;03;00.
15. With all three pins still selected, click any keyframing diamond  to the leftmost side of the pin layer. This will place a keyframe on all three. We want this so that at the end of the clip, our tentacle returns to its initial position.
16. Move the Playhead  to the middle, about 00;00;01;15.
17. Deselect the layers by clicking anywhere else in the program.
18. Select Puppet Pin3.
19. You can either move the pin around in the composition window to animate it, or change the Position to490,760.
20. Move the Playhead back to00;00;01;10. We want the keyframes to a bit offset to add some life into the animation.
21. Select Puppet Pin 2.
22. Change the Position to 520,566.
23. Select all three keyframes
24. Hit F9 to Easy Ease them.
25. We’ll be repeating this with the other two tentacles, so select the middle tentacle shape layer.
26. Select the Puppet Pin tool.
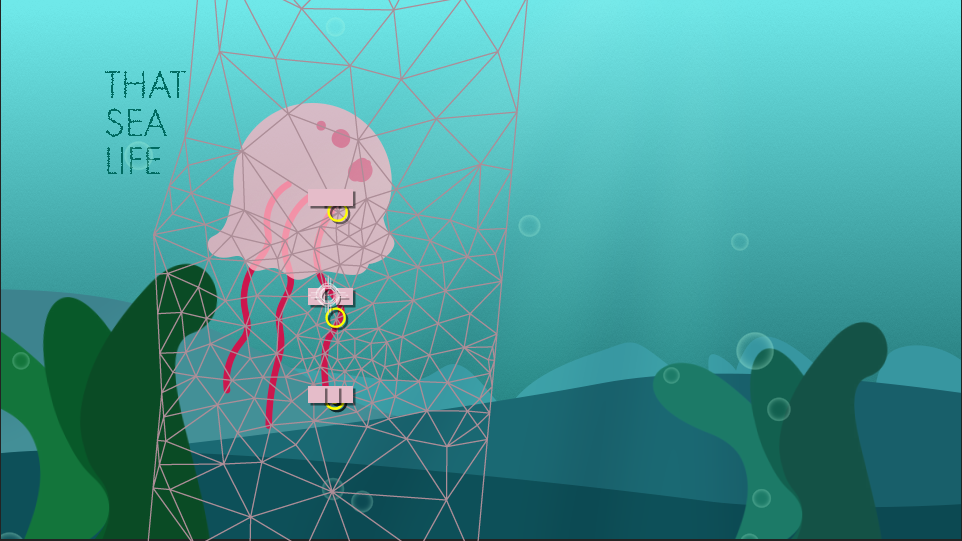
27. Like before, place the first pin on the top of the tentacle by clicking.
28. Place the second pin in the middle of the tentacle.
29. Click the bottom of the tentacle to insert the third pin. Your pin layout should look something like this.

30. Once again, switch to theSelection Tool to avoid adding more pins.
31. With the middle tentacle shape layer selected, press E.
32. Toggle open Puppet.
33. Toggle open Mesh 1.
34. Toggle open Deform.
35. Select all three Puppet Pin s.
36. Toggle them open.
37. Move the Playhead to 00;00;03;00
38. Press the diamond shape to add another set of keyframes.
39. Move the Playhead to00;00;01;00
40. Change the Position of Puppet Pin 2 to576,850.
41. Move the Playhead to 00;00;00;25
42. Change the Position of Puppet Pin3 to554,646.
43. Select all three keyframes.
44. Hit F9 once again to make them Easy Ease.
45. Last one! Select the right tentacle shape layer.
46. Select the Puppet Pin tool.
47. You know the drill. Place the first pin on the top of the tentacle by clicking.
48. Place the second pin in the middle of the tentacle.
49. Click on the bottom of the tentacle to insert the third pin. Your pin layout will appear like this.
50. Switch to the Selection Tool so we don’t add more pins.
51. With the right tentacle shape layer selected, press E.
52. Toggle open Puppet.
53. Toggle open Mesh 1.
54. Toggle open Deform.
55. Select all three Puppet Pin s.
56. Toggle them open.
57. Move the Playhead to 00;00;03;00
58. Press the diamond shape to add another set of keyframes.
59. Move the Playhead to00;00;02;00.
60. Change the Position of Puppet Pin2 to686,594.
61. Move the Playhead to00;00;02;05.
62. Change the Position of Puppet Pin3 to 687,794.
63. Select all three keyframes.
64. Hit F9 once again to make them Easy Ease. Your jellyfish tentacles are all animated! A little tedious but now you got the hang of it! We’ll be collecting this animation in a Precomp to allow us to animate the whole thing together next.
Precomping and Animation
1. Select all your jellyfish tentacle layers with Cmnd-A (Mac)/Cntrl-A (PC).
2. Press U on your keyboard to toggle all the layers closed.
3. Shift-click on all thejellyfish layers, i ncluding the body, to select them.
4. Right click on anyjellyfish layer to bring up some options.
5. Click Pre-compose. We’re collecting all the layers into a Precomp, which is like a box containing all your layers. This is so we can easily add some animation and duplicate the whole jellyfish at once.
6. Name your Precomp, jellyfish.
7. Click OK.
8. To keep things organized, let’s change the color label of the new Precomp. Click the colored box next to the layer name.
9. Choose Pink. Great! Now we’ll make some copies of our jelly and change them up a bit to differentiate them,
More Jellyfish
1. Select your jellyfish Precomp.
2. Cmnd-D (Mac)/CTRL D (Windows) will duplicate your jellyfish, making an identical layer above the one selected.
3. Hit Return (Mac) / Enter (Windows) to rename your layer.
4. Rename the layer to jellyfish 2.
5. Now press P to bring up Position.
6. Let’s move our new jellyfish to 1380,720.
7. Hit S for the Scale attribute.
8. We’ll resize this new jelly to 75% of its original size. Now it looks farther away, giving our piece some depth. One last detail to really sell the illusion.
9. Hit T to open Opacity.
10. Lower it to75%.
11. Duplicate this jellyfish with Cmnd-D (Mac)/CTRL D (Windows).
12. Press Return (Mac) / Enter (Windows) to rename your layer once more.
13. Rename the layer to jellyfish 3 if After Effects hadn’t done so already for you.
14. Press P for Position.
15. Move this layer to 1700,500.
16. Now hitS for Scale.
17. Change the size to 50% so it’s the smallest jellyfish.
18. And finally T for Opacity.
19. Change Opacity to 50% as well. All the jellyfish are set up and ready for animating! 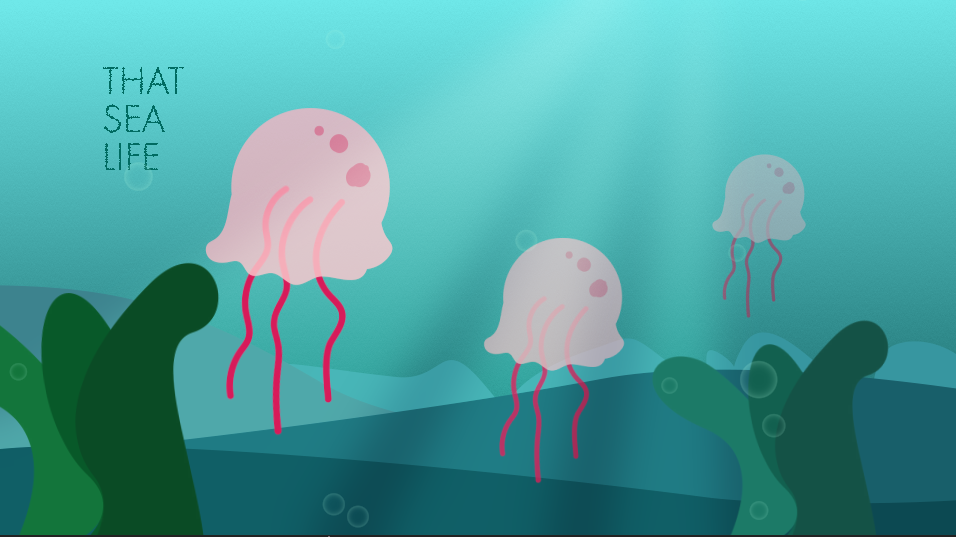
Animating the Jelly
10. Now we’ll add some animation. Select the first jellyfish layer.
11. Press P to open up Position.
12. Hit the stopwatch  to enable keyframes.
13. Move the Playhead to00;00;03;00.
14. Click the diamond to add another keyframe.
15. Now go back to 00;00;01;20.
16. Change the Position to960,590.
17. Select all keyframes.
18. Hit F9 to, yes, Easy Ease them.
19. To shorten the time spent adding keyframes for these, select bothjellyfish 1 and jellyfish 2 with Shift-Click.
20. Move the Playhead to 00;00;00;00.
21. Press P to open up both layers’ Position if they’re not open already.
22. Press the stopwatch to start keyframes on both layers.
23. Move the Playhead to00;00;03;00.
24. Press the diamond shape on both layers to add another keyframe on both.
25. Click anywhere else in the program to deselect the layers.
26. Move the Playhead to00;00;01;10.
27. On jellyfish 2, change the Position to 1380,750 to add a keyframe.
28. Move the Playhead again to 00;00;2;00.
29. For jellyfish 3, change the Position to 1700,440 to add one more keyframe.
30. Select all the keyframes in the jellyfish 2 and jellyfish 3 layers.
31. Hit F9 to Easy Ease them.
32. Go back to 00;00;00;00.
33. Press Spacebar on your keyboard to play your animation.
You’re all done!
Conclusion
There you go! Just with a little setup and know how of Puppet Pin s, we were able to make a cool underwater animation. You can create all sorts of Shapes and Puppet Pin them to make even more detailed animations, and Precomp and adjust them to make infinite variations. From jellyfish to cars to even humans and cities, with Shapes and Puppet Pin, you have a whole new world of animation possibilities before you.
Happy animating!
Learn More About After Effects & Video Editing
We offer the best After Effects and video editing courses in NYC. Scheduling is flexible, so sign up today to discover for yourself the career-changing magic of After Effects!


