
Particle Emitters are one of After Effects’ most versatile tools. By learning how each one works and how to adjust the settings, you can make anything from bubbles to smoke to caustics to even fireworks. There’s an entire menu of just particle simulators in the program, and in this tutorial, we’ll show you how to use three of the most ubiquitous ones.

Getting the Project Files
- Download the project files.
- After the download has finished, be sure to unzip the file if it hasn’t been done for you. You should end up with an After Effects Particle Emitters folder.
Project Overview
For this tutorial, we’ll be working with these particular effects: Star Burst for that cool interstellar space look, Particle Playground with a Gaussian Blur for the smoke, andCC Particle Systems ll for the engine sparks. Don’t be scared by these big names, the process largely involves just dropping the effects onto your layers and moving some settings around. We’ll also refine the look a bit with some simple Transparency animation. So let’s get started!
Star Field
1. Upon opening the file, you’ll see a few layers already there and animated. We’ll be focusing on adding effects to really pump up the piece, essentially working with only three layers total. So let’s go toLayer > New > Solid.


2. Click on Solid.
3. Name the new layer Star Field.
4. Click on the little colored box to bring up a color picker.
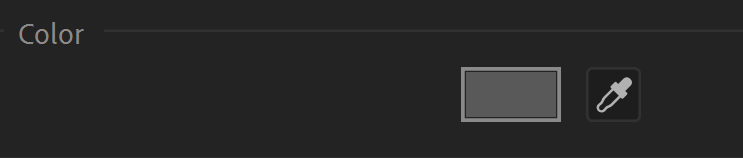
5. Change the color to#FFFFFF, pure white, by either sliding the picker to the top left or entering the hex code.
6. Click OK.
7. Click OK on the Solid settings.
8. A new layer now appears in your layer stack. Click and drag it to below the globe layer.
9. We’ll be making a super cool star field effect using Star Burst. You’ll find this by going up to Effects > Simulation > CC Star Burst.
10. Click on Star Burst.
11. This turns your Solid layer into an amazing star field, rushing towards the viewer. And that just took one effect!
12. There’s quite a few stars though, so let’s reduce the Size in the Effect Controls to 50.
13. Hit Spacebar to preview your new effect. Now we really feel like we’re in space!
Smoke
1. Okay, we’ll be making some smoke that jets out of the rocket’s engines. For this, go up toLayer > New > Solid.
2. Click on Solid.
3. Name this layer Smoke.
4. Click OK.
5. Go up to Effects > Simulation > Particle Playground.
6. Click on Particle Playground.
7. Now, in the Effect Controls, toggle openCannon.
8. Change the Position to 960,870 so the emitter lines up with the engines.
9. Alter the Direction to 180 degrees to aim the emitter downwards, like the smoke billowing out of an engine.
10. Direction Random Spread will be 150, so the smoke covers a nice wide area as it spreads out.
11. Click on the colored box to bring up the color picker.

12. Change the color to#3F3F3F, a grey color.
13. Hit OK.
14. Now the particles are grey, let’s size them up. Change the Particle Radius to 25.
15. This behaves like smoke, but it doesn’t quite look like it. We’ll have to blur the particles quite a bit so go toEffects > Blur & Sharpen > Gaussian Blur.
16. Now that this new effect appears in your Effects Panel, let’s change up the settings. Alter Blurriness to 100. Now you have actual smoke!
17. Check the box next toRepeat Edge Pixels to make sure the smoke touches the edge of the composition.
18. Finally, click and drag the smoke layer beneath the Rocket Ship Layer. We’ll just add some timing and fade out and the smoke will be done!
19. In the In column on the layer panel 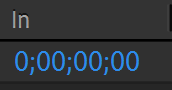 change the timing to 0;00;00;25. This will make the animation bar slide to the left, causing all the keyframes to start sooner and thus begin the animation sooner. Now the smoke is coming out when the rocket ship is gearing up.
20. Move the Playhead  to00;00;01;27.
21. With theSmoke layer still selected, hit T to bring up Opacity options.
22. Hit the stopwatch  next to the word to enable keyframing.
23. Lower the Opacity to 0°. The smoke might disappear but don’t worry, we’ll be bringing it back soon.
24. Move the Playhead to00;00;01;16.
25. Change the Opacity to100°. This will automatically add a keyframe since we enabled those already.
26. Select both keyframes withShift-Click.
27. Hit F9 to Easy Ease both keyframes.
28. Move the Playhead back to the beginning, 00;00;00;00.
29. Press Spacebar on your keyboard to preview your animation. Now you have smoke coming out of the engines! Let’s add our final effect, Sparks.
Sparks
1. For the Sparks, go up toLayer > New > Solid.
2. Click on Solid.
3. Name the layer Sparks.
4. Click OK.
5. If it’s not already on top of your layer stack, click and drag it to the top of all the layers so we’ll be able to clearly see what we’re doing.
6. Go up to Effects > Simulation > CC Particle Systems ll.
7. Click on CC Particle Systems ll.
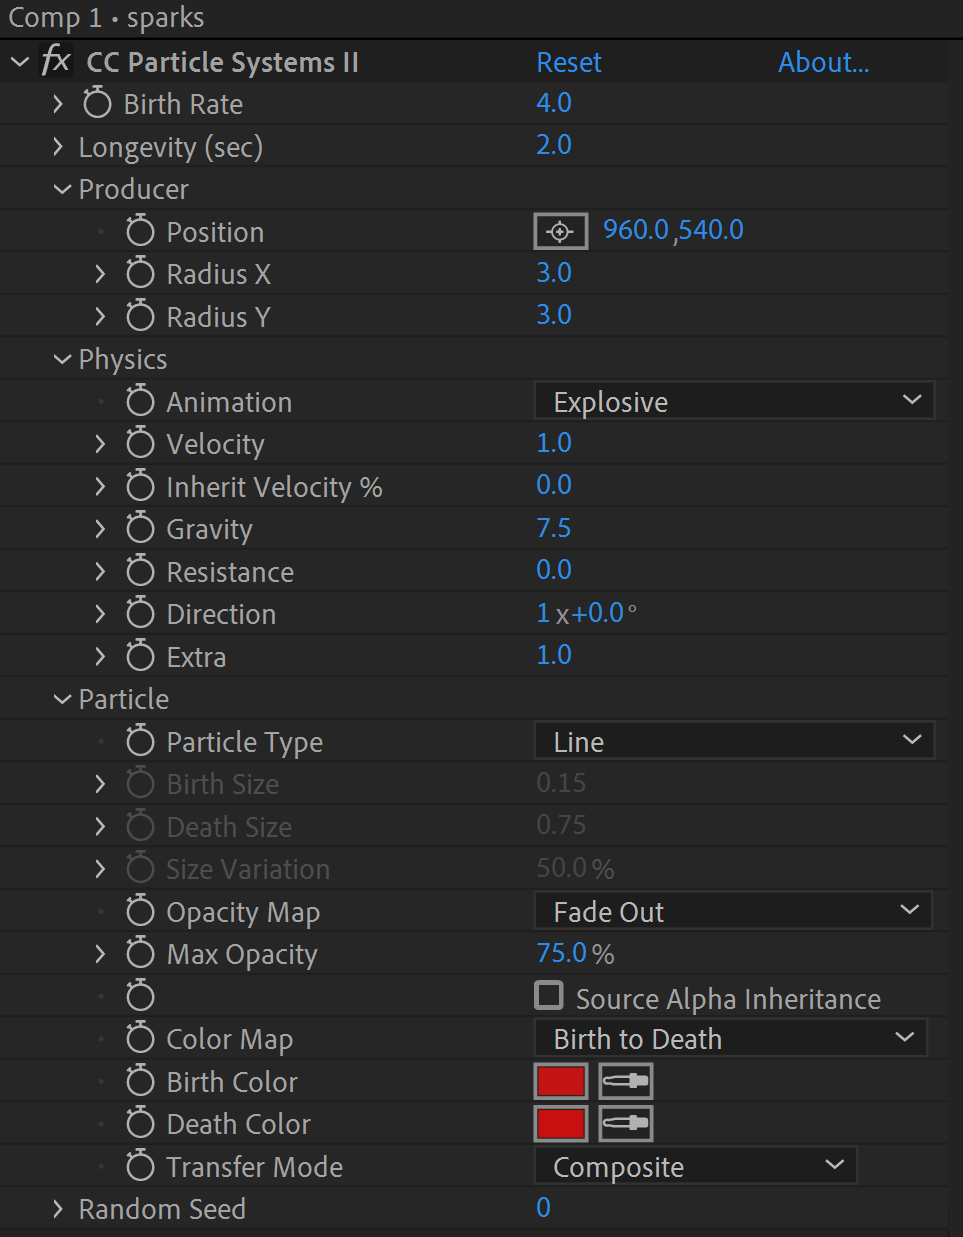
8. In the Effect Controls that pop up, toggle open Producer. This determines the location the Sparks spawn from in the composition.
9. Change the Position to 960,540.
10. Toggle open Physics.
11. Change Gravity to 7.5 to pull the sparks together.
12. Toggle open Particle.
13. In Birth Color, click on the colored box besides it.

14. Change the color to red, #C31313, in the color picker.
15. Click OK. Your settings should look something like this. Don’t be intimidated, we really changed just a few settings!
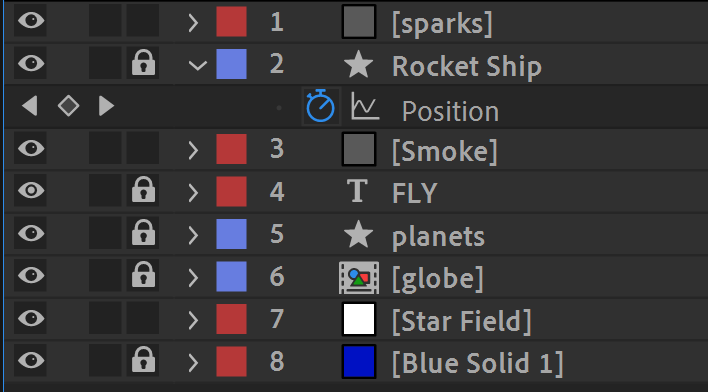
16. In the Parent & Link column, click the dropdown menu on the Sparks layer. 
17. ChooseRocket Ship from the menu. Alternatively, you can click and drag from the swirly symbol to the Rocket Ship layer. This will parent the Sparks layer to the ship layer, allowing it to follow the ship’s motion without needing to be keyframed.
18. Now with clicking and dragging, move the Sparks layer below the Rocket Ship layer.
19. Move the Playhead to 00;00;01;17.
20. With the Sparks layer still selected, hit T for Opacity.
21. Click the stopwatch besides the word Opacity to enable keyframing.
22. Change the Opacity to0°.
23. Now move the Playhead to 00;00;1;27.
24. Change the Opacity to 100°.
25. Select both keyframes.
26. Hit F9 to Easy Ease them both. And now you’re all done!
Conclusion
And you made it! Just three Particle Emitters and three cool effects add loads more detail and interest to your animation. You can alter any of the settings to create new and exciting personalized effects, like changing the particles themselves to the direction they emit to how fast or slow they're produced. You could make a foamy rim to a coffee animation, dragon’s breath, snowfall, or a nice rainy scene with even just one of the effects we used.
Happy animating!
Learn More About Motion Graphics
We offer the best motion graphics training in NYC. Our expert instructors guide you step-by-step through projects with real-world applications. Sign up today and start growing your career!
Video Transcript
Hello. This is the Tziporah Zions from Noble Desktop. And in this tutorial, I'm going to show you how to make a custom particle emitter on Adobe After Effects. We're going to be using this particular effect called the CC Particle World to make this beast form. Here, let me show you what looks like so let me show you what it looks like so you can see all these bees coming out all together swarming out of this beehive.
So the idea is to be able to, like, create clouds of particles using any shape or object that you want. First going to be setting up the fact to produce a swarm of bees, adjusting some settings, and then going back and animating the bees themselves to add a bit more visual interest. So you can see, you know, this is what a product looks like when it's all done.
So this technique is really useful for making like a ton of animated particles which is a huge timesaver. So like rather than animate like a flock of birds or these bees, fireworks, anything with a lot of moving parts, just use this effect cuts down and time increases flexibility and it doesn't run your computer as ragged. We're going to be using a couple of illustrative files that have been set up for you already.
The Bee the Bee Hive and this garden in the background. You can find the project for Tableau in the video description. So with that, let's get started all right. So let me actually get rid of this because this finished version, we want to start from scratch. So the first thing we're going to be doing is in the project panel you'll find the layer just called bee, that's all just called Bee.
Let's just drop it into our later sack like this. It makes a very big bee. Now, this is actually animated. So hold on one moment there. Actually want to remove the animation because we're going to be putting that back in ourselves later on. But anyway, we have this great big bee, so make sure to move it one more sweep of the whole thing evident right there.
And we're actually not going to be working directly on this layer just yet. It's going to come in handy later on. We're actually going to be doing for this swarm effect, this issue particle world effect helped to layer new solid. And I promise this is going to make sense in a few minutes.
So let's make our solid like a nice pale yellow and I am going to name this solid bee swarm. And OK, we have a yellow solid. So this is where we're going to head over to effects and presets over here and type in the sissy particle world. And that goes on to our new bee swarm layer and it disappears now don't worry, because what's going to happen is that we're going to be changing some settings and we're going to make it look like there'd be from before.
Right now it's the defaults kind of like the shower of sparks. We can already see that this is producing a lot of small particles. So let's head into the settings and we'll go through a couple of them, really the most popular ones. And we'll show to make this many bees. All right, so let's open up particle silver here.
So particle type we're going to be choosing textured square. And the reason for this is that we're basically telling the program, OK, we don't want the sparks. We want the particle to look like something else. Like the little bits want to be a textured square. So the program wants to know, well, what kind of texture do you want?
We're going to open up texture, texture, layer, it is going to draw its texture from the bee. Now, if we move this a little over, I'm going to turn off visibility in our main B. Now, it's quite small, but as you might surmise and guess these are all these great, but they're not shooting out in the way that we want.
We're going to have to do a couple more adjustments to get that look that we want. So the next thing that we're going to be doing is these bees are really tiny. So head over here you see the birth size and death size. So birth size refers to when these bees first appear on the scene, when they're first produced, and how big are they going to be.
And then when they're done flying around a bit, they disappear. How big are they? You know, what is their size when they're disappearing? So I want to up both of these. I want birth size. These guys are going to come out at one and they're actually going to get bigger when they disappear. All right. Give my computer a few moments to process that.
And when I'm sure the timeline a bit, you can see my computer's trying to process that, but you can already see that these guys are a heck of a lot bigger. Woohoo! They are giant. Oh. All right. So size variation here refers to how homogeneous the size should be or should they have some variety in them? I'm going to cut that in half.
I want them to be a little more homogenous and then let's see what else we have. Max opacity. So this basically refers to like how opaque you want it to be. I want them to be 100% opaque for mine. You can see that they're not transparent anymore. Well, you'll see that in a few seconds, you know, because they're their bees.
I don't want them to be see through the next thing that I want to change here. So the colors over here, so the first color does color. You can probably figure it out when they appear on the scene. They're yellow when they finish their little lifespan, they turn red. I just want them yellow. So I'm going to move first color.
I mean, this color right over to the yellows. They're all now yellow. All the way through. It's a little like they're different. Colors are not exactly the same. I didn't use the same hex code, but it's not a big deal for what I'm using it for. All right. We're actually going to be heading up through the settings.
Let's go up about birth rate. How many bees, you know, how many do you want to be produced oh, you know, all at once. It doesn't mean that there's going to be two bees appearing, you know, like every second that's it's going, but it's there's a correlation between this number and how many appear. But basically, you can figure out the bigger the birth rate, the more bees you have at the start of your animation.
I just want one. I want to be one and longevity is how long do you want these bees to be on the scene? I just wanted at one. I'm not changing that Now, let's head over to physics. So the animation, the reason why it's spreading out in that cloud is because it's such explosive I want this to get sideways.
And the other settings you can see here, twirl twirly, which you could probably figure out what they look like fire. You know, that kind of rises up vortex. That's also kind of almost a swirl kind of thing. You could try these out, but for my purposes, I want to get sideways now these guys. So what I am first going to start with is velocity.
So lastly essentially refers to how fast these guys are coming out. I want them to be coming out fast, but not as fast as two. Originally I'm actually not going to play my animation until the very end just because while this fact is better than animating on hundreds of these things, it's a bit of a heavy effect. So I just prefer to get all my settings done all at once, test it out and then head back to the drawing board if I need to.
Now, gravity refers to how strong gravity is. How much of a pull downwards does it have? How maybe gravity is real in the negatives and this stuff is floating upwards. I am actually going to set my gravity to start with 2.25. I'm going to set a keyframe over here and then I'm going to move up a bit and then I want my gravity to go up.
I want them to push upwards. All right.
All right. Almost done. Oh, I nearly forgot. I said I want to set this to get sideways. I actually want this to be direction axis. I apologize for that. All right. Finally, we're going to be going over producer. So producer refers to kind of the point at which all these particles come out of and how to position it.
So let's talk about that. So let's line it up with the beehives so position y, I got about -10 to start with and let's change position X over. Please move over you know, let's fine-tune it a little bit. Line it up perfectly. Almost perfectly. Nothing's going to be perfect. And this. Yeah, yeah, that looks all right. That looks all right.
It looks like what I want. I've got four here. I've got -9 in my position. One I've got a negative point four. Oh, negative. Sorry about that. Negative.094 Y and negative point four as you can see for X. All right, with that, let's head over and actually animate these little bees. So to do that, we're going to double click double click inside the bee pre-comp.
I'm actually going to do a simple animation on these guys. Left wing, right wing you see, if you don't have the anchor points at the base of the wing, you press Y and you drag the anchor points down until they are at the base of the wing respectively. I'm just going to do the little rotation thing here. And the reason why I'm doing this is because I want if I animate the particle, the source layer where the particle comes from, all the particles animated, which is, again, a very brilliant time-saving technique.
All right. I've got my animation of the bee flying and it will update in my main comp. So let's play it. All right. You can see that these bees are buzzing. So this technique can be combined with causing blur to make a smoke effect, or it can be parentage to other moving layers to create shooting effects like a cannon.
The particles themselves can have more complex animations and in turn would lead to the effect itself. Snow, fire, glitter, they can all be created with this effect. So that's all for this tutorial. Oh, we've enjoyed learning how to make your own custom particle emitter and Adobe After Effects. This has beenTziporah Zions for Noble Desktop.


