
So say you type out some text in After Effects. You might notice that around your letters, there’s an additional thin line, perhaps in a different color. Or you may have seen that in your color options, there are two boxes, one for fill and one for stroke. So what is that stroke anyway?
A stroke is pretty simple: It’s just the outline around your letters and can be modified to have a different appearance or even motion than the fill.
Getting the Project Files
- Download the project files.
- After the download has finished, be sure to unzip the file if it hasn’t been done for you. You should end up with an After Effects Animating Strokes folder.
Project Overview
In this tutorial, we’ll be putting together an animation that utilizes the Trim Paths tool to produce a cool “appearing stroke” animation. We’ll be using the Gaussian Blur effect to blur out a background photo, fading in some text, and, most importantly, animating some text strokes.
Let’s get started!

Setting up the File
1. Launch After Effects.
2. Navigate to After Effects Animating Strokes Files and open Stroke Animation.aep
3. In the layers panel, you should see a base layer containing a photo, then two text layers above it. The text layers may be a bit hard to see because they are both set on an Overlay layer mode, but we’ll soon fix up that visibility issue with an effect.

4. Click the photo layer to select it.
5. Go up to theEffect options in the topmost toolbar.
6. 
7. Click on it.
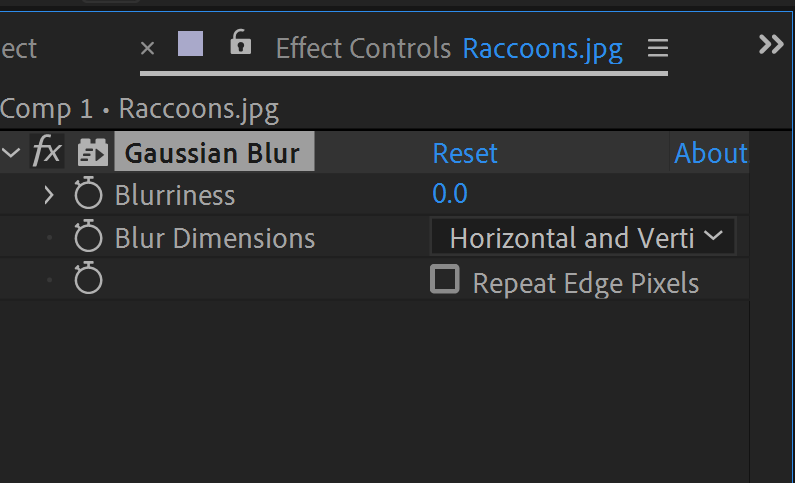
8. Navigate toBlur and Sharpen > Gaussian Blur. This should instantly apply the effect to the current layer selected, the photo layer. You also should see effect options appear in the leftmost panel.
9. Move the playhead to 00;00;01;15.
10. In the Gaussian Blur effect control panel on the left, change the Blurriness attribute to 230.
11. To the left of theBlurriness attribute, you should see a stopwatch.  Click it to activate a keyframe.
12. Check the box next to Repeat Edge Pixels. This will make sure that the edges of your image are as blurry as the rest.
13. Now, let’s move the playhead back to the beginning at 00;00;00;00.
14. Go back to theBlurriness attribute and change it to0. This will automatically add a keyframe as you have activated the stopwatch earlier.
15. If you don’t see the keyframes on the Timeline, make sure your image layer is selected and hit U. This will show all your current keyframes.
16. Select both keyframes.
17. Hit F9 to add an Easy Ease In.
18. Now hit the spacebar to play back your animation. The background image should go from clear to blurry and make your text easier to read! We’ll be animating the text in the next few steps.
Animating a Fade-In
1. We’re going to animate the top layer of text first, so let’s select that in the layers panel.
2. Move the playhead to00;00;01;20.
3. With that top layer of text selected, hit T on your keyboard to open up the Opacity attribute.
4. Click the stopwatch to activate keyframes.
5. Change the Opacity to 0 percent.
6. Now let’s move the playhead to 00;00;02;08.
7. To make the text appear, change the Opacity to 100 percent.
8. Select both keyframes, and yep, hit F9 to make them Easy Ease In.
9. Move the playhead back to the first frame.
10. Hit the spacebar and watch your text fade in! Just one more animation to do: the stroke.
Animating Text Stroke
1. We’re going to right-click on the bottom text layer to bring up some options.
2. Navigate to Create > Create Shapes From Text.
3. Click on Create Shapes From Text.
4. A new layer appears! If you look at your layers panel, you’ll see your bottom text layer still exists, but has the visibility turned off. If you’d like, you can even delete it to clean up your layers.
5. Select your new text outlines layer.
6. All the way on top, you should see a Fill option and a Stroke option.

7. Click on the word Fill itself.
8. A small window with coloring options will come up. Click the leftmost box with a strikethrough symbol to make the Fill invisible. This might make your text seemingly disappear, but don’t worry, it’s still there and we’ll get it visible in the next few steps.
9. Now, click the rectangle to the right of the word Stroke.
10. This gives you a color picker. We’ll be using pure white, #FFFFFF, so you can either copy-paste that hex code into the color picker or just slide the picker all the way to the top left.
11. Click OK.
12. One last detail here, click the number to the right of the Stroke options. 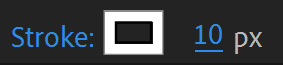
13. If it’s not already there, enter 10.
14. Hit Return (Mac) / Enter (Windows).
15. Now let’s look in the layers panel at your outlines layer.
16. Click on the little arrow next to the color label  to swivel open your options.
17. You should see a round button next to the word Add. Click on it.
18. This will give you different options for animating your objects. We’ll be using Trim Paths, so click on that one.
Whoa! A bunch of options now appear within your layer, but don’t feel overwhelmed; we’ll go through them one by one.
19. Let’s go up to the first letter of your text layer and toggle open the Trim Paths attribute.
20. Move the playhead to 00;00;01;14.
21. In the Trim Paths attribute on this first letter, there should be an End option. This option and the Start option determine where the stroke of the shape begins and, of course, ends.
22. Hit the stopwatch on theEnd option to enable keyframes.
23. Slide the number next to the End option all the way to0 percent.
24. Then move the playhead to00;00;02;11.
25. Now we’ll change that End option number to 100%.
26. Select both keyframes and hitF9 to get an Easy Ease In.
27. Play or scroll the playhead to view your stroke animation. You should see the letter “writing” itself on the screen. Cool, right?
28. We’ll be repeating these steps for the rest of the letters, so you can either follow these following timecodes or feel it out yourself.
29. For the second letter: 0 percent at 00;00;01;19 and 100 percent at00;00;02;14.
30. The third letter: 0 percent at00;00;01;22 and 100 percent at 00;00;02;15.
31. The fourth letter: 0 percent at 00;00;01;26 and 100 percent at00;00;02;19.
32. The fifth letter:0 percent at 00;00;20;00 and 100 percent at 00;00;02;24.
Make sure they’ve all got Easy Ease In added!
Final Details
1. We’ll be adding a small line that appears under the text to add a bit of emphasis. Look up to the topmost toolbar to find the Layer option.
2. Click on it.
3. Navigate toNew > Add Shape Layer.
4. You should have a newShape Layer appear in your layer panel. AShape Layer is a blank layer that allows you to add well, shapes, using certain tools.
5. Click on thePen  tool in the top toolbar.
6. Click below the left side of the words in your composition, then the below the right side to create a straight line.
7. 
8. It should also be white and the same stroke thickness as your previous text strokes, but if not, go up to theStroke options 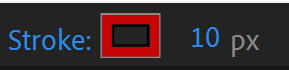 and click on the rectangle.
9. Move the slider to the top left to make the line white.
10. Click the number to the right of theStroke color.
11. Enter10.
12. HitReturn (Mac)/ Enter (Windows).
13. Toggle open the Shape Layer options.
14. You’ll see theAdd button. Click it.
15. Click onTrim Paths.
16. Move the playhead to00;00;02;26.
17. Now, you’ll toggle openTrim Paths to see theStart andEnd options. Feel free to play around with altering the numbers for each and see what happens when you combine them. For purposes of this tutorial, we’ll just focus on theEnd option.
18. Hit the stopwatch next to theEnd option to enable keyframes.
19. Change the value to0 percent.
20. So close to done! Move the playhead to00;00;03;08.
21. Now change theEnd value to100 percent.
22. Select both keyframes.
23. Hit F9 to add anEasy Ease in. You should now have a line “write itself” into appearance below the text.
Trimming the Timeline
33. Almost done! Let’s move the playhead to00;00;03;13.
34. Hit theN key to truncate your animation, which will allow your preview to repeat and your render to be that length of time.
35. Head all the way back to the very beginning of the animation, 00;00;00;00, and press the spacebar to view your animation.
All done! You now have a cool text animation at your disposal, with nearly limitless options. You can change the background photo, even swap it out for a graphic or a video, and the Trim Paths tool can also work for shapes. It’s a cool, slick effect that’s becoming more popular these days, and will absolutely add a professional touch to your work.
Happy animating!
Go Beyond After Effects
We offer a full suite of motion graphics courses for students at all levels of experience. Learn through real-world projects from expert instructors. Check out our classes now:


