Learn how to create interactive animations using GreenSock's TweenLite, including controlling the direction of rotation, using the set() method to change an element’s position, and utilizing the play() and reverse() methods for user interaction.
This exercise is excerpted from Noble Desktop’s past web development training materials created in partnership with GreenSock. It is compatible with GreenSock version 2. To learn current skills in web development, check out our coding bootcamps in NYC and live online.
Topics Covered in This GreenSock Tutorial:
Using Set() to Change an Element’s Position, the TransformOrigin Property, Controlling the Direction of Rotation, Giving a Tween a Var Reference, the Play() & Reverse() Methods
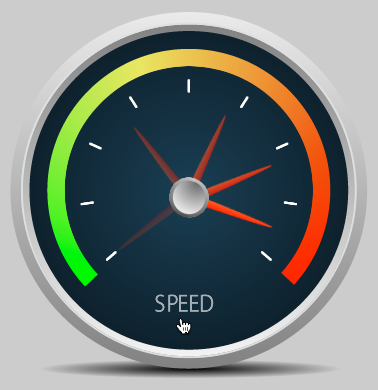
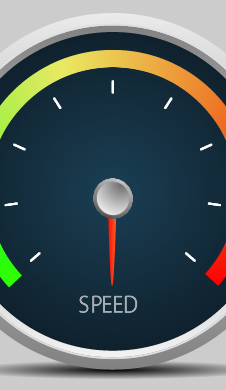
Exercise Preview
Exercise Overview
In this exercise, we’re going to explore some of the ways we can control tweens. TweenLite tweens can be played, paused, reversed, resumed, and controlled in a number of ways. This exercise will focus on using TweenLite’s play() and reverse() methods to control a single tween.

We will also work with the transformOrigin property, which gives you precise control over where a transform originates. Want to rotate around the bottom-left corner or scale from the top right? No problem!
Previewing the Finished Animation
To take a look at the animation we’ll be building, open up Google Chrome.
Hit Cmd–O (Mac) or CTRL–O (Windows), navigate to Desktop > Class Files > yourname-GSAP Class > Tween Control, and double–click on finished.html.
Mouse over the speed gauge to start the animation. The pointer “accelerates” clockwise, as shown in the exercise preview at the top of the page.
You can move the mouse off at any time to reverse the animation. Notice that the animation doesn’t have to be fully completed to reverse. Try mousing on and off quickly to watch the tween play and then reverse from any point.
Mouse over and off of the speed gauge as many times as you need to get a feel for the animation.
Examining the DOM Structure
In a code editor, open start.html from the Tween Control folder.
-
Look at the code from lines 34–37 to get familiar with the basic DOM structure.
<div id="speedGauge">
   <img id="pointer" src="img/pointer.png" height="9" width="89">
   <img id="center" src="img/disc.png" height="41" width="40">
</div>
There are two images within the speedGauge div. The one we’ll be rotating has an ID of pointer. The image with an ID of center is the gray, circular center of the speed gauge. The rest of the gauge is a background image in the speedGauge div.
-
Preview start.html in a browser. There is no animation yet.
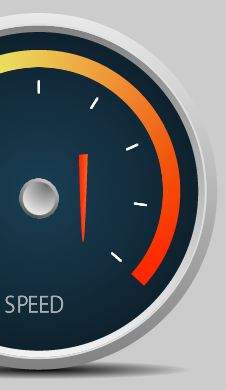
As you can see in the screenshot below, the pointer that we will animate is in the wrong starting position. Before we can animate, we’ll need to move the pointer to its proper start value: the first notch on the left.
Using Set() to Change an Element’s Position
-
Back in your code editor, look around lines 50–51 and notice the following two variables as shown in bold. We’ll animate the first one. The second is the trigger.
$(document).ready(function() {

   var $gauge = $("#speedGauge"),
       $pointer = $("#pointer");
Before we start tweening, let’s strategize what to do next. We want to rotate the
$pointer object to the left when we mouse over the$gauge, but we do not want it to animate yet. In the old days, you’d be spending a while writing a ton of CSS for the rotation, adding the necessary vendor-prefixes. GSAP has come to the rescue—now you can do all of that with a single line of code! Let’s test it out.-
The set() method essentially creates a tween that happens instantly and has no duration. After the
$pointer variable, hit Return (Mac) or Enter (Windows) twice to give yourself some space. Then add the following bold code:$pointer = $("#pointer"); TweenLite.set($pointer, {rotation:90});As you can see, the basic syntax is almost exactly the same as the to() and from() methods, except there’s no duration between the target and vars object.
-
Save the file and preview the page. As shown below, the pointer rotated 90° but looks pretty funky because it rotated around its center.
The TransformOrigin Property
By default, the rotation originates at the center of the object we are tweening. To fix this we need to define a transformOrigin property which will allow us to control the point around which the element will rotate.
-
Return to your code editor and add the following bold transformOrigin to the set() method:
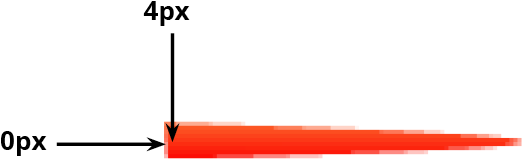
TweenLite.set($pointer, {rotation:90, transformOrigin:"0px 4px"});The string values in quotations are the horizontal and vertical positions respectively. This transformOrigin specifies that the pointer should rotate around a point 0px from the left edge and 4px down from the top, as shown below.
-
Save the file and preview the page in a browser. The rotation of 90° places the pointer in the less-than-ideal six o’clock position, but the pointer is rotated from the ideal spot. The transformOrigin is spot on!
Return to your code editor.
-
TransformOrigin values can be any CSS units but pixels and percentages are most common. Take a moment to examine the possibilities listed in the sidebar below. If you have time, feel free to experiment in the file and preview in a browser.
Transform Origin Values
The string value in quotations describes the horizontal and vertical positions. You can define values for the transform-origin property using the following:
- Keywords (left, right, or center for the horizontal position and top, bottom, or center for the vertical position) such as (
"right bottom") - Percentages:
"100% 100%"is the same as the previous example. - Pixel values:
"100px"is 100 pixels from both the top and left. This approach is the most exact. - A combination of these approaches such as
"50% bottom"for 50% horizontal at bottom.
- Keywords (left, right, or center for the horizontal position and top, bottom, or center for the vertical position) such as (
-
Before moving on, make sure your code reads as follows:
TweenLite.set($pointer, {rotation:90, transformOrigin:"0px 4px"}); -
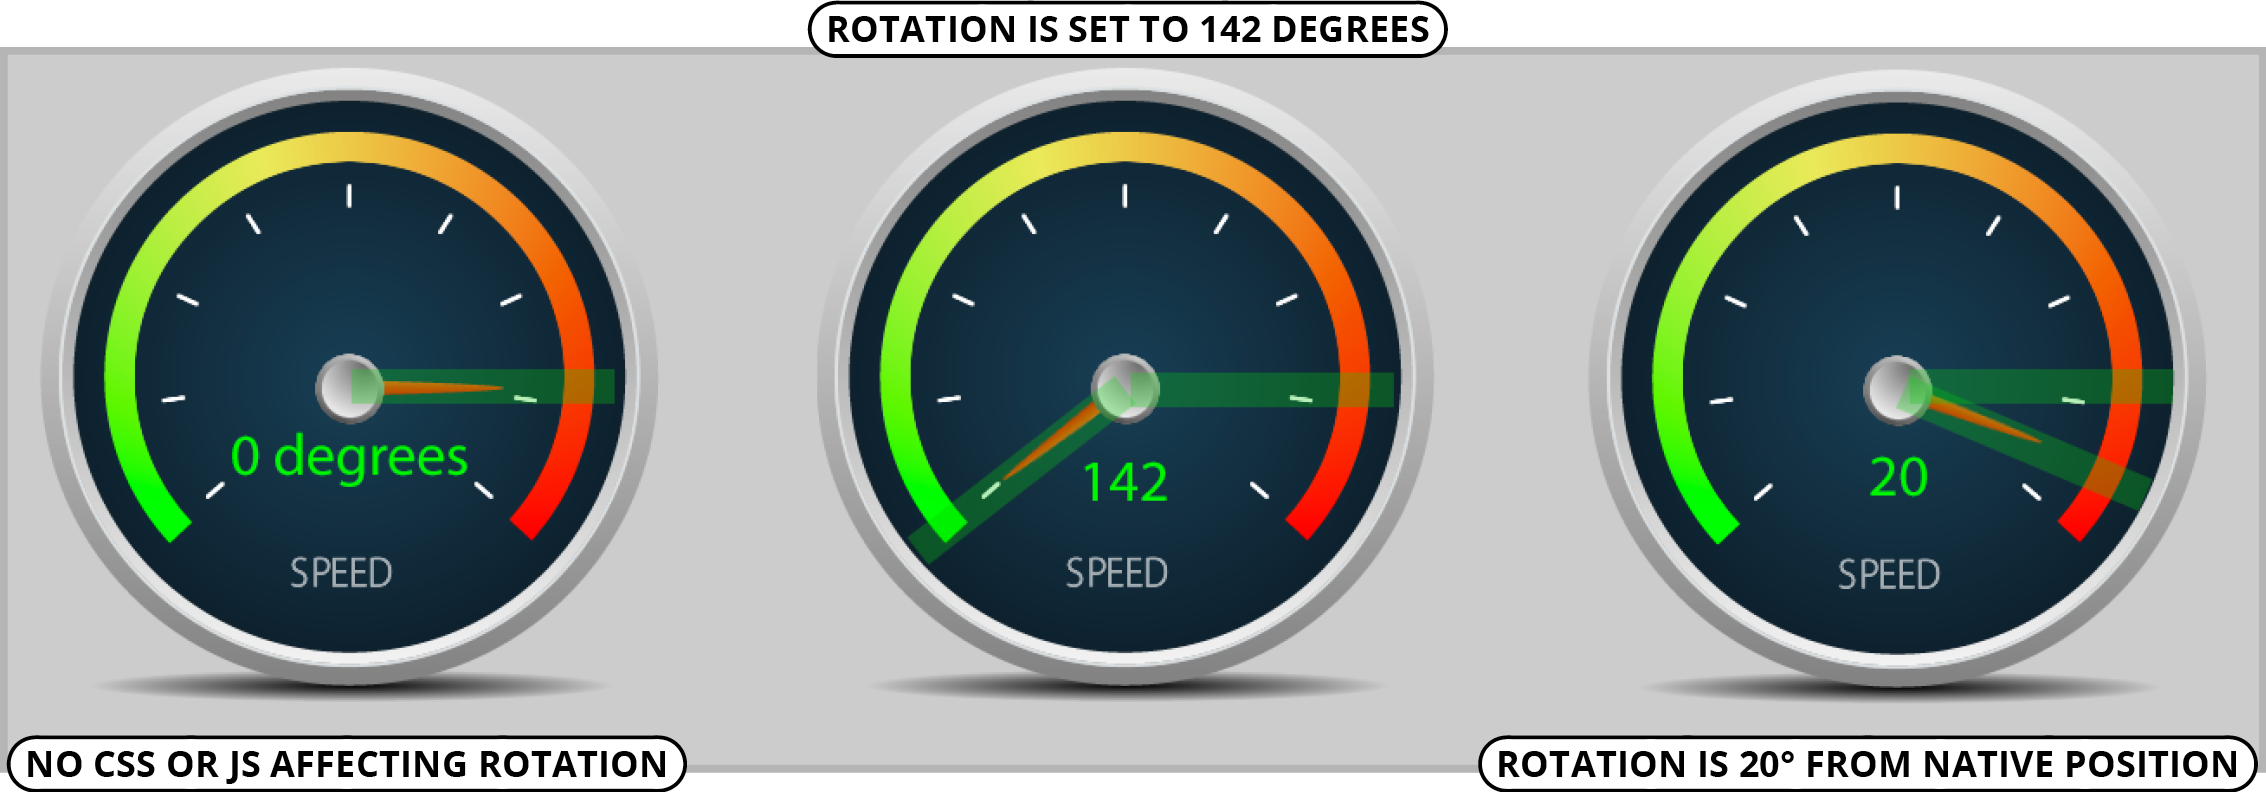
To place the pointer exactly where we want it, in your code editor, change the rotation for the set() method to 142, as shown below in bold:
TweenLite.set($pointer, {rotation:142, transformOrigin:"0px 4px"}); Save the file and preview the page in a browser. Sweet, the
$pointer has assumed its starting position at the bottom left!
Controlling the Direction of Rotation
Now that we’ve set the starting rotation of the pointer, it’s ready to be animated. The first issue to consider is the direction of the rotation. Let’s give it a try.
-
In your code editor, after the TweenLite.set() method, type the following TweenLite.to() method:
TweenLite.set($pointer, {rotation:142, transformOrigin:"0px 4px"}); TweenLite.to($pointer, 1, {rotation:20, ease:Power1.easeIn}); -
Note the following:
- We did not have to specify the transformOrigin for the second rotation tween. It will use the previous value for transformOrigin by default.
- We are using one of the Power eases that come packaged with TweenLite—no EasePack needed. While we have also loaded EasePack into our file, this tween would work without it!
Save the file and preview the page in a browser. The rotation ends up where we want it to, but it’s moving in the wrong direction. Oh no!
Thankfully GSAP gives you control of the direction of the rotation! Return to your code editor.
-
Add the bold code shown below to the to() method:
TweenLite.to($pointer, 1, {rotation:"20_cw", ease:Power1.easeIn});When rotating, GSAP will most often pick the direction of the shortest distance. The cw suffix in this string forces the rotation to go clockwise. For more ways to control a rotation property, read the sidebar below.
Rotation Specifiers
There are three ways to handle rotation:
_cwRotates an element clockwise _ccwRotates an element counterclockwise _shortRotates an element by the shortest distance Save the file and preview the page in a browser. Cool, this animation is headed in the right direction!
-
As illustrated below, notice that even though we used set() to modify the start value of the pointer to a 142° rotation, as far as the browser is concerned, tweening the rotation to 20 will be 20° offset from the object’s native rotation of 0.
Giving a Tween a Var Reference
-
We want this tween to play and reverse. In order to control it, we need to be able to reference the tween by assigning it to a variable. In your code editor, at the beginning of the TweenLite.to() method, type the bold code shown below:
var pointerTween = TweenLite.to($pointer, 1, {rotation:"20_cw", ease:Power1.easeIn});We can now control our tween by referencing the variable in a method. The first thing we might want to do is create some interaction between the user and the animation. Right now, the animation plays as soon as the page loads. Let’s pause it by default and only have the animation play when a user mouses over the gauge.
-
To pause the tween, enter the following bold method below your last line of code:
var pointerTween = TweenLite.to($pointer, 1, {rotation:"20_cw", ease:Power1.easeIn});

pointerTween.pause();
Save the file and preview the page. There is no animation because the pointerTween has just been paused.
In your code editor, delete the entire pause() method you just typed.
-
You can also pause a tween in its constructor (in this case, the to() method). At the end of the properties in the to() method, add a comma and the following bold property as shown below:
var pointerTween = TweenLite.to($pointer, 1, {rotation:"20_cw", ease:Power1.easeIn, paused:true});NOTE: This has the exact same result as the pause() method, but you can save and test in a browser if you like.
The Play() & Reverse() Methods
-
To make the tween play when the
$gauge is moused over, type the following bold code:var pointerTween = TweenLite.to($pointer, 1, {rotation:"20_cw", ease:Power1.easeIn, paused:true}); $gauge.mouseenter( function() { pointerTween.play(); });mouseenter() is one of jQuery’s event handlers, methods that specify behaviors that happen when the user interacts with the webpage in a specific way. In this case, when the user’s mouse enters the
$gauge, the pointerTween’s play() method will be executed and the tween will play. Save the file and preview the page in a browser.
Mouse over the
$gauge and notice that the animation starts playing, thanks to the play() method. Awesome!Move the mouse off the
$gauge. Nothing happens.-
In your code editor, specify what the tween will do when the user’s mouse leaves the
$gauge by entering the following bold code:$gauge.mouseenter( function() { pointerTween.play(); }); $gauge.mouseleave( function() { pointerTween.reverse(); });NOTE: The play() and reverse() methods you just used are two of the many control methods available in TweenLite. We will learn more of these in the next exercise. To see control methods in action see the demo at greensock.com/tweenlite
-
Save the file and preview the page in a browser as follows:
- Mouse over the speed gauge to see your animation.
- When you move the mouse off the speed gauge, notice that the pointer reverses from the position you’re on, with the timing and even the easing intact!