Looking to enhance your graphic design skills for emails? Learn how to create compelling HTML email designs with this comprehensive tutorial covering topics like slicing a Photoshop file, naming slices, adding alt text, and link URLs.
Key Insights:
- The tutorial guides you on how to transform a graphic-heavy design into an HTML email using Photoshop. This method, although not recommended for repetitive emails, is quicker than coding from scratch.
- The step-by-step instructions discuss how to slice the Photoshop file into areas that will link to different webpages using the 'Slice' tool. This includes creating and positioning slices for different areas of the design.
- It further explains the importance of naming slices which will become the filenames when exported. Each slice should be named based on the content inside it.
- The tutorial also provides guidance on how to set alt text and links for each image using the 'Slice Select' tool. Photoshop will automatically include these in the code when HTML is exported.
- The walkthrough includes specific directions and visual aids to ensure clear understanding of each process.
- The tutorial is part of the 'HTML Email Class' and uses the 'Lunch Menu.psd' file for practice, which is included in the course materials.
Dive into this comprehensive HTML email tutorial to learn about slicing a Photoshop file, naming slices, adding ALT text, and adding link URLs for a seamless email creation experience.
This exercise is excerpted from Noble Desktop’s HTML Email training materials and is compatible with updates through 2021. To continue learning HTML Email with hands-on training, check out our coding bootcamps in NYC and live online.
Topics Covered in This HTML Email Tutorial:
Slicing a Photoshop File, Naming Slices, Adding ALT Text, Adding Link URLs
Exercise Preview

Exercise Overview
Some graphic-heavy designs cannot be recreated strictly with HTML, so you have to make the entire email with images. This comes with a few disadvantages, namely the large size of images, and poor experience for users with images disabled. All the same, Photoshop is capable of doing most of the things we need for a one-time email, and it’s going to be quicker than coding it from scratch. Keep in mind that Photoshop does not produce very flexible, reusable code, so the approach we will use is not recommended for any email that will be used more than once.
Slicing the File
Launch Photoshop.
Go to File > Open, and navigate into the yourname-HTML Email Class folder. In the Lunch Menu folder, open Lunch Menu.psd.
If you get a warning about missing fonts, proceed through the dialog(s) and Don’t Resolve missing fonts. You will not need to edit the text in these files.
Go to File > Save As and name the file yourname-Lunch Menu.psd.
If you get a warning about maximizing compatibility, just click OK.
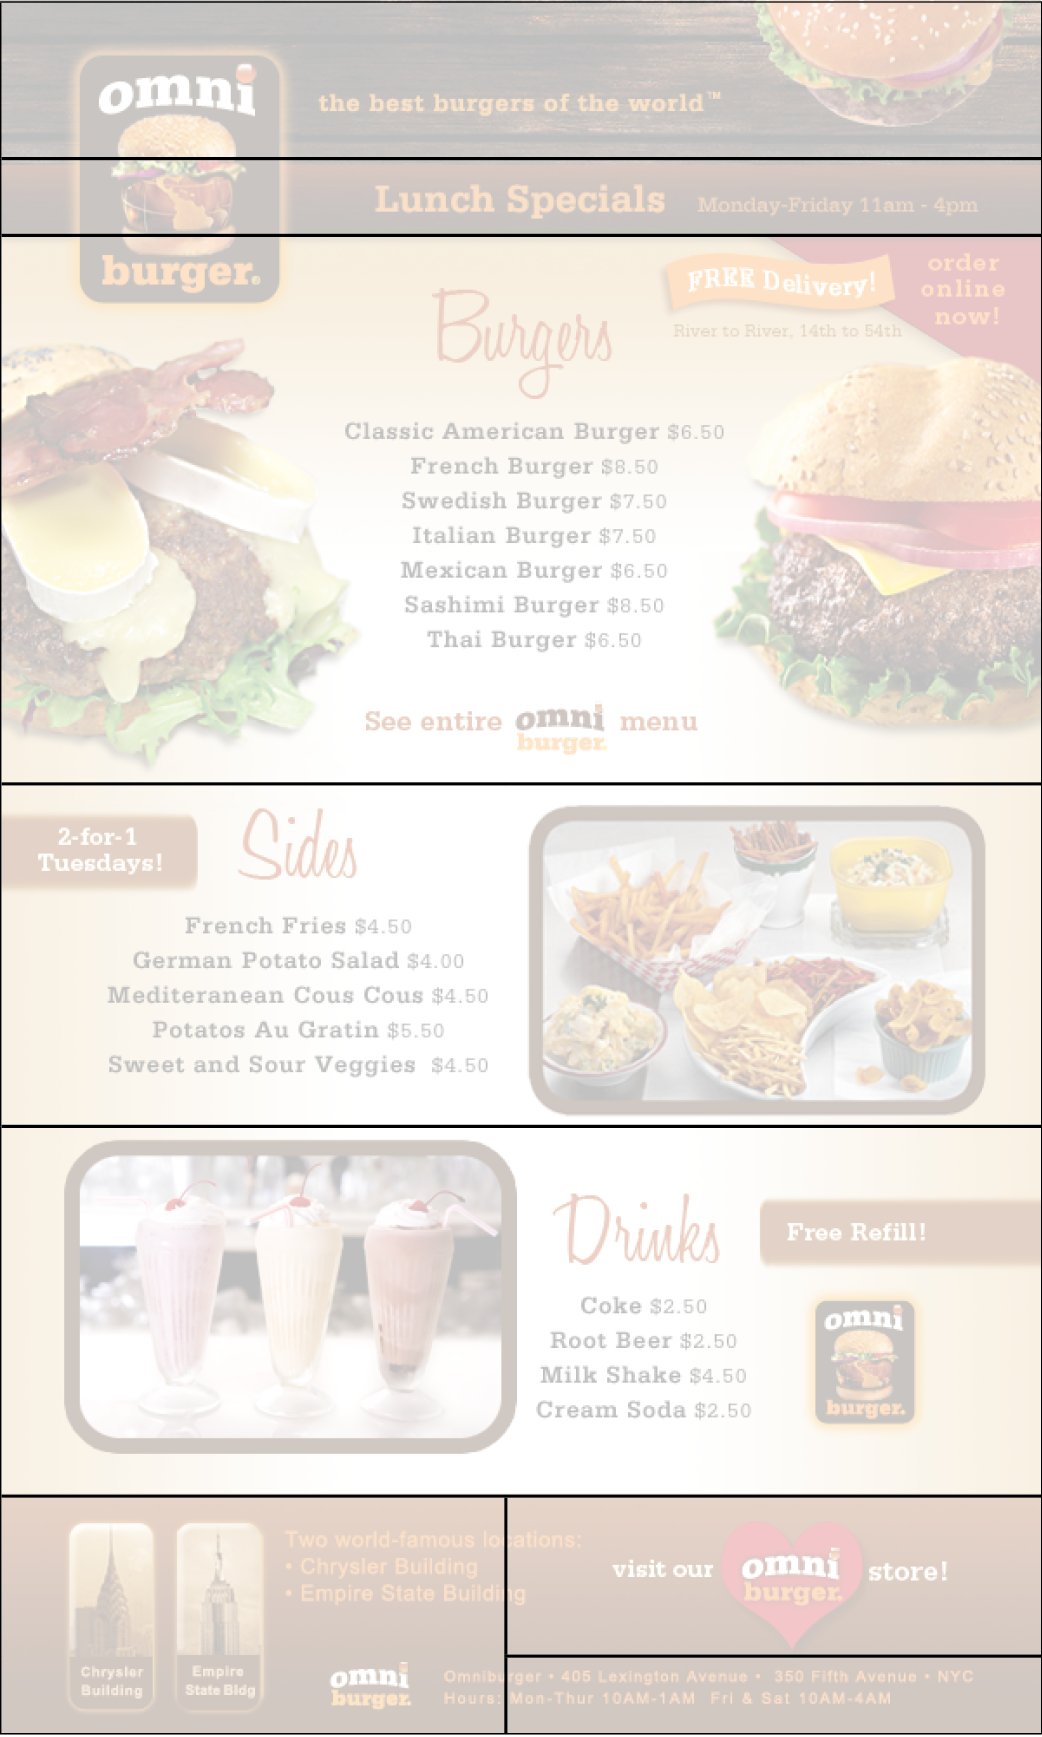
We need to slice this into the areas that will link to different webpages. In the Tools panel on the left, select the Slice tool
 . You might have to click and hold the Crop tool
  to find it.
Drag a slice over the top wood area, using the pink Smart Guides to help you position the slice.
If you need to adjust the slice, move the cursor over an edge and drag to resize it.
Drag another slice over the Lunch Specials bar—just below the first slice.
-
Continue slicing the email as shown below:

Naming Slices
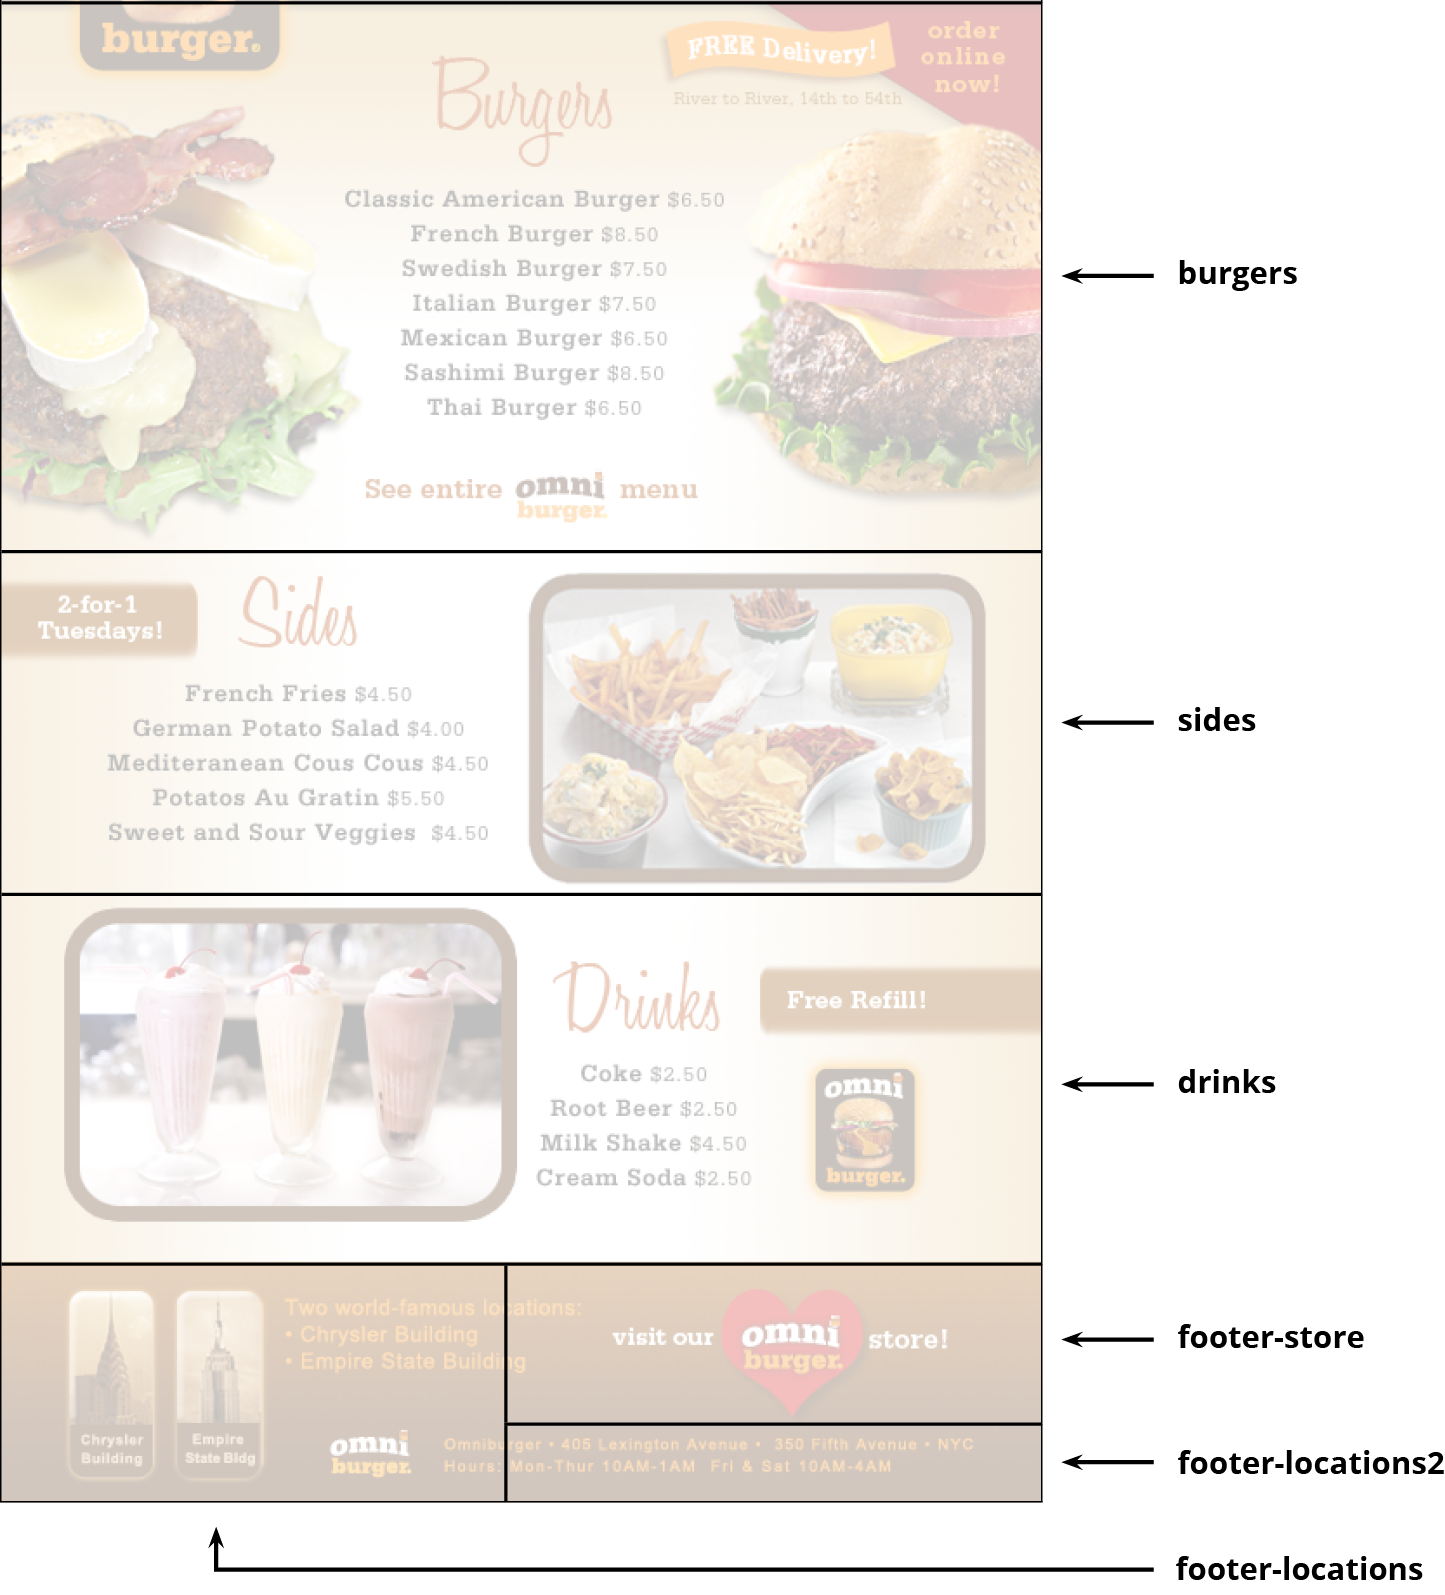
The names of slices are important because they will become the filenames when we export. Each slice should have a name that describes the content inside it.
Choose the Slice Select tool
 . You’ll have to click and hold the Slice tool
  .
.Double–click the top slice.
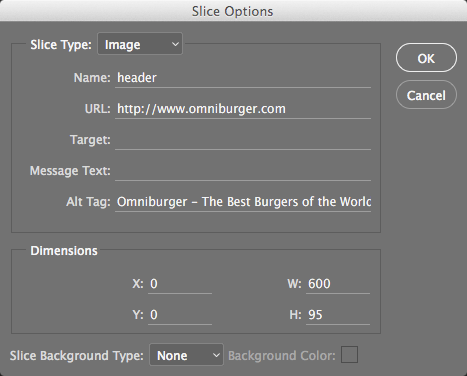
In the dialog that appears, next to Name, type: header
Click OK.
Double–click the Lunch Specials slice.
In the dialog that appears, next to Name, type: lunch-specials and click OK.
-
Continue naming slices according to the diagram below:

Creating ALT Text & Links
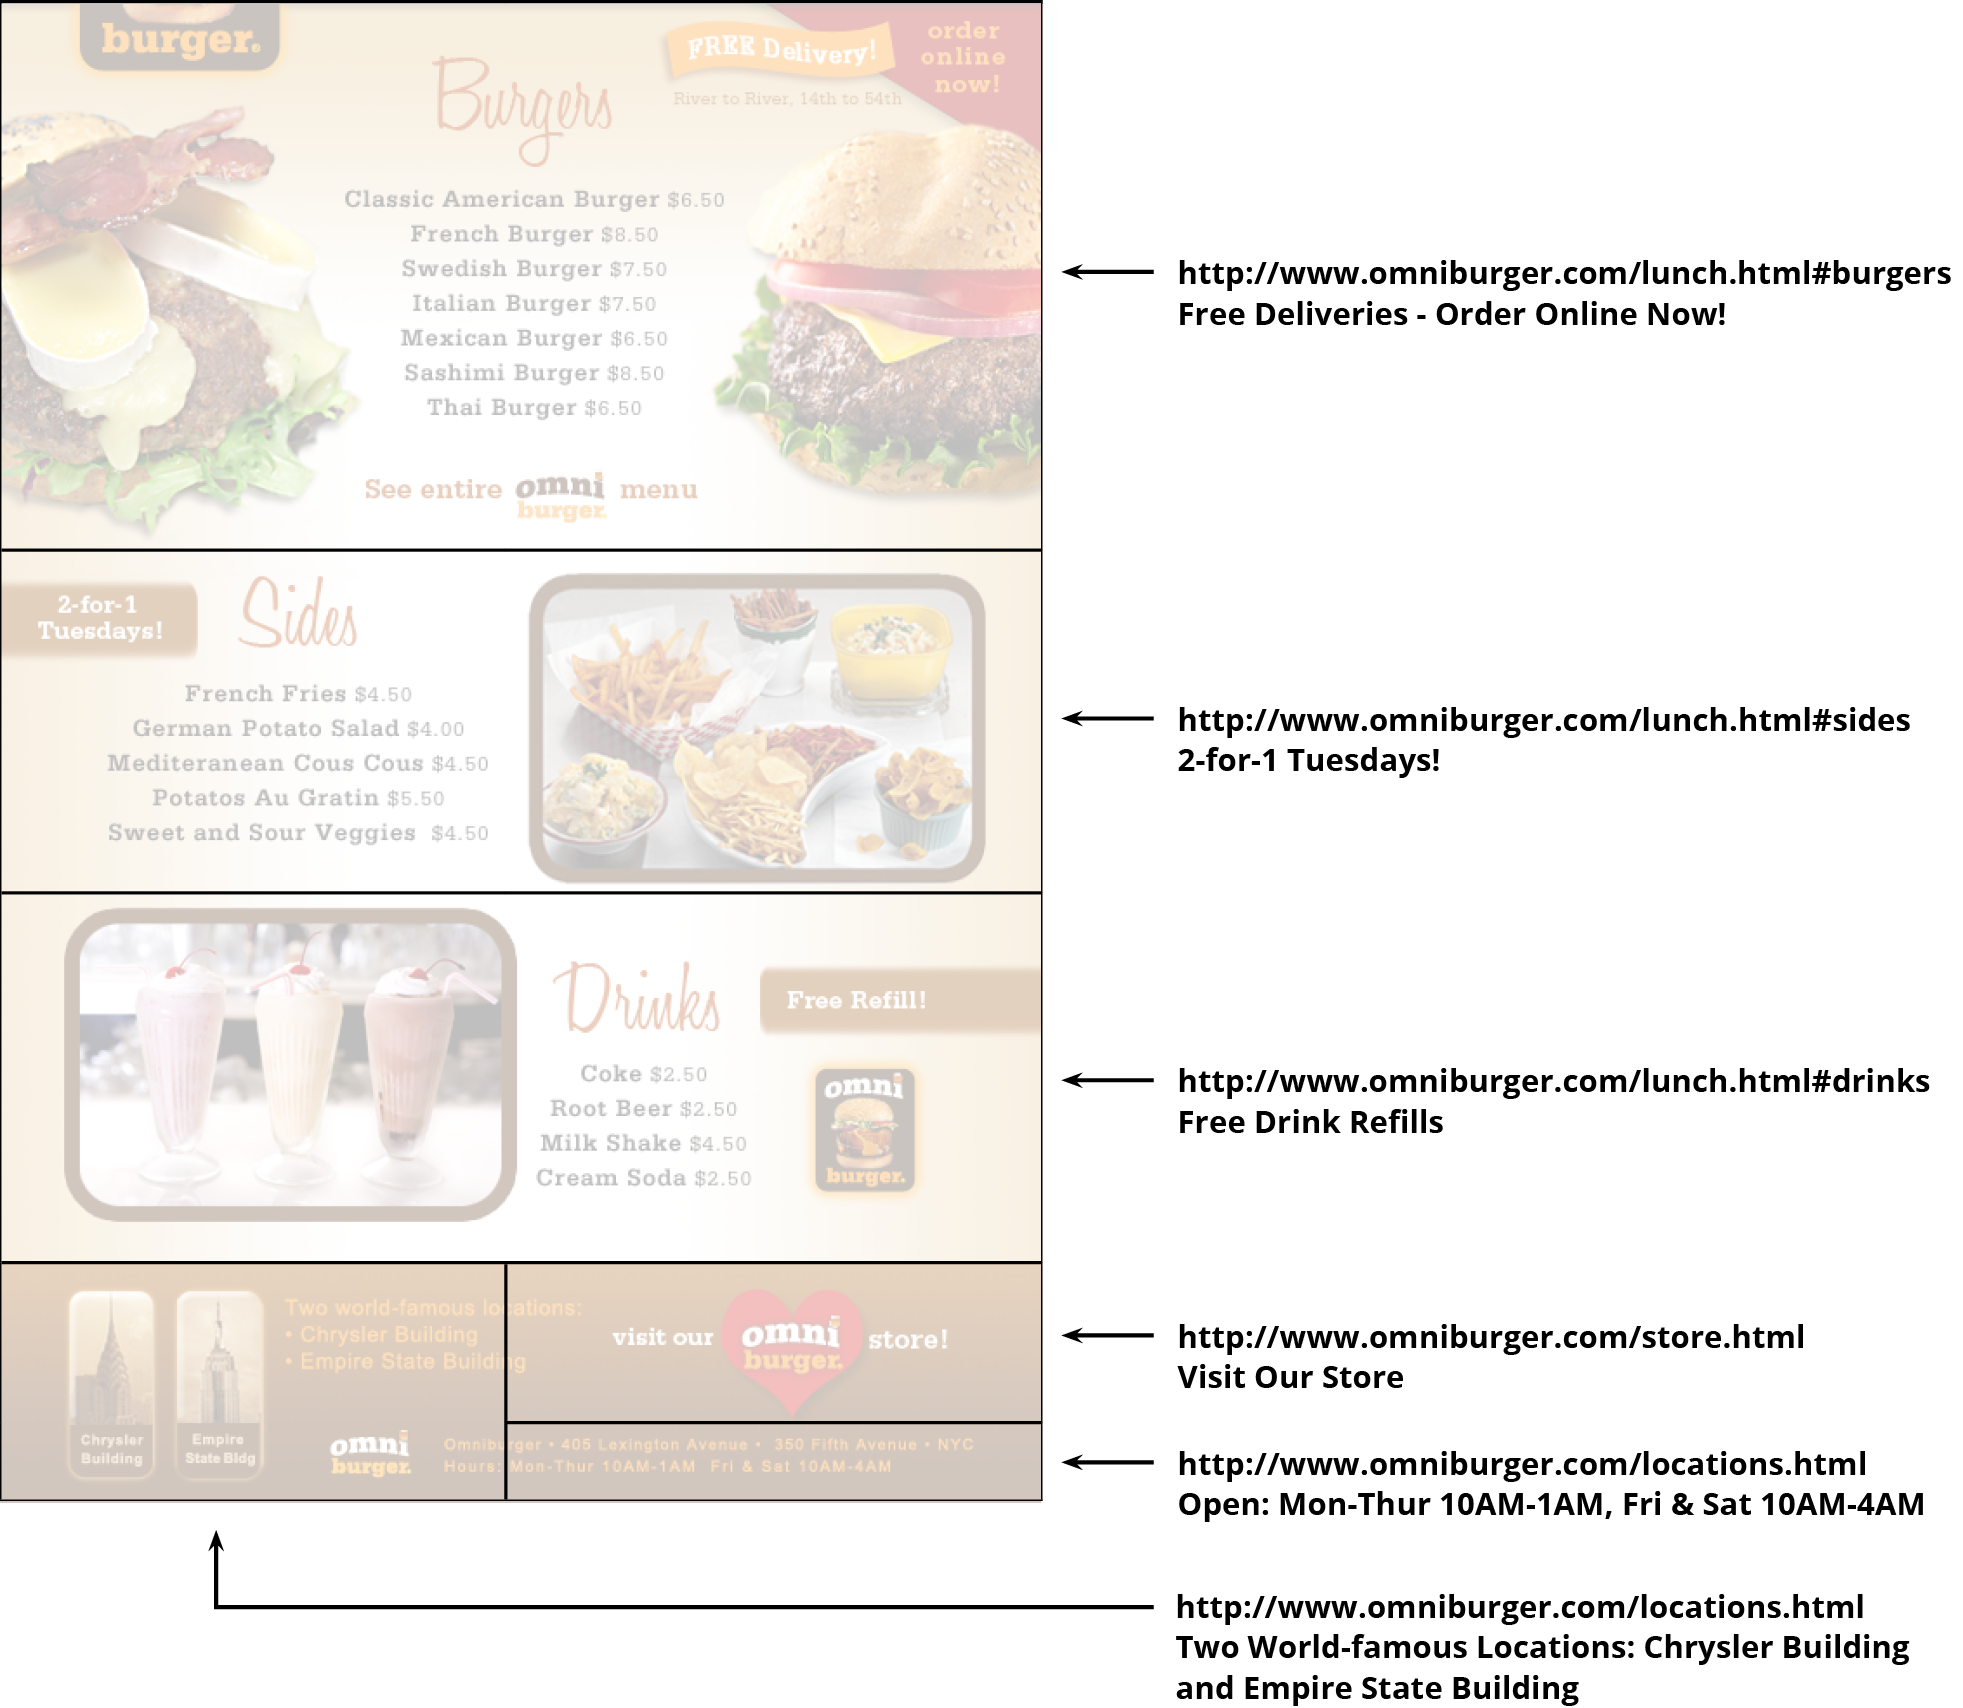
Photoshop can also set the ALT text and link for each image. When we export HTML later, it will put the ALT text and links in the code for us.
With the Slice Select tool
 chosen, double–click the top slice.
-
In the dialog that appears, set the following before clicking OK:
URL: http://www.omniburger.com ALT Tag: Omniburger—The Best Burgers of the World Double–click the Lunch Specials slice.
-
In the dialog that appears, set the following before clicking OK:
URL: http://www.omniburger.com/lunch.html ALT Tag: Lunch Specials Mon-Fri, 11am-4pm -
Continue setting URLs and ALT text according to the diagram below:

When finished, Save the file.
Keep it open; you’ll be using it in the next exercise.


