Explore this detailed tutorial on using the GreenSock animation platform, specifically the SplitText utility, which allows you to break apart the text of an HTML element so each character, word, and line can be animated individually.
This exercise is excerpted from Noble Desktop’s past web development training materials created in partnership with GreenSock. It is compatible with GreenSock version 2. To learn current skills in web development, check out our coding bootcamps in NYC and live online.
Topics Covered in This GreenSock Tutorial:
Club GreenSock, Downloading Members-only Club GreenSock Files, Using GSAP’s SplitText Utility, Animating the Quote, Animating the Author’s Name, the Revert() Method
Exercise Preview
Exercise Overview
In this exercise, we will learn some of the basics of GSAP’s SplitText utility. SplitText makes it easy to break apart the text of an HTML element so that each character, word, and/or line resides in its own div and can be animated individually, producing some really nifty effects.

Club GreenSock
SplitText is one of the many bonus utilities, plugins, and exclusive features available to Shockingly Green Club GreenSock members. Members are the first to know about cool new features and bug fixes, and get access to beta releases and demo source code.
Shockingly Green members get SplitText and the rest of GSAP’s bonus features:
| DrawSVGPlugin: | Gives you fine-tuned control over animating SVG strokes. |
| Physics plugins: | Physics2DPlugin and PhysicsPropsPlugin allow you to tween objects based on velocity, acceleration, friction, etc. instead of an end value. |
| ThrowPropsPlugin: | Animate things as though they are being thrown, decreasing a tween’s momentum so a property smoothly glides to a stop. Great for user interaction. |
| ScrambleTextPlugin: | Produces a nifty effect that looks like a computer decoding a string of text. Great for rollovers. |
If you are taking a class at Noble Desktop, you have automatically been enrolled as a Shockingly Green Club GreenSock member for 1 year! Your instructor will provide you with your Club GreenSock credentials so that you can download the bonus features necessary to complete this lesson in class.
If you purchased this book independently of a Noble Desktop instructor-led class, you may go to greensock.com/club to become a Shockingly Green Club member for the price of $99/year. Once you have enrolled, you can use your username and password to download the files needed to complete this bonus exercise.
Downloading Your Members-Only Club GreenSock Files
Follow these steps to download the members-only files with your login info.
Open a browser and go to greensock.com
At the top right, click Login/Sign Up.
Enter your Email Address and Password, then click Login.
Once logged in, click the green Download GSAP button further down the page.
In the modal window that appears, click Download zip with bonus content.
After the .zip file has finished downloading, be sure to unzip the file if it hasn’t been done for you. You should end up with a GreenSock-ShockinglyGreen-js folder.
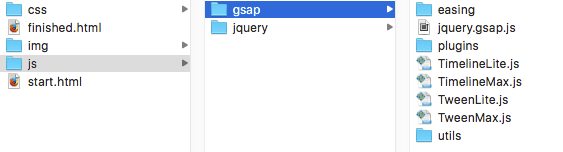
Inside the GreenSock-ShockinglyGreen-js folder, navigate to src > uncompressed.
Select all the files and copy them (make sure to copy the contents, not the folder).
Still on the Desktop, navigate to Class Files > yourname-GSAP Class > Quote with SplitText > js.
-
There will be an empty gsap folder waiting for you. Paste the files into the empty gsap folder. The contents of your gsap folder should now be as follows:
Previewing the Finished Animation
To take a look at the animation we’ll be building, open up Google Chrome.
-
Hit Cmd–O (Mac) or CTRL–O (Windows), navigate to Desktop > Class Files > yourname-GSAP Class > Quote with SplitText, and double–click on finished.html.
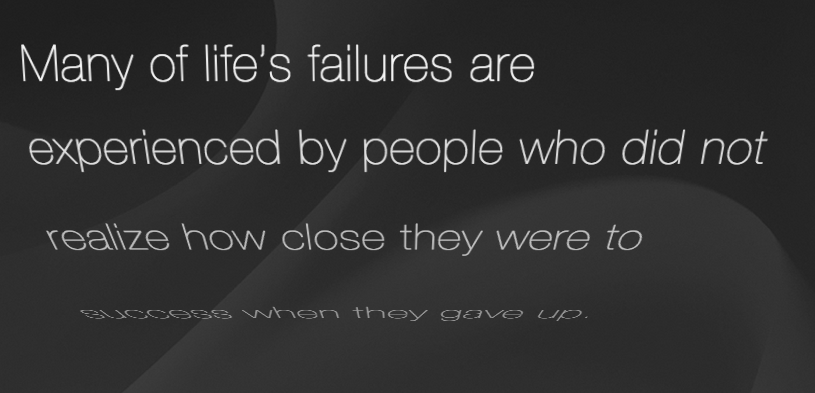
A quotation animates in line-by-line, and then the name THOMAS EDISON animates in character-by-character with a cool twirling effect. Both these animations involve some 3D perspective features and are made possible by SplitText.
Reload the page a few times to get a sense of the animation’s features. If you do not see the animation, make sure you are a Shockingly Green Club GreenSock member and have downloaded the members-only files.
Examining the DOM Structure & JavaScript
In your code editor, open yourname-GSAP Class > Quote with SplitText > start.html (or the entire Quote with SplitText folder if your code editor allows).
Preview start.html in a browser. The text and background are in one place, but nothing is animating yet.
-
Return to your code editor and check out the HTML setup on lines 44–47:
<div class="wrapper">
   <div id="quote">Many of life's failures are experienced by people who did not realize how close they were to success when they gave up.</div>
   <div id="author">THOMAS EDISON</div>
</div>
The setup is very simple; we have a quote div containing the quote text and an author div containing Thomas Edison’s name.
-
Check out the three jQuery variables we set up on line 56:
$(document).ready(function(){
    var quote, author, tl;
These variables point to the quote div, the author div (the SplitText objects), and tl of course points to a TimelineLite that we’ll create soon.
-
Finally, look at line 59:
TweenLite.set(["#quote", "#author"], {perspective:400});Because both quote and author will be animated with 3D effects, we are setting a perspective property on both. The child divs of quote and author will now live in the same 3D space and share the same vanishing point.
Perspective Vs. TransformPerspective
perspective is applied to a parent element and causes each child element to share the same vanishing point.
transformPerspective is applied to separate elements and causes each to have its own vanishing point.
The difference between perspective and transformPerspective is discussed and illustrated at greensock.com/CSS3
Using GreenSock’s SplitText Utility
SplitText is a utility, not a plugin. It’s not directly tied to any of the animation tools and can be used fully on its own without any other GSAP components.
-
Around line 50, import the SplitText file with a script tag as follows:
<script src="js/gsap/TweenMax.js"></script> <script src="js/gsap/utils/SplitText.js"></script> <script src="js/jquery/jquery-1.10.1.min.js"></script> -
Around line 61, create a SplitText object with default behavior as shown in bold:
TweenLite.set(["#quote", "#author"], {perspective:400});

quote = new SplitText("#quote");
Let’s test what SplitText can do! Save the file and preview the page in a browser.
-
CTRL–click (Mac) or Right–click (Windows) on the quotation and select Inspect. Notice these lines, which show that the text has been split up (you may see a different number of lines depending on the width of your browser window):

-
Expand the divs by clicking the gray triangle on the left. Mouse over the various divs while looking at the quotation text on the page, and you should see the individual characters, words, and lines being highlighted.
This means that SplitText has, by default, automatically split the quote div into characters, words, and lines. We only need it separated into lines.
-
Switch back to your code editor and edit the vars object to be more specific, telling SplitText exactly how we want the text to be split:
quote = new SplitText("#quote", {type:"lines"});SplitText Options
The three options for splitting text with SplitText are:
Any combination of the three is also valid such as:{type:"chars"} {type:"words"} {type:"lines"}{type:"chars, words"} Save the file and preview the page in a browser.
CTRL–click (Mac) or Right–click (Windows) on the quotation and select Inspect. Now there are no longer any sub-divs for words and characters. Great!
-
Return to your code editor and under the SplitText object, add the following:
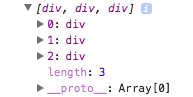
quote = new SplitText("#quote", {type:"lines"});
console.log(quote.lines);
This will look for the SplitText object named quote and produce an array of all the lines in that object.
NOTE: In case you are not familiar with the concept of arrays, an array is a variable that accepts multiple values—it is basically a list of data. Arrays can store different data types (for example, numbers and strings).
When we preview the results in the Console, you will see that square brackets enclose the array’s values. The values are ordered so the position of each value is fixed. Values have zero-based indexing: it starts at 0 and increments from there.
Save the file and preview it in Google Chrome.
Hit Cmd–Opt–J (Mac) or CTRL–Shift–J (Windows) to bring up the Console tab of Chrome’s DevTools.
Reload the page.
-
Open the gray triangle to see an array of divs like the one shown below. There are the same number of divs as there are lines on-screen, which means that each div corresponds to a line. Once again, the number of divs/lines depends on the width of the browser window.
A little later on, we will target this array of divs to animate the lines individually and apply staggerFrom() tweens.
Return to your code editor.
-
Delete the console.log code and replace it with the following bold code:
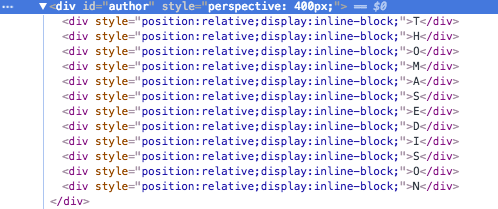
quote = new SplitText("#quote", {type:"lines"});
author = new SplitText("#author", {type:"chars"});
This SplitText object will take the text of the author div and place every character in its own div.
Save the file and preview in a browser.
-
CTRL–click (Mac) or Right–click (Windows) on the name THOMAS EDISON and select Inspect. You should see the following:
Animating the Quote
Now that we have created both our SplitText objects, we can start animating!
-
Return to your code editor and create a new TimelineLite as follows:
quote = new SplitText("#quote", {type:"lines"}); author = new SplitText("#author", {type:"chars"}); tl = new TimelineLite(); -
Let’s use the staggerFrom() method to animate the quote:
tl = new TimelineLite();
tl.staggerFrom(quote.lines, 0.6, {opacity:0}, 0.1)
By targeting quotes.lines as we planned earlier, we are making sure that everything in the quote object’s lines array will be animated.
Save the file and preview in a browser. Cool, the lines fade in from an opacity of 0. Let’s jazz it up by adding a 3D effect.
-
Return to your code editor and add the following bold code:
tl.staggerFrom(quote.lines, 0.6, {opacity:0, rotationX:-90}, 0.1) Save the file and preview in a browser. It’s getting more exciting, but the default transformOrigin looks a bit distracting for this animation.
-
Return to your code editor and add the following bold code:
tl.staggerFrom(quote.lines, 0.6, {opacity:0, rotationX:-90, transformOrigin:"50% top"}, 0.1) Save the file and preview it in a browser. Swinging from the top is a nice effect!
-
Return to your code editor and add the following bold code:
tl.staggerFrom(quote.lines, 0.6, {opacity:0, rotationX:-90, transformOrigin:"50% top -200"}, 0.1)This –200 applies to the z-axis of the animation.
NOTE: When referring to a three-dimensional plane, a z-axis refers to the depth of a three-dimensional object. While the X-axis goes left to right and the y-axis goes top to bottom, the z-axis plane goes front to back.
-
Save the file and preview the page in the browser. Cool, now each piece of text is rotating around a radius 200 pixels BEHIND their position.
If you feel like it, you can experiment with different z-axis values and see how it changes the nature of the animation.
Animating the Author’s Name
Let’s move on to animating the character-by-character appearance of Thomas Edison’s name.
-
Return to your code editor and add the following:
tl.staggerFrom(quote.lines, 0.6, {opacity:0, rotationX:-90, transformOrigin:"50% top -200"}, 0.1)
  .staggerFrom(author.chars, 0.6, {opacity:0}, 0.02)
This applies a fade-in animation to the chars array from the SplitText object named author. We’ll jazz up this very basic code after we see how it’s working.
-
Save the file and preview the page in a browser.
The author name animates in after the quote simply because it’s chained onto the end of the timeline. Looks nice, but let’s make it more interesting with 3D effects.
-
Return to your code editor and add the following bold code:
.staggerFrom(author.chars, 0.6, {opacity:0, rotationX:180}, 0.02) Save the file and preview the page in a browser. Wow, that spin effect is so cool—and it was basically effortless to make!
The Revert() Method
As we’ve seen, SplitText is great at splitting text into characters, words, and lines. However, you may decide that, once your page loads, you don’t want your DOM littered (so to speak) with dozens of child divs each containing a single character, word or line. The revert() method will allow you to revert your text to its original state after the animation has finished running.
-
Return to your code editor and add the following bold callback to the vars object in the TimelineLite constructor function (around line 64):
tl = new TimelineLite({onComplete:revert}); -
Define the revert() function beneath the TimelineLite tweens (around line 68) as shown in bold below:
.staggerFrom(author.chars, 0.6, {opacity:0, rotationX:180}, 0.02)

function revert() {
   quote.revert();
   author.revert();
}
This function will run once the TimelineLite is finished animating.
Save the file and preview the page in a browser.
-
Watch the animation run, and once it’s done, CTRL–click (Mac) or Right–click (Windows) on the quotation (or author name) and select Inspect.
Amazing, all the child divs have disappeared, and the code looks so clean!
Read the full SplitText documentation at greensock.com/docs/Utilities/SplitText