In this article, we are going to look at how to organize Expense Tracking in Microsoft Excel
Tracking Expenses with Excel
Whether you’re an employee or self-employed, you need to keep track of the expenses you incur in the process of doing business. If you’re an employee, you need to track them so you can be reimbursed by your employer, and if you’re self-employed, you need to track expenses to take advantage of the many tax deductions they can offer, saving you potentially thousands of dollars on your yearly federal and state income tax.
Find out more about what you can and can’t declare as business expenses, according to the IRS, here.
Setting up Your Expense Workbook
Chances are, if you’re an employee, you have to enter your receipts into a third-party software application, provided by your employer, which requires you to enter information that links your expenses to one or more billing/expense codes. This helps your employer’s financial team keep track of expenses accrued against specific events, clients, projects, and so forth, and helps them keep an accurate accounting and stick to established budgets.

You also have to provide a copy of your expenses, and as all transactions are now processed virtually, you’ll need to have scanned copies, downloads, and photos of your receipts. Additionally, you’ll probably have to provide some kind of context for the expense, beyond choosing the budget code for each expense – so you also need to store notes as to the nature and purpose of each expense. These can be good for your own recollections in the future, but they can also be copied and pasted into that third-party application your employer uses for processing reimbursement requests. There’s typically a Description field, and you’ll be able to populate that with the notes you store in your worksheet.
Of course, if you’re self-employed, you’re the one devising and sticking to a budget, even if it’s an informal one, and it’s wise to keep track of the money you spend doing business. This includes everything from lunches with clients to gas for your car to get to appointments to your computers and software, all the tools required to do whatever it is you do. Even your wardrobe and home maintenance expenses can be applied to the “cost of doing business, ” especially in the case of home repairs, if your office is in your house.
So – whether you’re an employee or an entrepreneur, that’s a lot to store, and it probably seems like it might be way too complex to store in Excel, but Excel is actually the perfect place to keep all of it. The expenses you add to a worksheet are sortable by date, type of expense, amount, related event/activity, anything that you choose to keep track of about the things you pay for in the process of doing your job or running your business.
You can approach the process of building a workbook for your expenses in one of two ways – through the use of a template or by building the workbook from scratch. We’ll cover both approaches here.
Starting with a Template
Microsoft, being a company with over 180,000 employees working on thousands of projects, knows a thing or two about expenses. And therefore, you’ll find several very useful templates to choose from when you choose New from the File tab and search for “Expenses” in the Search for Online Templates box.
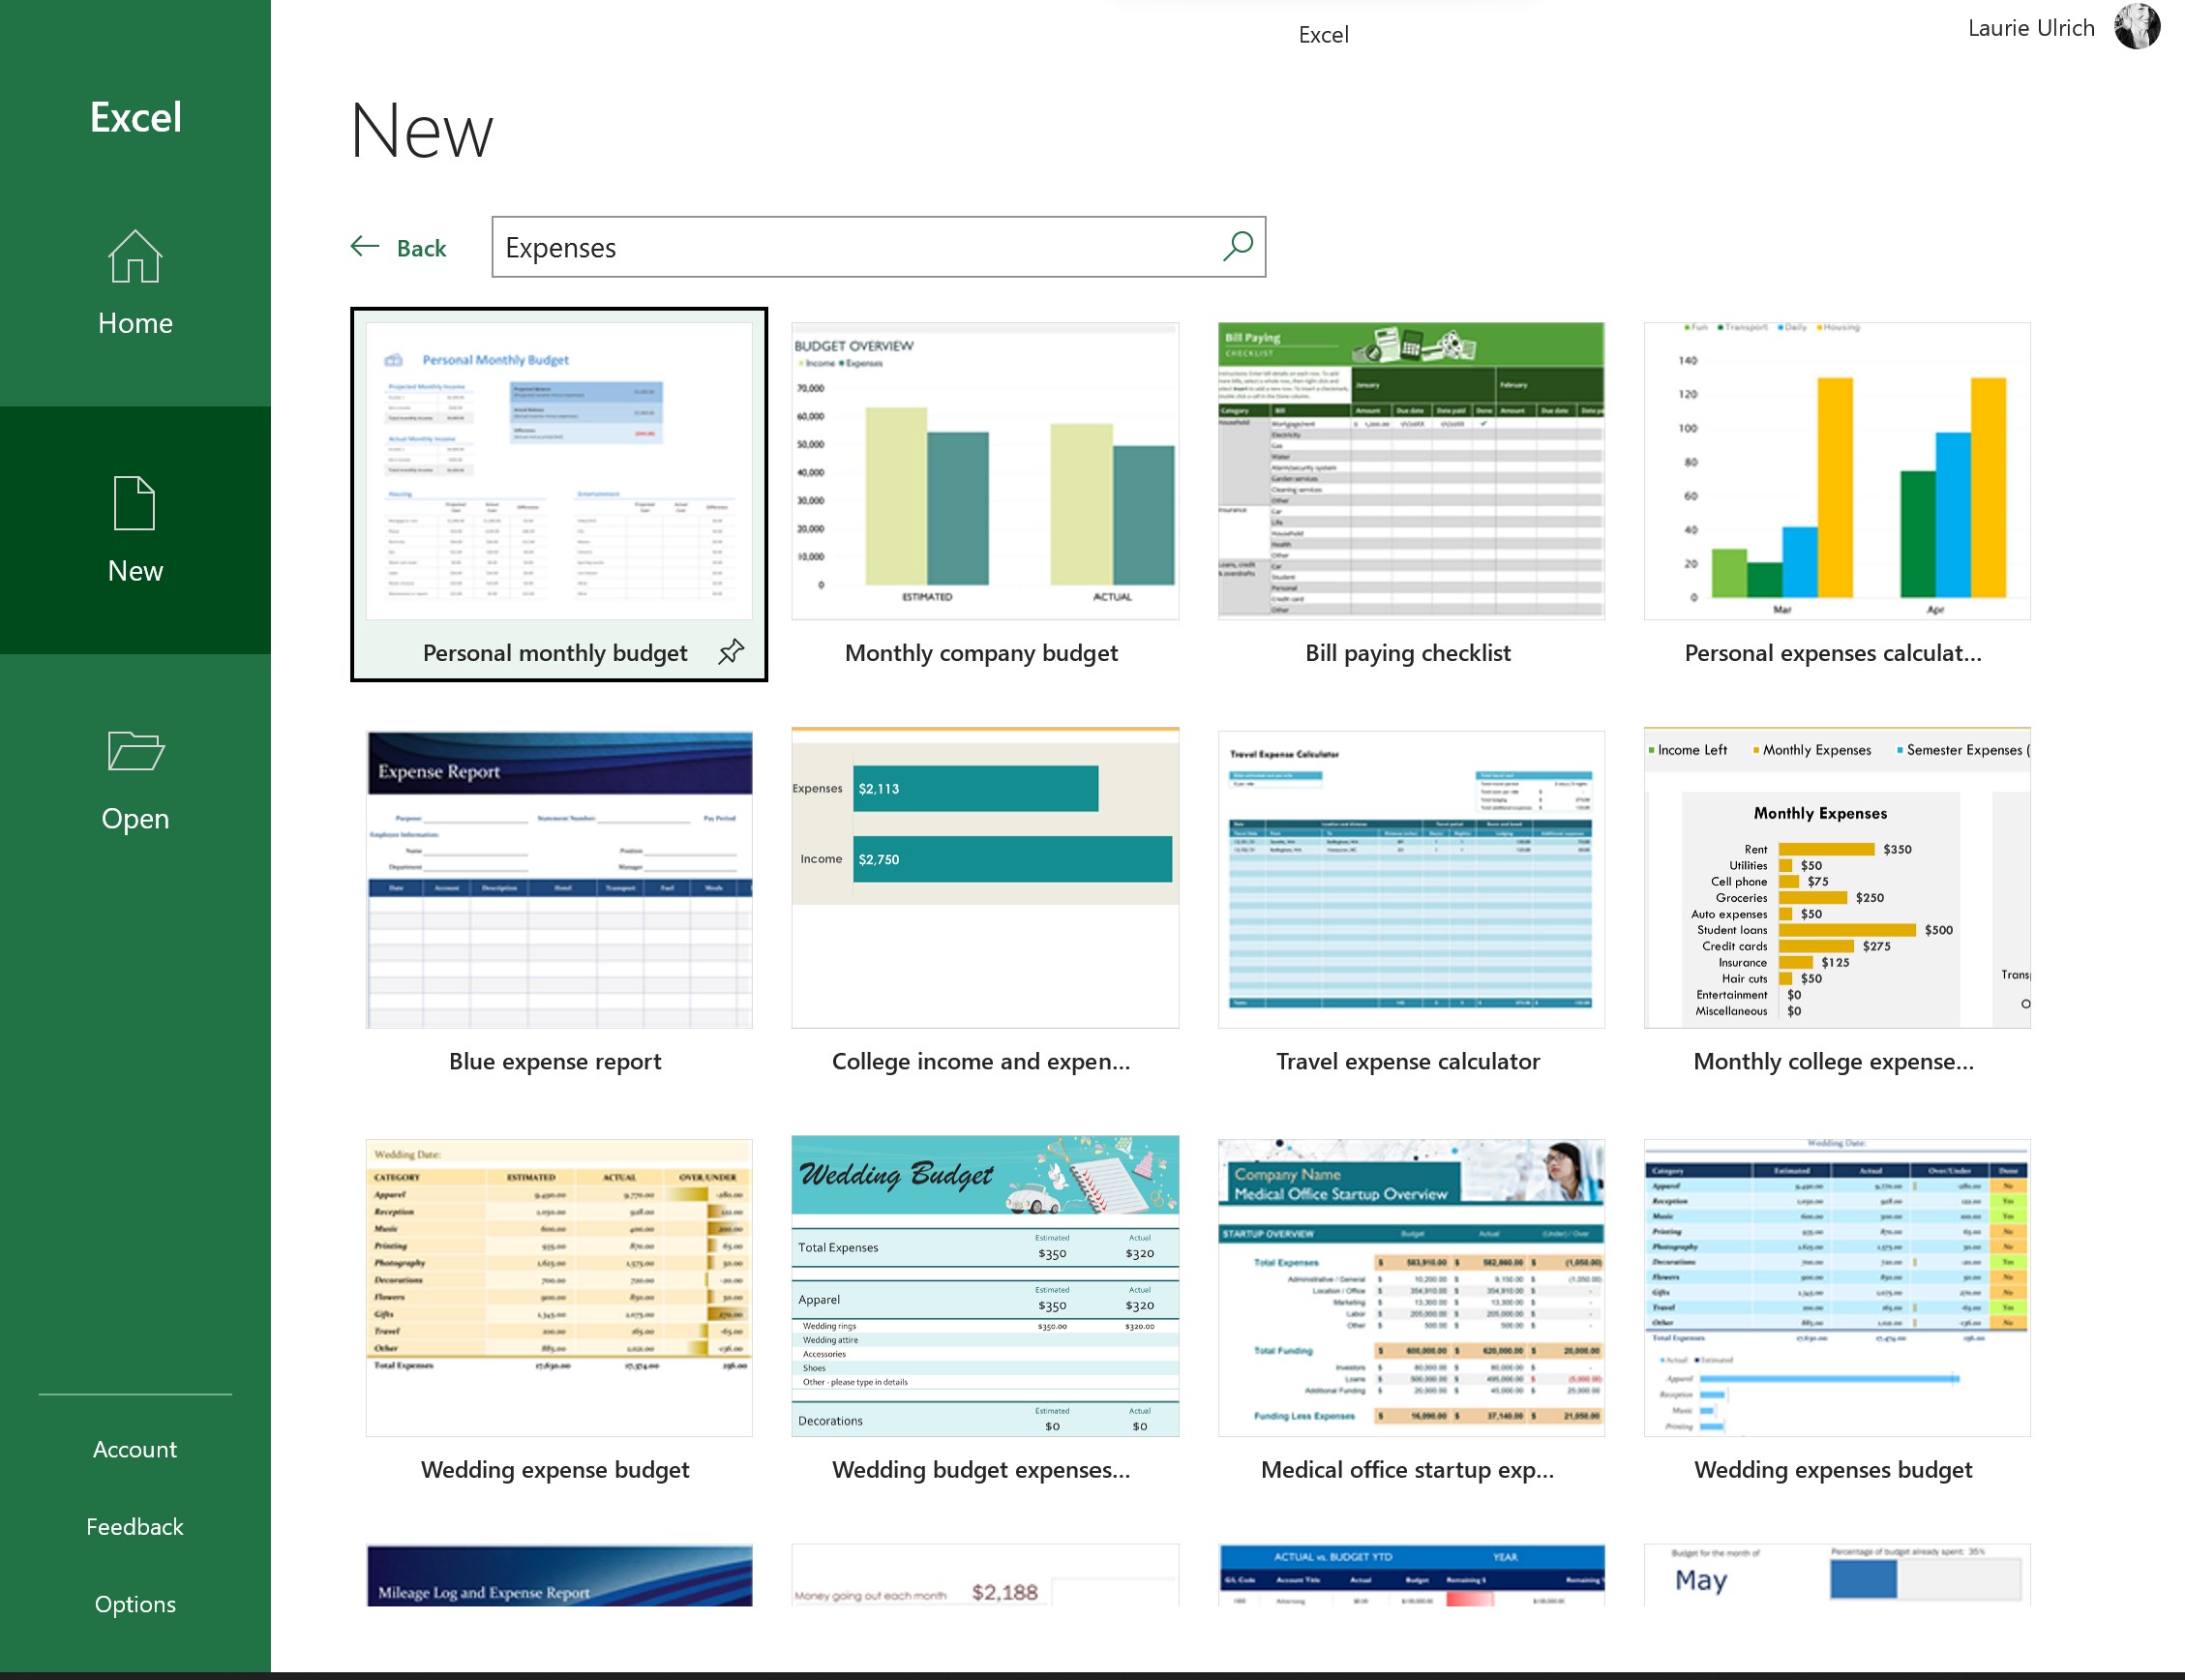
In truth, there are really way too many, so I suggest refining that search by typing “Business Expenses” into that search box instead – but if you ever need to calculate expenses for a wedding or other personal adventure, the previous search will give you lots of options.
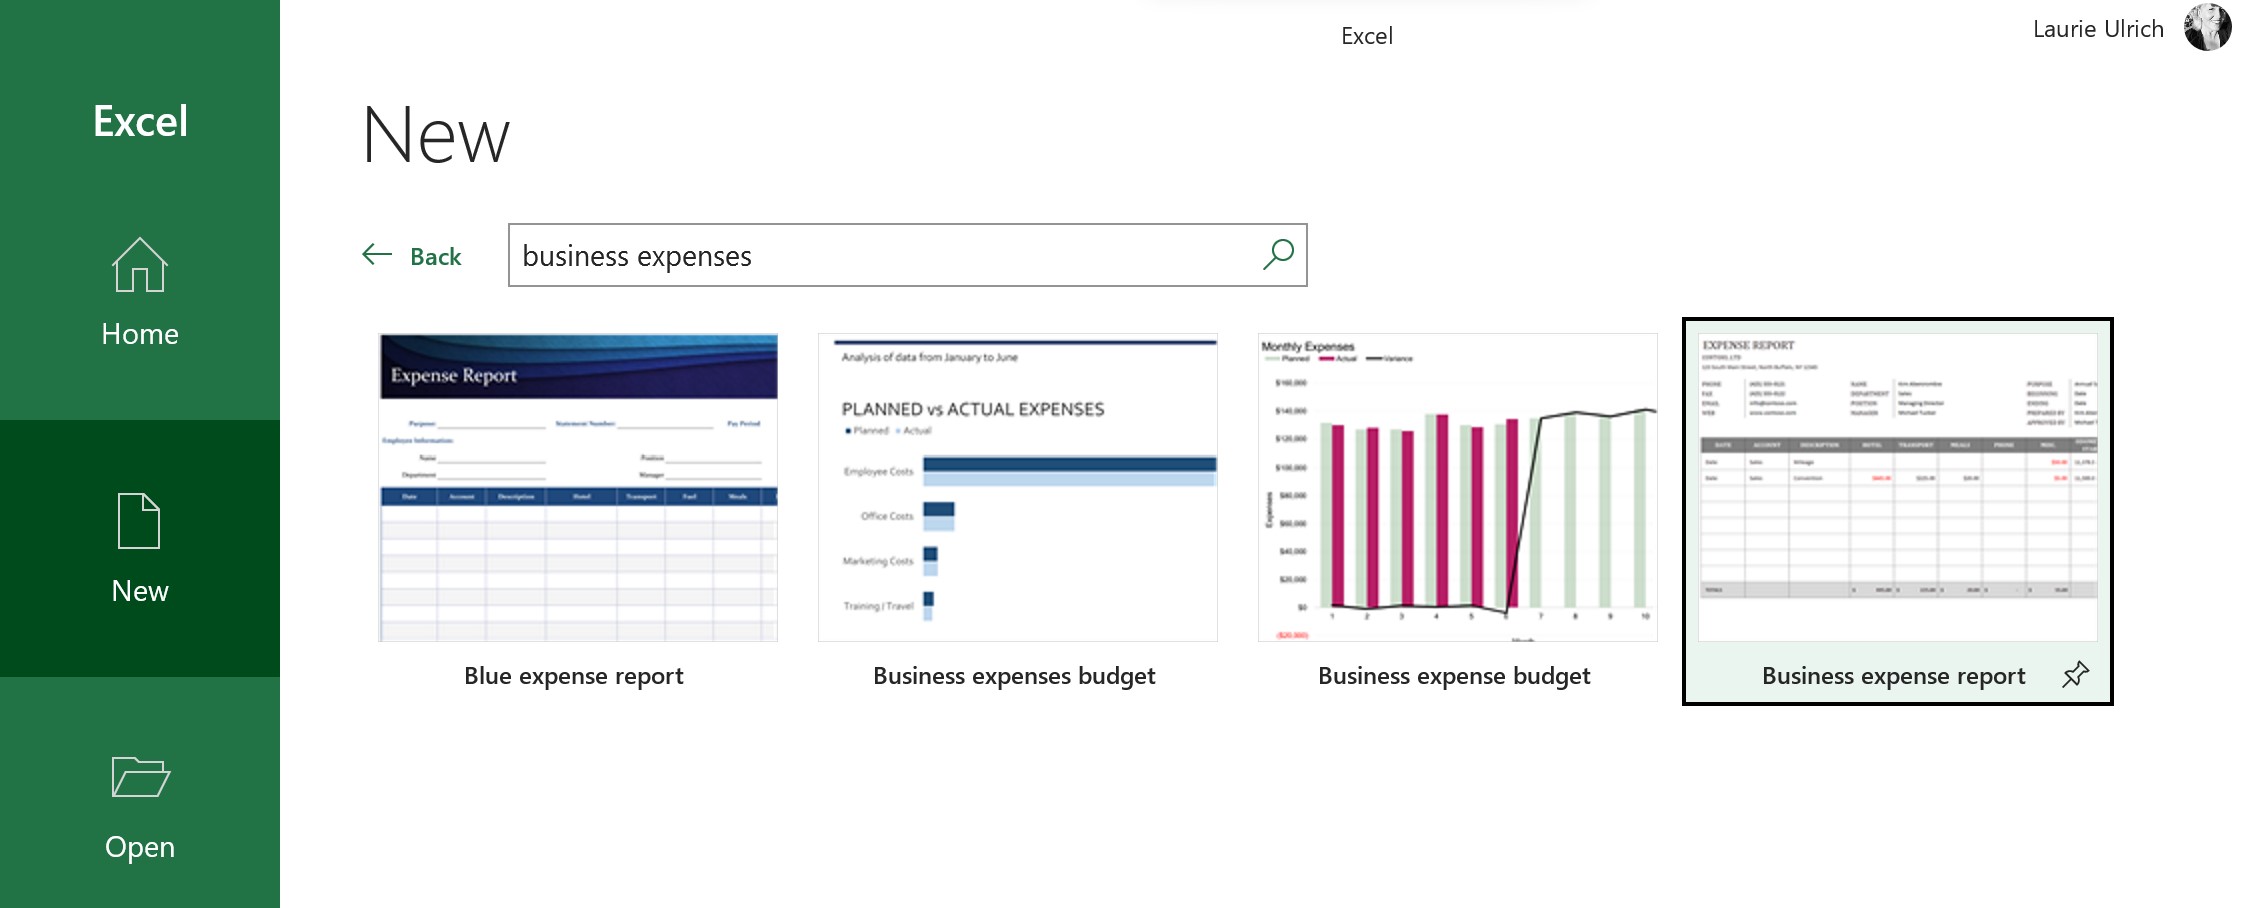
With a more reasonable set of templates to consider, I’d recommend either the Blue Expense Report or Business Expense Report. I encourage you to download them both, and see which one you like best. I’m going to go with the latter option, simply because it’s more visually simple, which means you can dress it up if you want to, and you’re not stuck with a color scheme that may not be appealing or match your other company-based workbooks.
To download either template, select it and then select Create in the resulting dialog box. This starts a new workbook based on the template.
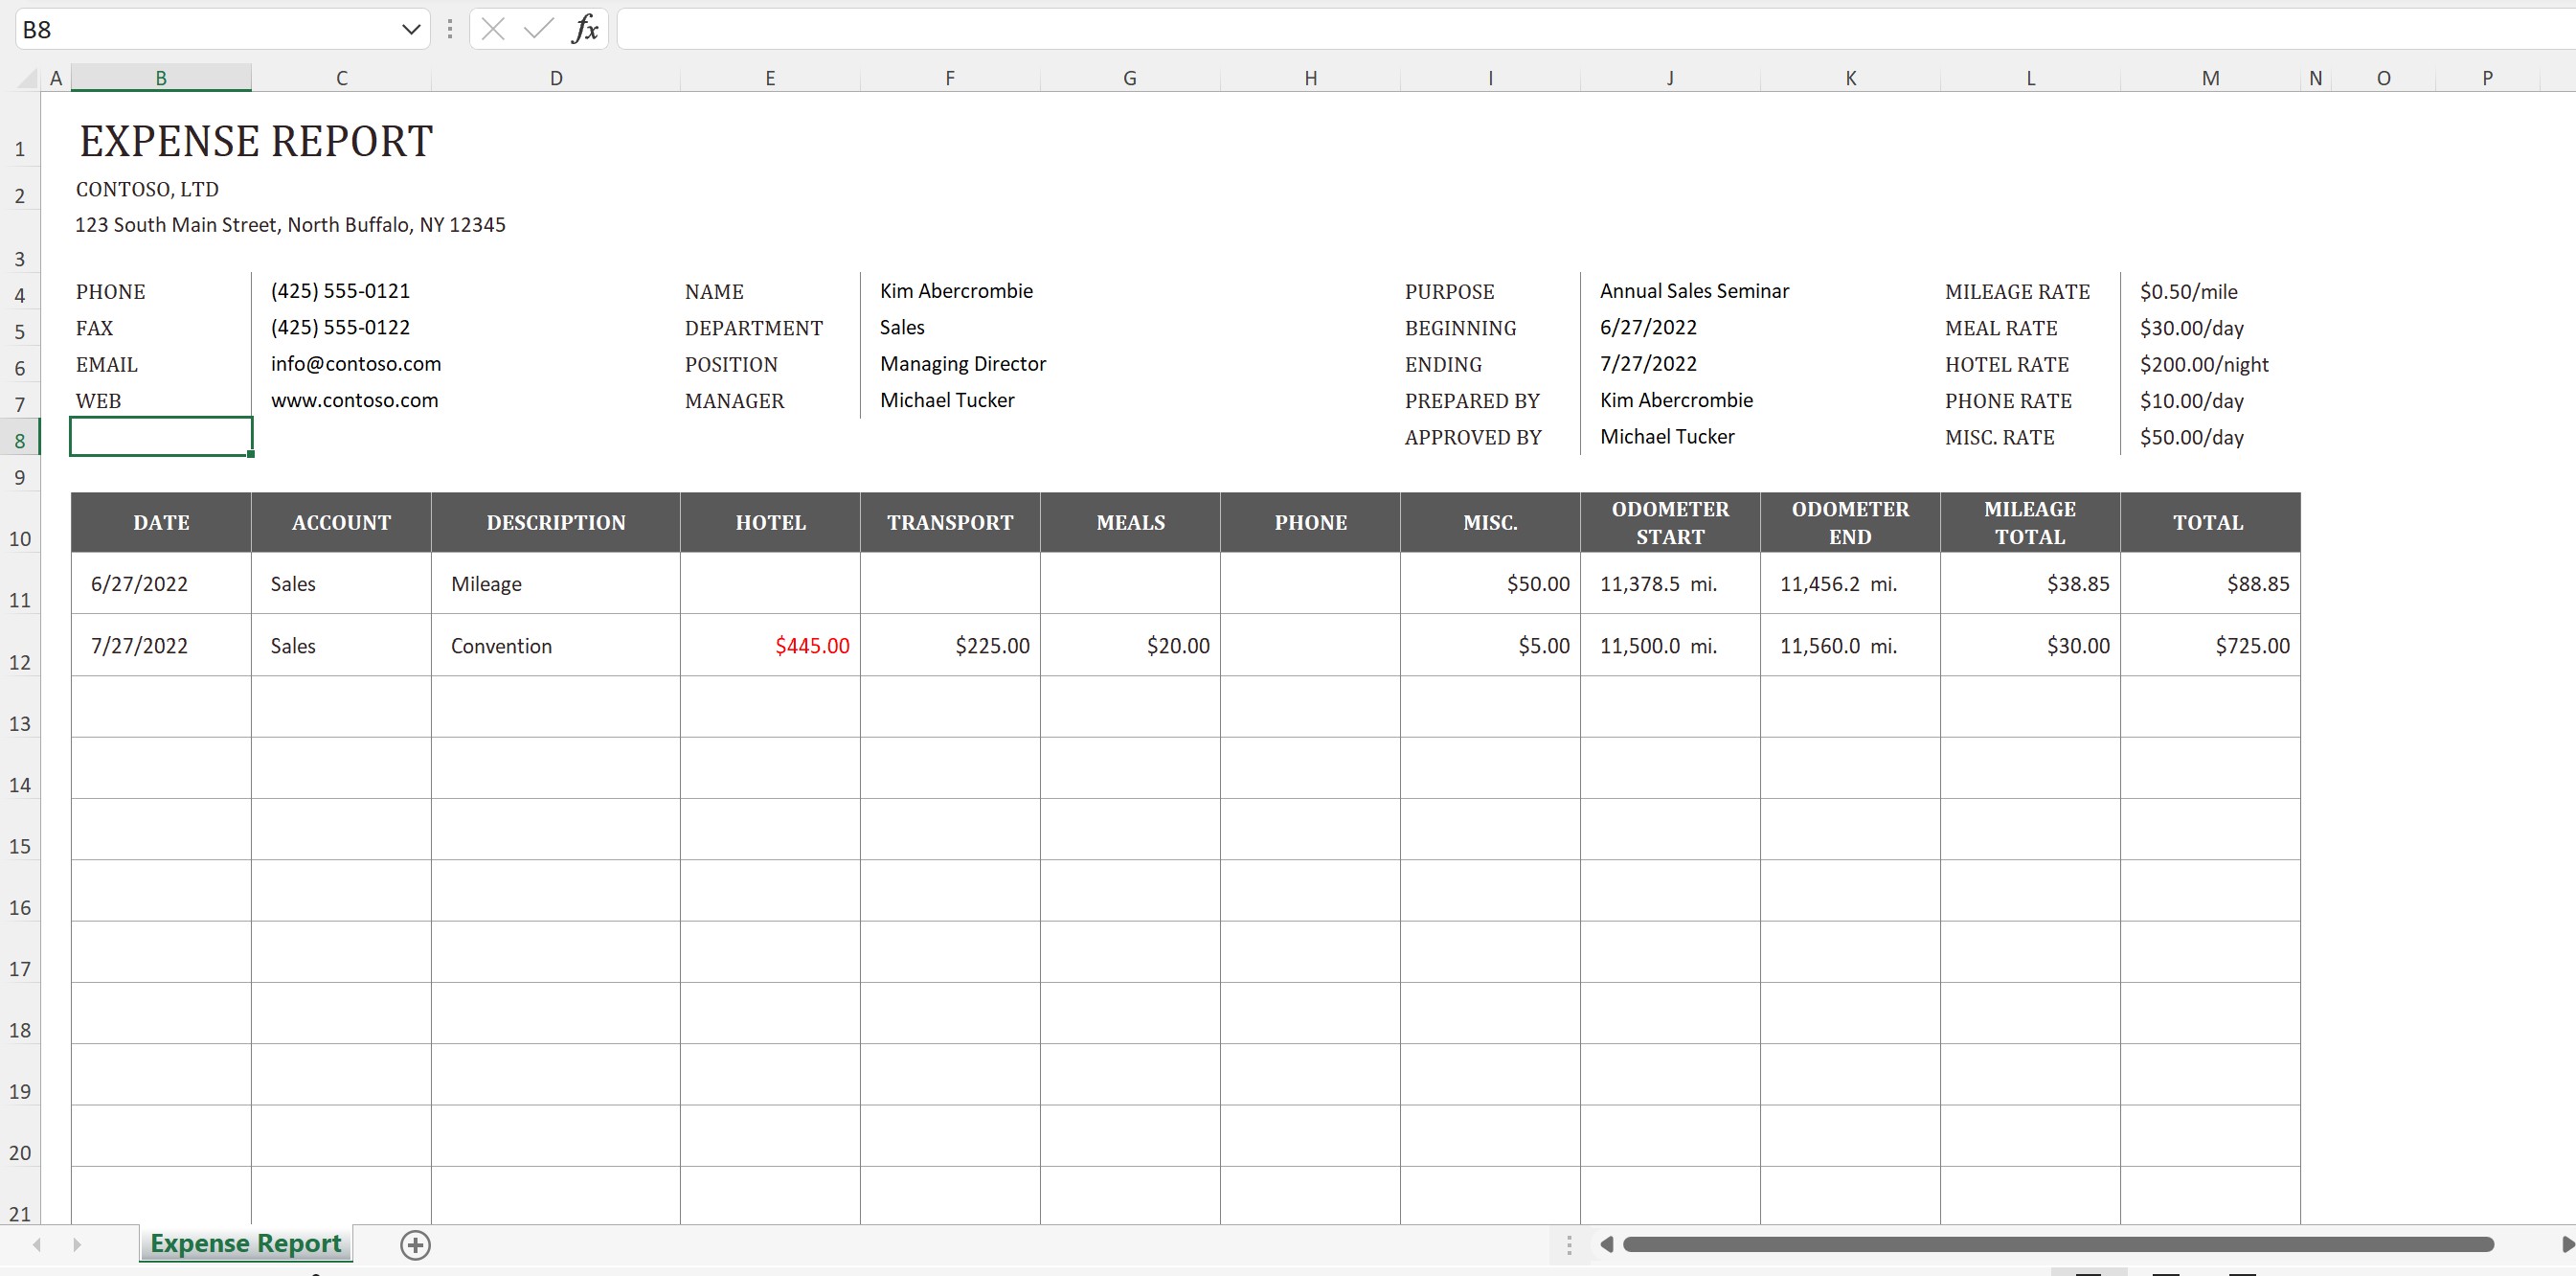
The resulting workbook has a lot of handy features, but the approach is based on one sheet per group of related expenses – the worksheet displayed immediately is for a fictional company and employee, and her expenses for an Annual Sales Seminar. This information – about “Kim” and her job title, contact information, and the event (including the hotel she stayed in and the related costs for her lodging) lives in rows 4 through 8, and you can delete some or all of them – or any unwanted cells in columns B through M – if you so desire.
If you want to know even more about working with templates in Excel – for expenses and any other tabular endeavor, check out the video at the following link:
Https://www.youtube.com/watch?v=wDWnb3LXx-Y&list=PL_eVGUXO7Anha4lv9dp_Nk96KP1WuBpKi&index=71
Starting from Scratch
If a template isn’t for you, it’s easy to build your own, completely customized workbook to store your expenses – and generate an expense report for your employer or for your accountant to use in preparing your taxes.
But why would you start from scratch, given how comprehensive the templates are? Maybe you have more or very different needs in terms of what information you need to store about your expenses or in how you create your weekly or monthly expense reports. Maybe you need to mirror the system your employer uses, with the exact same fields in the exact same order, or maybe you just have a very clear idea of what you need, and it’s not found in the template.
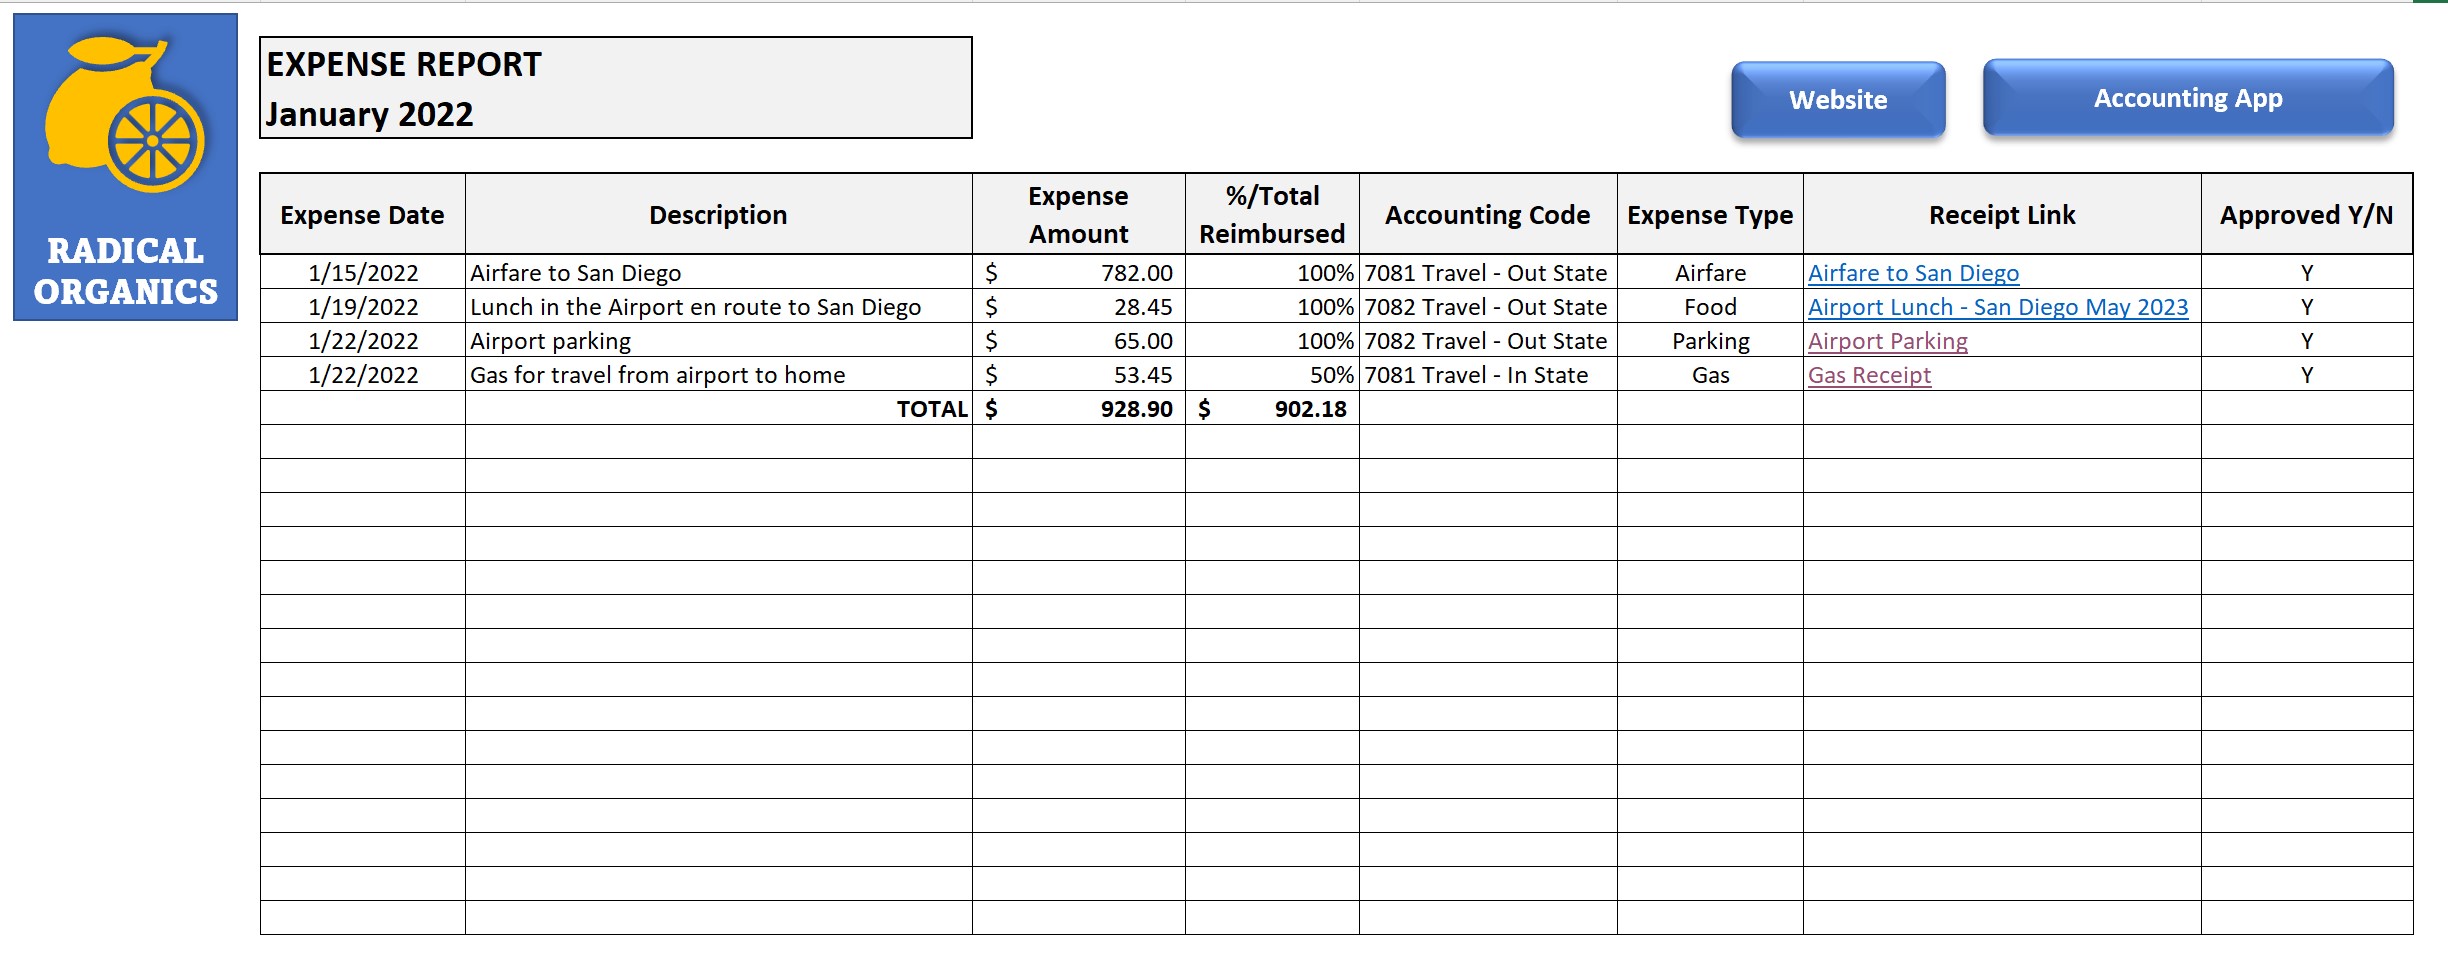
The why doesn’t matter, and luckily, the how is just a matter of organizing your worksheets’ headings, rows, and columns to meet your needs. Shown here (and the finished workbook is also attached to this article via a file link), your expense report is pretty simple to set up.
Https://docs.Google.com/spreadsheets/d/1iVL32BJVMEBED7MgshXwakefrqz20BOc/edit?usp=share_link&ouid=109458182170120820541&rtpof=true&sd=true
Setting up Your Own Workbook
The first thing you’ll want to do is set up your main worksheets – after choosing New from the File tab and then selecting Blank Workbook.
I’ll be creating a worksheet for every month of the year – but fear not, that doesn’t mean making 12 worksheets from scratch. That means creating sheets for every month of the year, and then grouping them. Then, while they’re still grouped, build the content that’s common to every month’s reports – the column headings, row labels, even the titles, and all the formatting. Don’t forget sums at the foot of columns, and any other calculations you can set up referencing the now-empty worksheet cells such as averages by expense type or category, or percentages for reimbursement, if not all of your expenses will be 100% covered.
After the common content is built, break up the group (right-click any of the grouped tabs and choose Ungroup Sheets from the pop-up menu), and then start editing individual sheets for what’s unique to each month. That means the sheets’ titles and any specific references to the individual months, and if you didn’t do so before grouping the sheets, you can also go in and name the sheet tabs themselves.
Https://drive.Google.com/file/d/1208PYlVz2wOW8GDP3qC24HGQHgMEiK-B/view?usp=share_link
TIP! How about next year? Just make a copy of the whole workbook from the current year, change the title to reflect the new year, and then group the sheets. Go into any sheet in the group and delete the last-year-specific data and any references to the year such as the worksheet titles. Ungroup, and then you’re ready to go on January 1st, building a new year’s worth of expenses and related data. Easy!
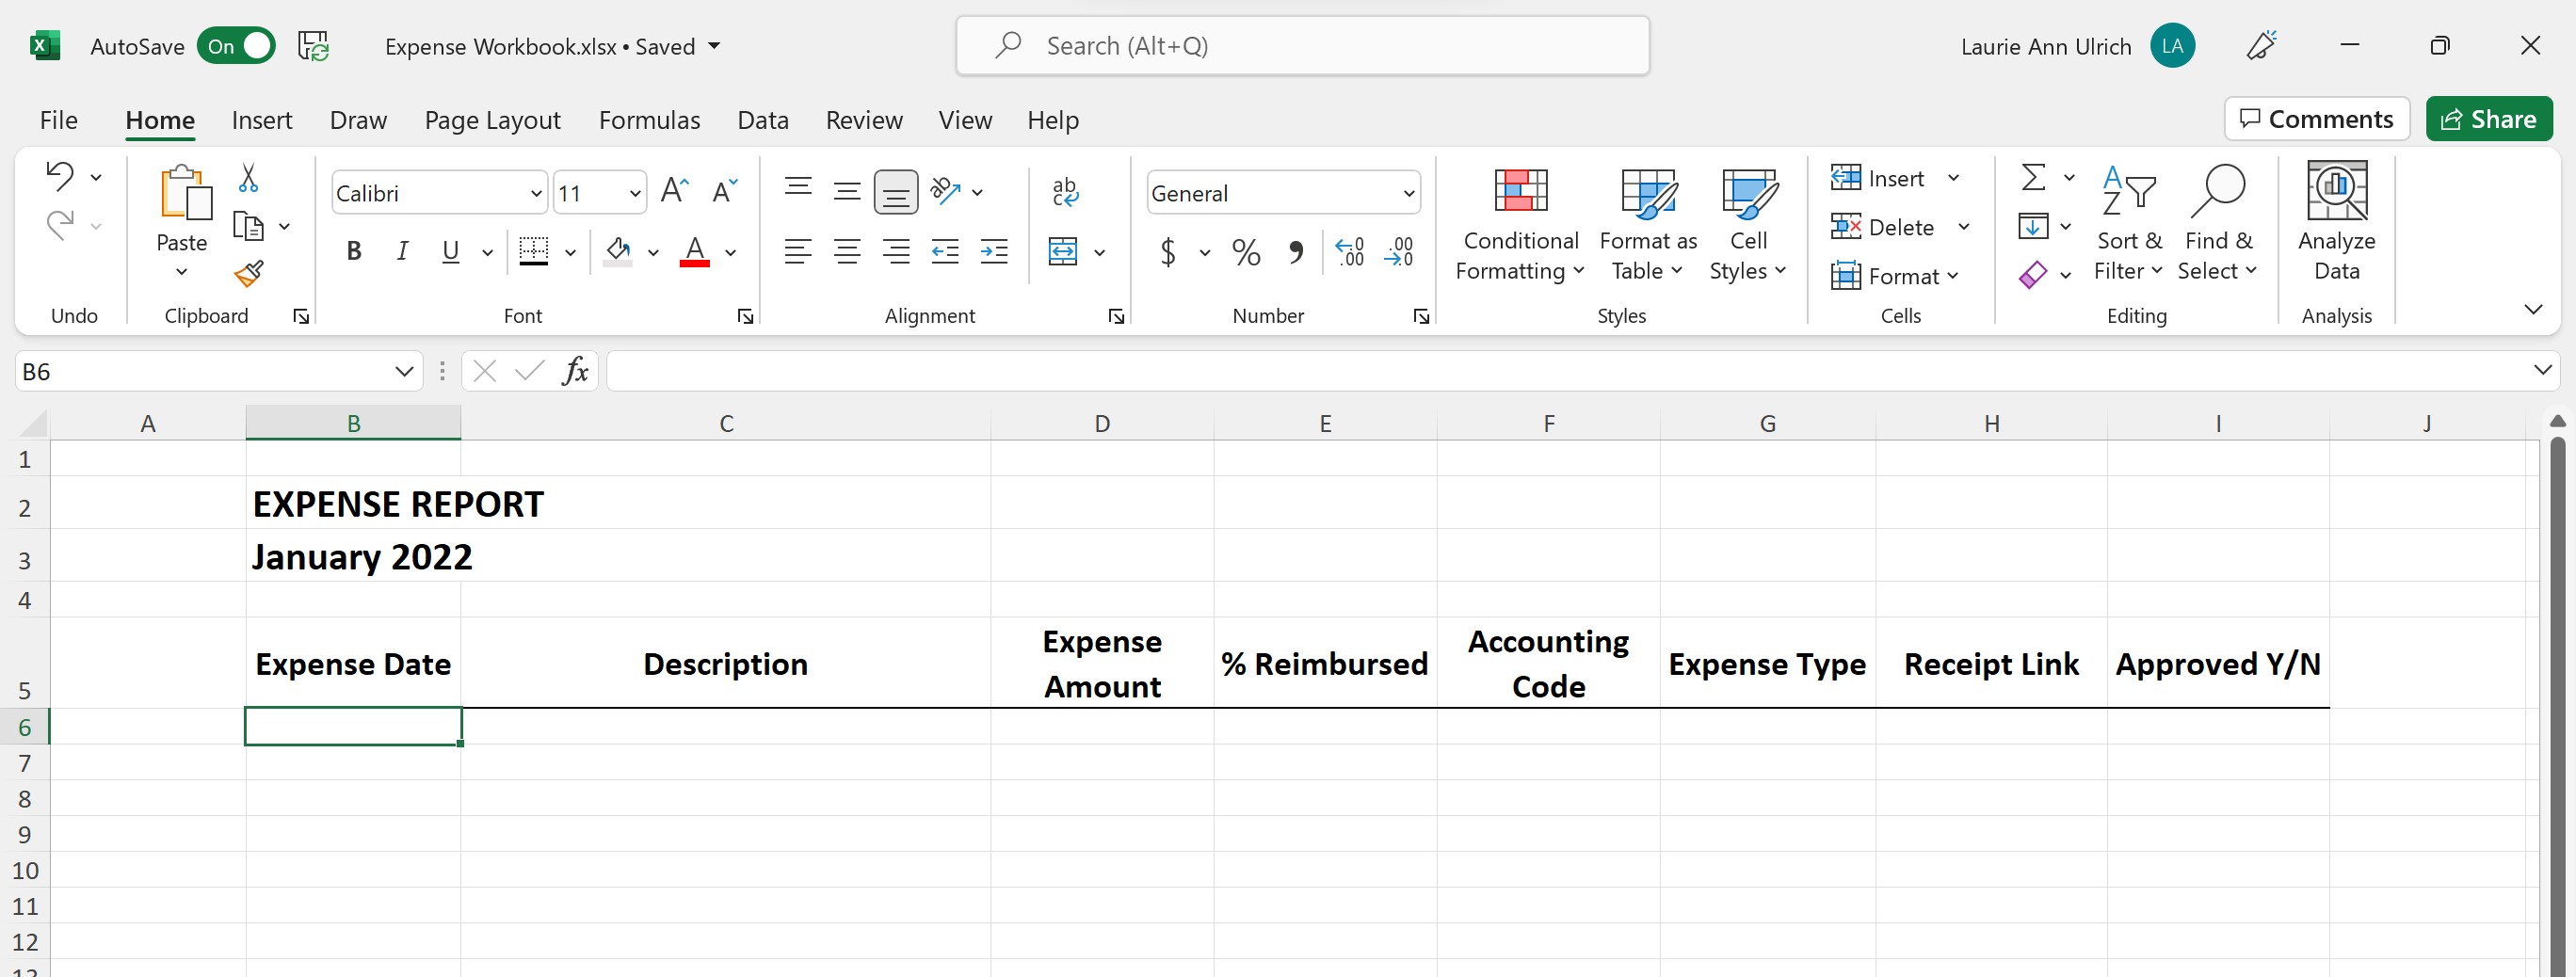
My starting month’s worksheet – I’ll start with January, despite the fact that I’m writing this in June – should contain column headings for each piece of information I store about my expenses. And then, each row becomes an expense. Of course, above all of those headings is the Month and Year title, and space for buttons (if you want to create buttons that link to a website (maybe your employer has an online app you use to enter your expenses or you have backups on your Google Drive) or your company logo.
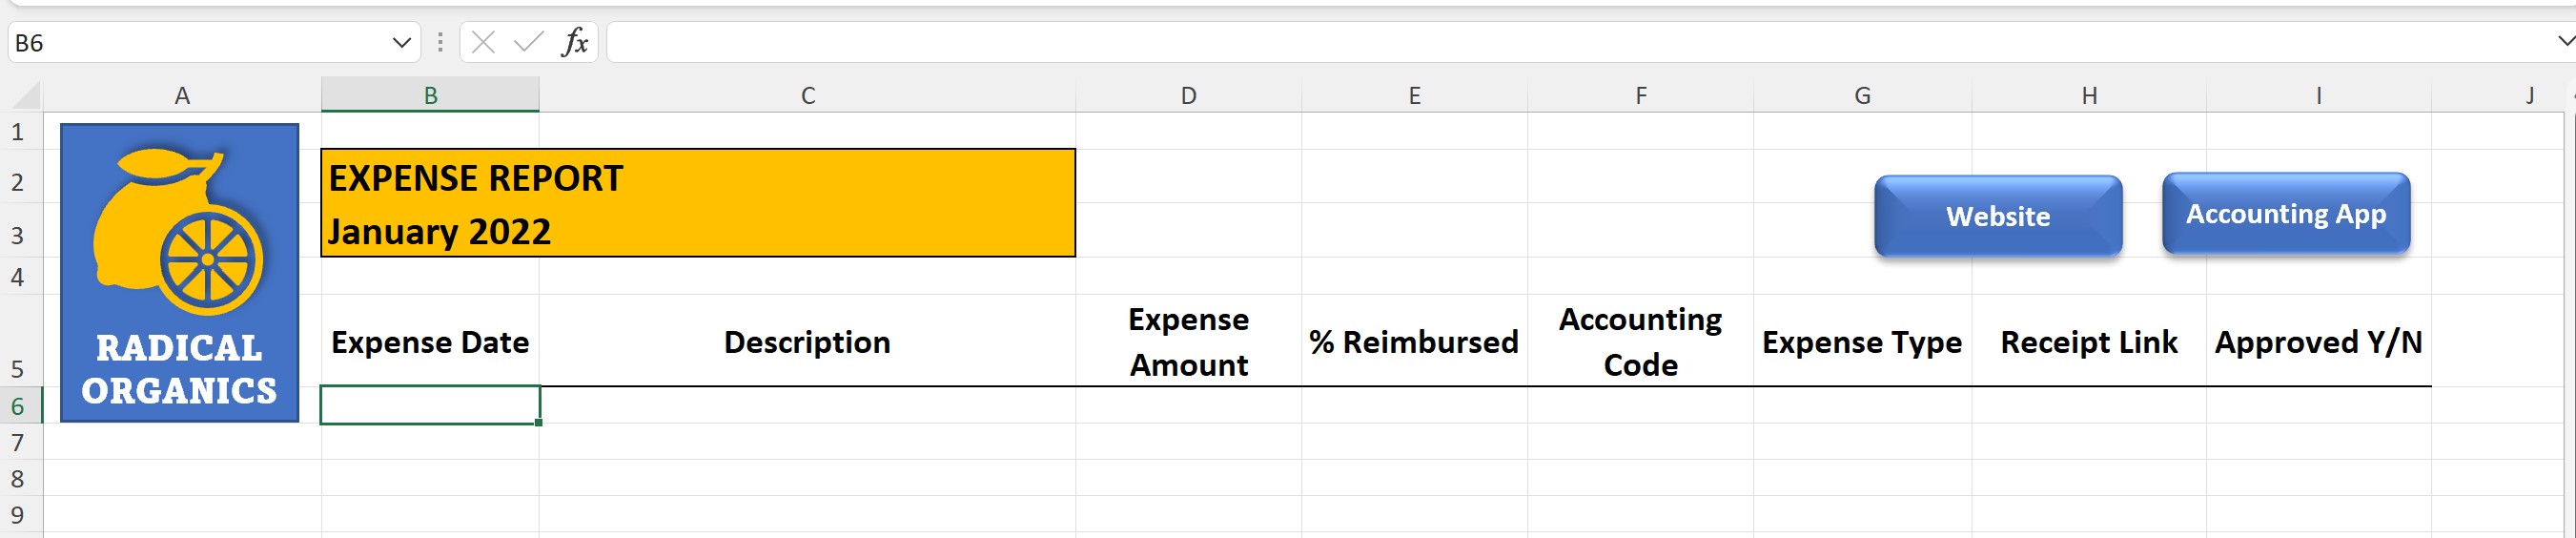
Categorizing & Referencing Expenses
Rather than having separate columns for food, airfare, hotels, tolls, parking, mileage, and other types of expenses, consider having a column that allows you to choose an Expense Type from a drop list. You can do the same thing for the expense codes your accounting department (or accountant) wants to see for each expense, which means you pick a single code for each expense so it can be tracked back to a particular client, event, or activity.
To create these drop lists, you’ll use the Data Validation feature, which I describe fully in this video:
Https://drive.Google.com/file/d/1R1Vv87Aj7FLcIrhNxIO3IuN4ZXeemtMH/view?usp=share_link
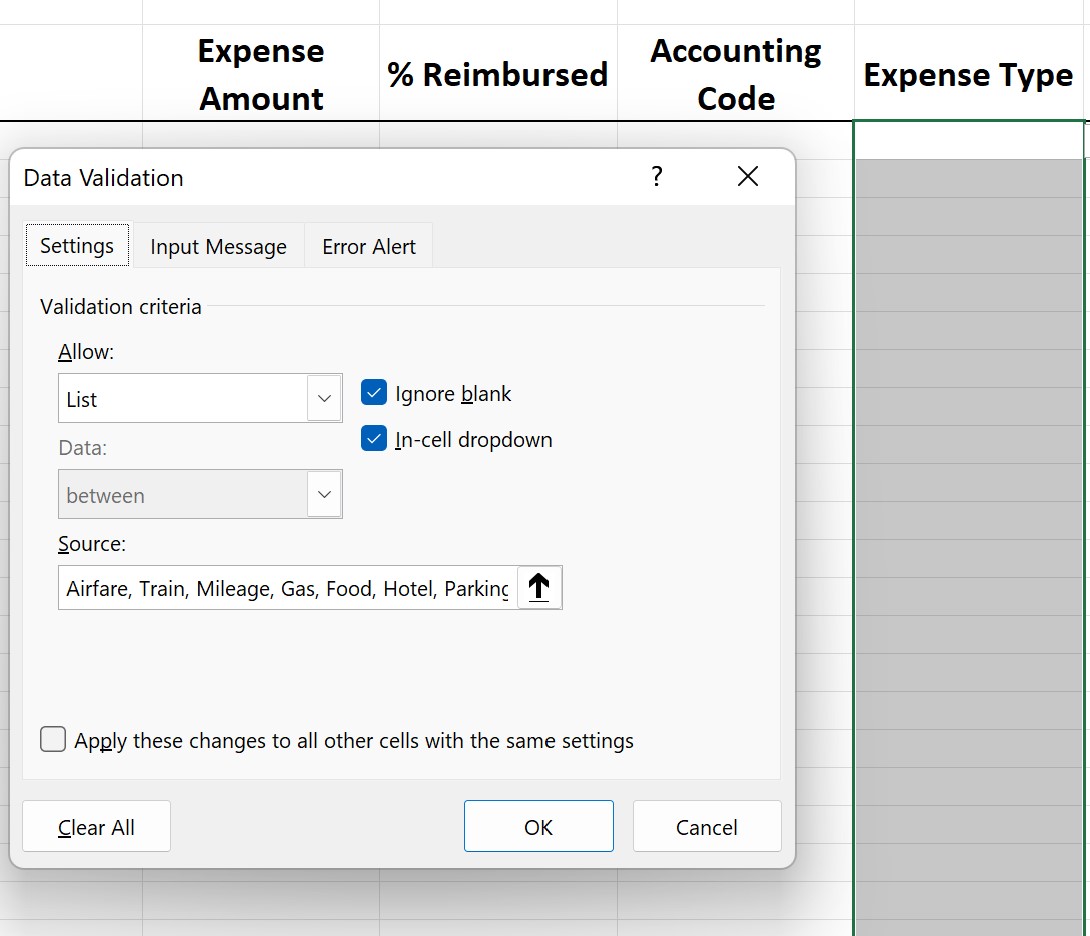
The process is pretty simple – just select the column from the first row that will contain an expense, down to the last row of the worksheet. Or, if you know you’ll only have, say, 50 expenses per month, select to that 51st row from the first record row. This defines how many cells in a given column will display the drop list you’re making.
Then, from the Data tab, click the Data Validation button, and in the resulting Data Validation dialog box, choose List from the Allow field.
After that, all you have to do is type the list of possible values for the drop list into the Source box. Separate each value with a comma, as shown.
If you need the source list to include a lot of values – perhaps many, many accounting codes taken from your Finance department’s database – you can put them on a separate sheet in the workbook (call it “Data Sources” or something similar) and then type or paste the codes into a column, one value per cell, on that sheet (shown here).
.jpg)
After you’ve created the list of accounting codes, return to your Expense Report sheet and select the column’s cells that should offer that list for data entry, and click the Data Validation button on the Data tab. Choose List as the type of validation to Allow. In the Source box, click to then select the range of cells on the Data Sources tab that contain your codes. Note that after activating the Source field in the dialog box, you can click the tab containing your code values and make the selection there (selecting the cells containing the codes) while the Data Validation dialog box remains onscreen.
Https://drive.Google.com/file/d/1R1Vv87Aj7FLcIrhNxIO3IuN4ZXeemtMH/view?usp=share_link
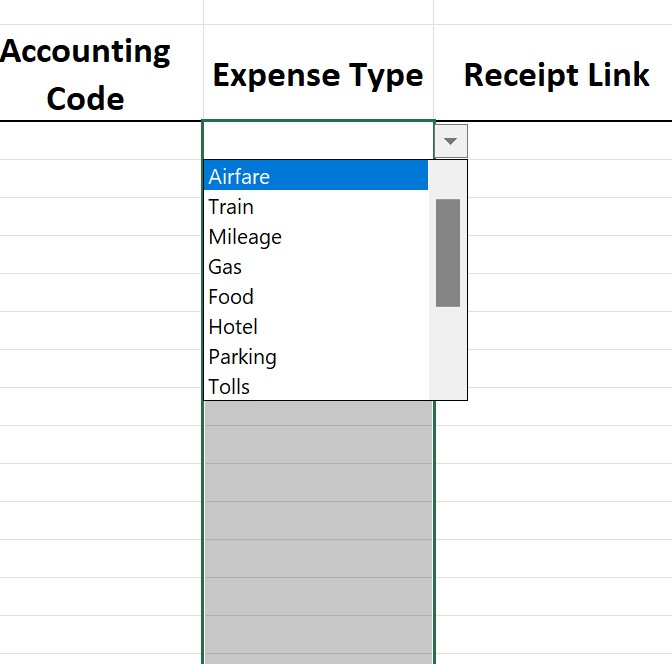
After you’ve selected the range of cells containing your source values, click back inside the Data Validation dialog box, and click OK – you’re all set. Now, when you click any cell in that Accounting Codes column, your list of codes from the Finance department appear, ready to be assigned, one per expense. And if accounting codes are later changed or added by your employer? Just update that list on the Data Sources sheet, and the drop list in your Expense Report changes accordingly.
.jpg)
TIP! What if a given expense can be attributed to two different codes? Typically, that’s not the case, but if that were to happen, divide the expense into the percentages that should be attributed to different codes, and enter it as two or more line items in the Expense Report worksheet, one row per code. For each “piece” of the expense, choose the appropriate code for that percentage.
Storing & Linking to Your Receipts
If you’re like me (and most other humans), you probably don’t do a perfect job keeping track of your expense receipts. I don’t travel or incur business-related expenses every day, or even every week, so I often forget to keep them. This then requires me to pull up credit and debit card transactions and take screenshots of them, or dig through my handbag for crumpled receipts that luckily never got thrown away. Then I have to take pictures of them with my phone, and email those images to myself so I have a copy for my Expense Report.
.jpg)
Regardless of your process of saving (or not saving!) receipts, you’ll need them to “prove” your expenses, either to an employer who needs to be sure they’re only reimbursing you for legitimate business expenses, or to the IRS, which has a very finite list of things you can declare as business expenses. If you ever run afoul of the IRS, you can expect them to ask you to produce all of your receipts for expenses on which you took a tax deduction, so read the next few paragraphs carefully. And, if you missed it earlier in this article, click here to find out more about the expenses the IRS considers legitimate for deduction on your tax returns.
Saving Your Receipt Images
To make the best use of them, you’ll want to store all those emails, screenshots, and photos of your receipts in a single location, and name them something meaningful. If not, you’re no better off than the person who’s been tossing scraps of paper into a box all year and then has to sort them out right before tax day.
You probably already know how to rename an image or other file, but to make sure you’re doing so in the best way possible, let’s review.
- First, put all the files in one folder, into which you can build subfolders for each month. A good name for the main folder is “Expense Receipts” or something similarly revealing. You can then drag them into the month’s subfolders as you create them.
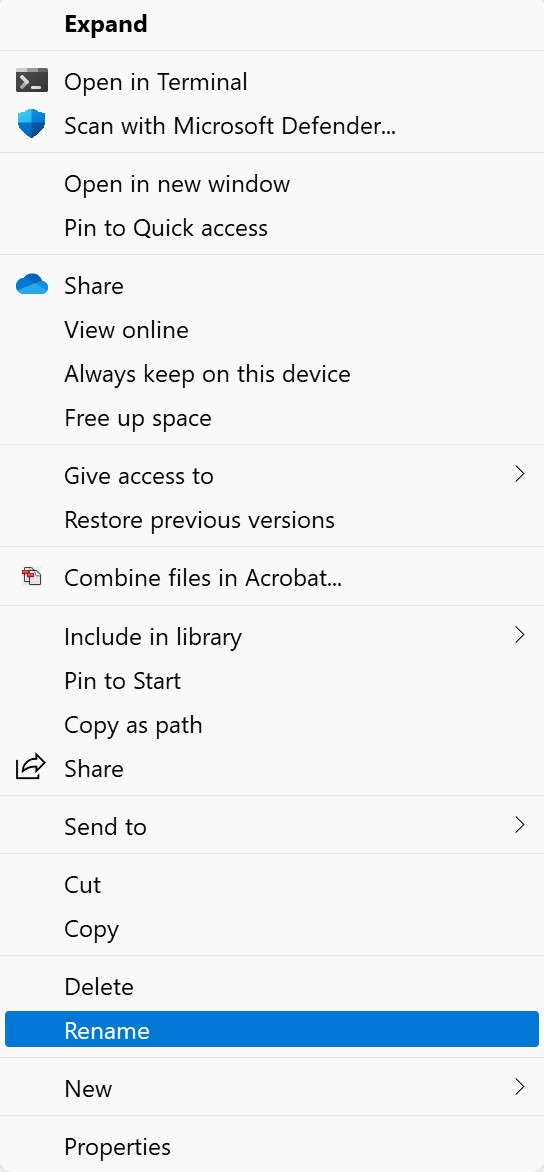
- Next, renaming begins. If you need a reminder, briefly open the file to see what it was for, and then close it. Right-click the file, and choose Rename from the pop-up menu. If you’re using Windows 11, you may have to go to the Show More Options command to get at the submenu that contains the Rename command.
- I like to name the files something that both identifies the type of expense and the activity it was related to. So instead of “Client Lunch, ” I might say “Lunch with Rainbow Organics CEO – 6-20-2022” or “Hotel Room Service San Diego May 2022” – by including the date, too, I can more easily file them in those monthly subfolders and avoid mixing up expenses that recur.
Creating Links to Your Receipt Images
Now, with your receipts named something useful and stored in a central location, you can begin linking them to the rows in your Expense Report worksheet, using the Link to Expense Receipt column. The process is simple, and begins with clicking in the cell that should contain the link:
- In that active cell, start the linking process by clicking the Link button on the Insert tab.
- With the Insert Hyperlink dialog box open, make sure Existing File or Web Page is chosen on the left, and then use the Look In folder view to navigate to the folder where your receipt images are stored.
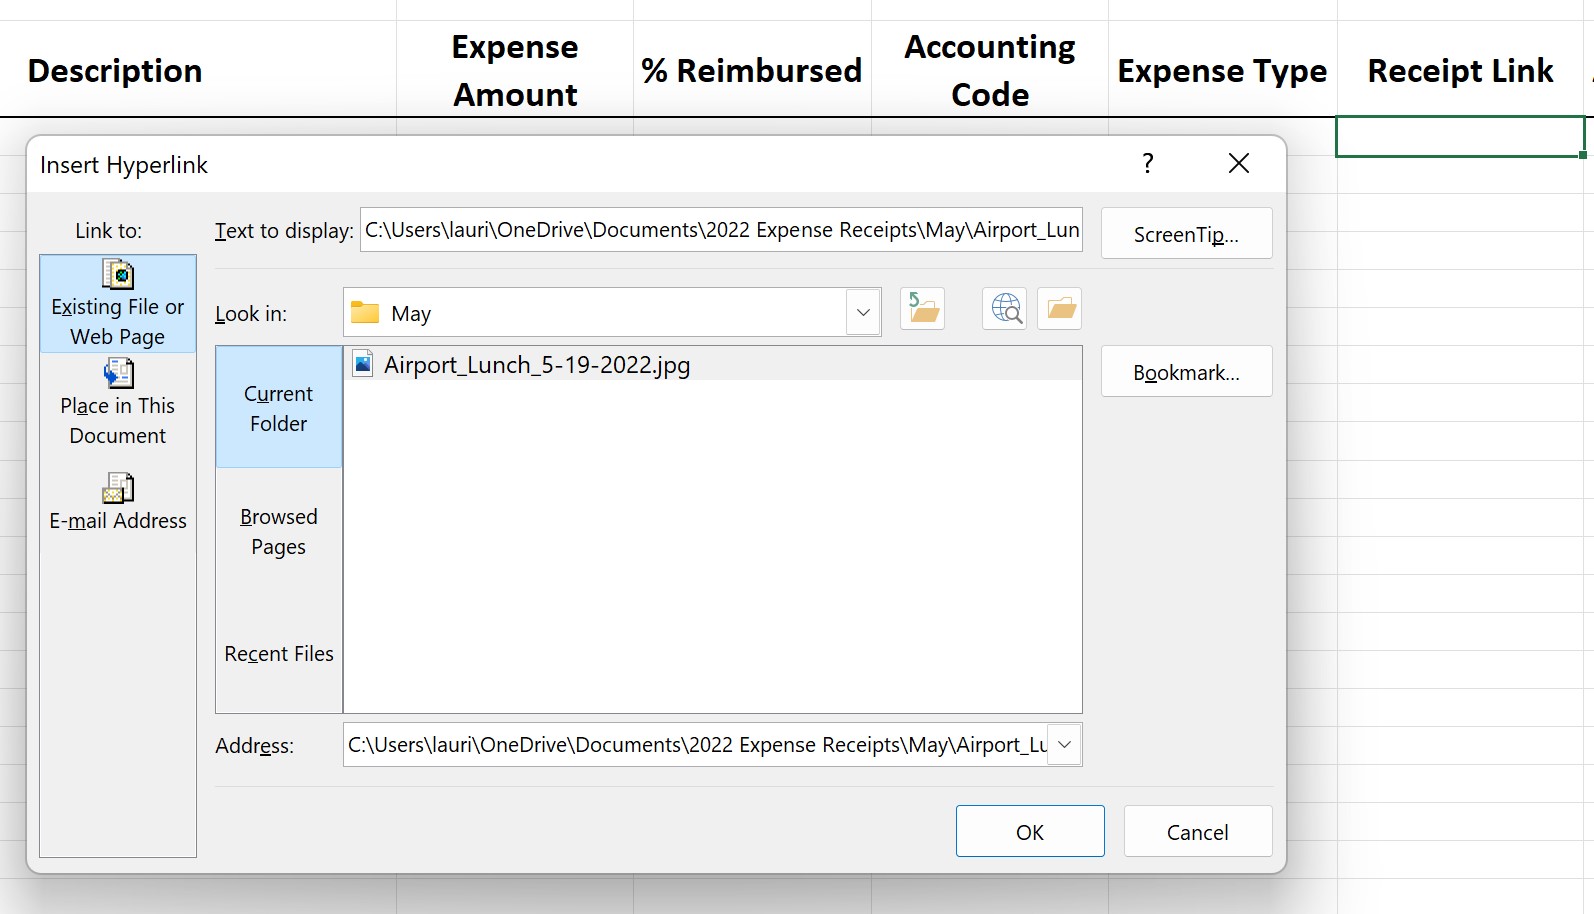
- Once you’ve found the folder and selected it, you’ll see your receipt files. Click once on the file you want to select it, and it appears in the Address field in the dialog box.
- Now, to prevent seeing a long path along with the file name in your worksheet, type the name of the receipt, typically the file name (another reason to make those names revealing and clear) in the Text to Display field.
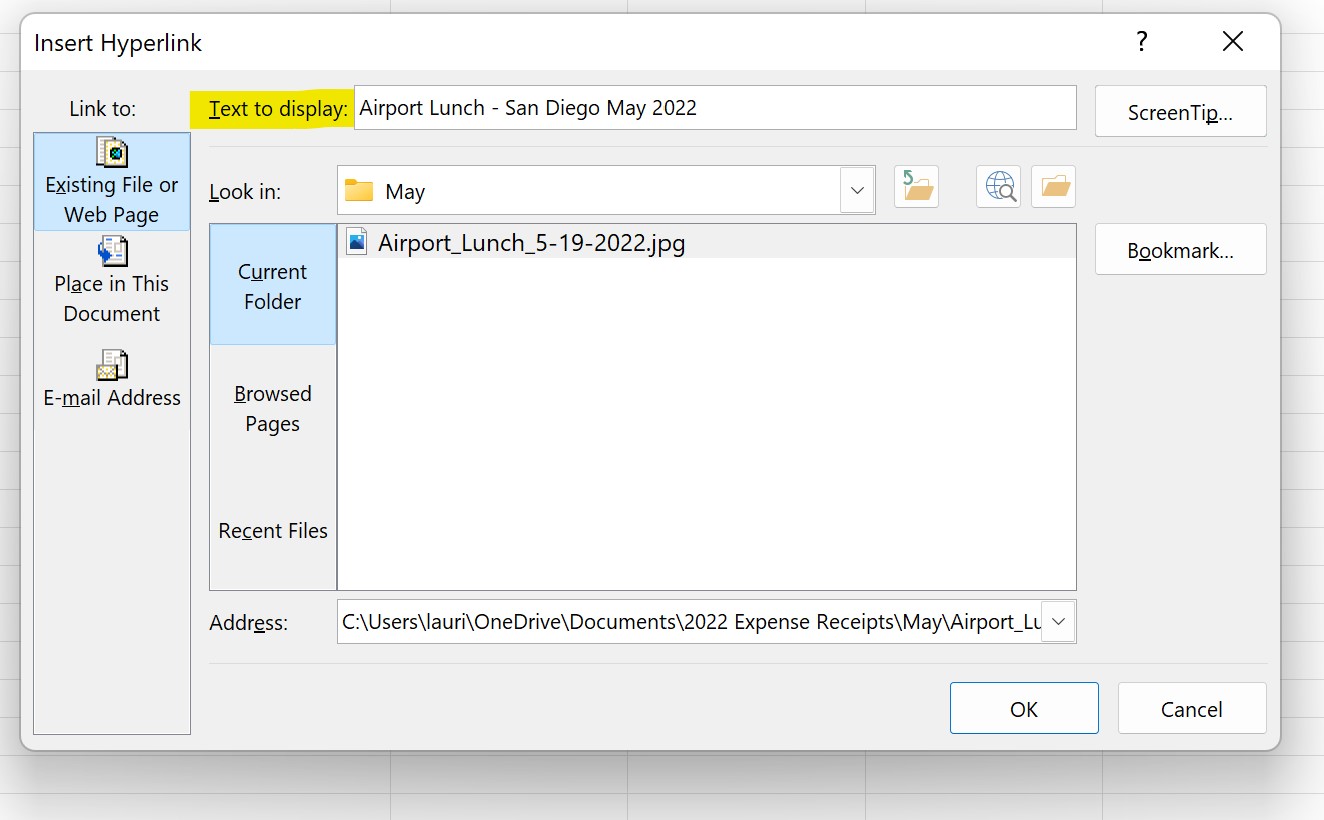
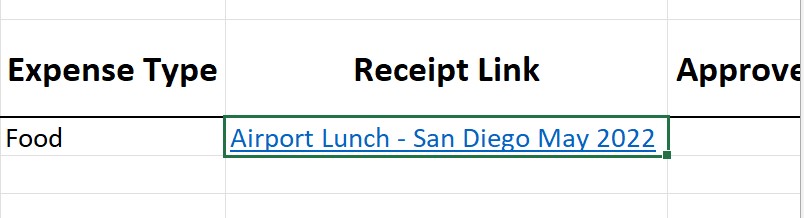
- Last, click the OK button to insert the hyperlink. It’s now an active link in that cell, providing instant access to the receipt related to the expense in that row.
Creating a Professional-Looking Expense Report
If you’re the only person who will ever see the Expense Report worksheet, its appearance need only be tidy and clear. As long as your column headings can be visually separated from the first Expense row as shown here, you’re probably “good to go.”
But if you want to be able to share the worksheet or send an attractive PDF version to someone else for viewing, you’ll want to do a bit more.
A bit more can include any of the following:
- Bolding, enlarging, and choosing a different font and font color for the title
- Adding your company logo to the top of the worksheet, next to the title
- Utilizing colors found in your company logo or branding
- Adding shading behind the title and/or column headings
- Making the column headings noticeably larger than the data in the rows below them
- Applying a white fill to the cells in and around the area containing data
- Applying borders to cells you want noticed such as headings and cells containing useful calculations
Not sure you know all you should about formatting your worksheets? Check out the video linked here for a refresher:
Https://www.youtube.com/watch?v=NtnxqEwMga8&list=PL_eVGUXO7Anha4lv9dp_Nk96KP1WuBpKi&index=44
