Gain a comprehensive understanding of WordPress in this tutorial that covers topics such as exporting a database, modifying the SQL for absolute URLs, uploading a WordPress site, and importing a database.
This exercise is excerpted from Noble Desktop’s past WordPress training materials and is compatible with WordPress updates through 2020. To learn current skills in WordPress, check out our WordPress Bootcamp and coding bootcamps in NYC and live online.
Topics Covered in This WordPress Tutorial:
Exporting a Database, Modifying the SQL to Use Appropriate Absolute URLs, Uploading a WordPress Site, Importing a Database
Exercise Preview

Exercise Overview
Once you are satisfied with the way the site looks and functions, it’s time to upload it to the remote web server. This exercise assumes that you have already set up WordPress using the easy one-click installation that most web hosts offer. This means a database has already been created and WordPress has been installed on your web server. All that’s left to do is upload our database and wp-content folder.

This exercise was written for use in a Noble instructor-led class. If you are at your home or office, please go to Exercise B4 in the Bonus section at the end of the book.
If You Did Not Do the Previous Exercise
- In a web browser, go to localhost:8888/mrp/wp-admin (Mac) or localhost/mrp/wp-admin (Windows) and log in if prompted.
- On the left of the Dashboard, mouse over Appearance and click Themes.
- Click the Add New button.
- Click the Upload link, then the Browse (or Choose File) button.
- Navigate to Desktop > Class Files > WordPress.org Class and double–click mrpTheme-ready-for-uploading.zip to open it.
- Click Install Now, then click Activate.
Getting Started
-
The instructor will supply you with a username and password. So you don’t forget them, write down the following (you’ll need them later).
- WordPress URL
- PhpMyAdmin URL
- FTP Username
- FTP Password
Open a browser and go to the WordPress URL you were assigned above. Notice that WordPress is already installed (this was done by the host’s one-click install). We’ll be replacing the default WordPress install with the MRP site we’ve created in the previous exercises.
Exporting the Database
WordPress stores all the posts, page content, and comments in a MySQL database. We can easily transfer all our site content from the local version to the remote server by transferring the database.
-
Open phpMyAdmin, as shown below:
Mac
- Open the MAMP application.
- Servers should start automatically; if not, click Start Servers.
- Click Open WebStart page if the MAMP start page doesn’t automatically open in your default browser.
- On the start page, in the nav menu, go to Tools > phpMyAdmin.
Windows
- Open XAMPP.
- In the control panel, ensure the Apache and MySQL services are running.
- Open your browser and go to localhost
- On the start page, on the left sidebar, under Tools, click phpMyAdmin.
-
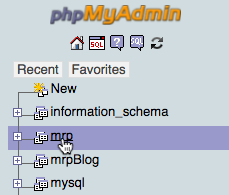
Click the mrp database from the list of databases on the left. This is the WordPress database that stores everything.
-
On the following page, click the Export tab:

-
To finish exporting your WordPress database, follow the appropriate directions for your operating system:
Mac
- Under Export Method, choose Custom.
- Under Table(s), click Select All to make sure all the tables are selected.
- Under Output, choose Save output to a file.
- Under Object creation options, check on Add DROP TABLE / VIEW / PROCEDURE / FUNCTION / EVENT / TRIGGER statement.
- At the bottom of the page, click Go.
Windows
- Under Export Method, choose Custom.
- Under Object creation options, check on Add DROP TABLE / VIEW / PROCEDURE / FUNCTION / EVENT / TRIGGER statement.
- At the bottom of the page, click Go.
-
If a pop-up window appears, Save the file into your Downloads folder. (If you are using Chrome on any platform or Safari on a Mac, it won’t open a pop-up window; it will just download the file.)
NOTE: By default, most web browsers will download files into the Downloads folder on your machine. Depending on whether you have changed your preferences, the file may download into another location other than the Downloads folder.
The mrp.SQL file will now be downloaded and placed in your Downloads folder.
Replacing the Local URLs
WordPress uses absolute links for almost everything in the database, so we need to change all the local paths to the new remote path. Currently all the links stored in the database are linking to localhost:8888/mrp (Mac) or localhost/mrp (Windows). This would cause linking issues if you were to import the database directly to your remote server now. The easiest way to fix this is to do a Find and Replace in your code editor.
Open your code editor.
Choose File > Open.
- Navigate to your Downloads folder (or the folder that mrp.SQL was downloaded to):
- Mac: [username] > Downloads
- Windows: C: > Users > [username] > Downloads
Open mrp.SQL.
-
Go to the following to do a Find and Replace:
- If you are using Sublime Text, go to Find > Replace.
- If you are using Dreamweaver, go to Edit > Find and Replace.
-
Enter the following (the Find and Replace labels may be named differently in your code editor):
Find: http://localhost:8888/mrp (Mac) or http://localhost/mrp (Windows) Replace: Enter the WordPress URL you were given at the beginning of the exercise. Click the Replace All button.
Save the file.
Importing the Database
Go to the phpMyAdmin URL you were given at the start of class. (Please note that the URL is case-sensitive, so type it exactly as it was given to you!)
Log in using the Username and Password you were given.
-
As shown below, click on the name of your database from the list of databases on the left. (The name of the database will be the same as the FTP Username you were given at the beginning of the exercise.)

-
Click on the Import tab.

Click the Choose File button (in some browsers it is Browse).
Go to the Downloads folder where the mrp.SQL file was saved.
Double–click mrp.SQL
-
At the bottom of the page, click the Go button. It should import your database. You’ll know it worked if you see a message at the top that says something like: Import has been successfully finished, 396 queries executed.
NOTE: It shouldn’t take more than a few seconds to import the database. In our testing, we found that Safari would sometimes stall during the process. If this happens, we recommend using Chrome instead.
FTP Clients
While there are many great FTP Clients you can use for uploading your website to a remote server, we choose to use Cyberduck in this workbook because it is free and cross-platform. Rest assured: if you choose to use a different FTP client, it will involve the same simple steps we outline in the exercise. If you’re in a Noble Desktop instructor-led class, Cyberduck has already been installed for you.
Uploading Your WordPress Site
Launch Cyberduck.
Click the Open Connection button at the top left of the main window.
Next to Server, enter: noble.local
For Username, enter the username you selected or were assigned.
For Password, enter the password you selected or were assigned.
At the bottom, if More Options aren’t already showing, click the triangle
 next to More Options to reveal them.
For Path, enter: public_html/WordPress/
-
To connect to the server, click Connect. If you get a warning that you have an Unsecured FTP connection, just hit Continue.
NOTE: If Cyberduck cannot make a connection, double-check your username and password as well as making sure there are no extra spaces.
Once connected, you will see the window that lists the files for your site.
TIP: Once connected, you can choose Bookmark > New Bookmark to save all this information for future use.
You are now ready to upload your files. In order to do this, move the Cyberduck window to one side so you’ll be able to see your local file folder next to it.
- Open a Finder (Mac) or Explorer (Windows) window and navigate to:
- Mac: Hard Drive > Applications > MAMP > htdocs > mrp
- Windows: C: > xampp > htdocs > mrp
Arrange this window and the Cyberduck window so they are side-by-side.
Drag the wp-content folder from your computer’s window onto the Cyberduck window. TIP: Be careful not to drop the folder into one of the existing folders. If you get another warning that you have an Unsecured FTP connection, just hit Continue once more.
-
A Transfers window will appear, showing the progress of the upload.
If you get an Overwrite window or a warning about overwriting the pre-existing files and folders, just hit Continue to overwrite those files with your own.
Once it has finished uploading, you can go ahead and close the Transfers window.
Go to the WordPress URL you were given at the start of class. The MRP website should load. Awesome!