Learn how to resize and reframe video clips in Premiere Pro for optimal social media usage, with this detailed tutorial covering a range of topics including changing the aspect ratio and setting pinning options.
This exercise is excerpted from Noble Desktop’s Adobe Premiere Pro training materials and is compatible with Premiere Pro updates through 2023. To learn current skills in Premiere Pro with hands-on training, check out our Premiere Pro Bootcamp, Video Editing Certificate, and video editing classes in-person and live online.
Topics Covered in This Premiere Pro Tutorial:
Resizing Video (Changing the Aspect Ratio), Reframing Video Clips, Setting Pinning Options
Exercise Preview

Exercise Overview
In this exercise you’ll resize a sequence to make it square, a common aspect ratio for social media apps such as Instagram.

Getting Started
- If a project is open in Premiere Pro, go to File > Save, then File > Close Project.
- In Premiere Pro, go to File > Open Project and navigate to Desktop > Class Files > Premiere Pro Class > The Interview.
- Double–click on The Interview—Done.prproj.
- Go to File > Save As. Name the file Your Name—The Interview version 2.prproj and save it to Desktop > Class Files > Premiere Pro Class > The Interview.
Duplicating & Resizing a Sequence
In video editing applications the rule of thumb has long been to work at the native settings of our video. This is why it is a common practice to create new sequences based on the settings of the video you’re going to edit. This is a very common workflow, however issues arise when we have to export our video at different aspect ratios. Now it’s time to convert this sequence so we can export it in a square format.
In the Project panel, CTRL–click (Mac) or Right–click (Windows) on the Interview—Dan Rodney sequence and choose Duplicate.
CTRL–click (Mac) or Right–click (Windows) on the duplicate sequence Interview—Dan Rodney Copy 01 and choose Rename.
Change the name of this sequence to Interview—Dan Rodney—Square and click on any empty area of the Project panel to finalize the name change.
-
Double–click on the icon for the Interview—Dan Rodney—Square to open the sequence in the Timeline panel.
NOTE: You can have any number of sequences open at the same time. They display like different tabbed windows in a web browser.
- Move the Timeline playhead to 03:15
-
Click on the title graphic on the Video 2 track.
If we just resize the sequence right now, the title will resize badly. To prevent this we will set the pinning behavior of the graphic’s layers.
Choose Window > Workspaces > Captions Graphics.
At the top of the Essential Graphics panel, select the Edit tab if it’s not already on it.
-
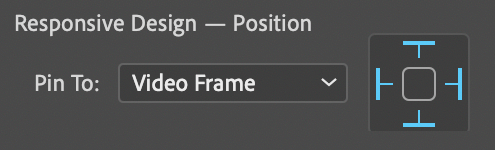
At the top of the Essential Graphics panel, click on the background layer to select it.
- Make sure the Pin To menu is set to Video Frame.
- Click on all 4 pins in the edge selection icon:
-
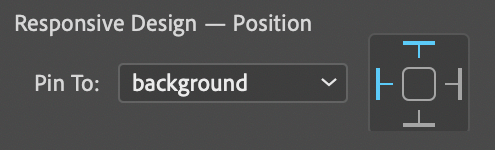
At the top of the Essential Graphics panel, click on the Dan Rodney layer to select it.
- Set this layer’s Pin To menu to background.
- Click on the top and left pins on the edge selection icon:
-
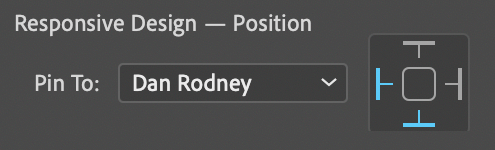
At the top of the Essential Graphics panel, click on the Designer and Instructor layer to select it.
- Set this layer’s Pin To menu to Dan Rodney.
- Click on the bottom and left pins on the edge selection icon:
- In the Timeline, click on the Interview—Dan Rodney—Square sequence to make it active.
- Choose Sequence > Sequence Settings.
-
In the Video section, change Frame Size: horizontal from 1920 to 1080.
This will give you a video that is now 1080 X 1080 (an aspect ratio of 1:1).
-
Click OK to resize the sequence.
If you get a message about preview files, click OK.
The automatic resizing that was done to the title is a little extreme, so let’s adjust it.
At the top of the Essential Graphics panel, click on the Dan Rodney layer to select it.
Below in the Align and Transform section, change Scale
 to 80.
At the top of the Essential Graphics panel, Designer and Instructor layer to select it.
-
Below in the Align and Transform section set:
-
Scale to 80
-
Position
 set the second value to 45 (this is vertical position)
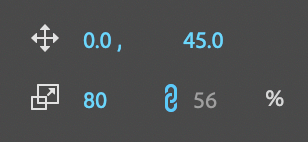
-
Scale
Choose Window > Workspaces > Editing.
Choose File > Save or hit Cmd–S (Mac) or CTRL–S (Windows).
Reframing Video Clips
Resizing the sequence creates a problem with the framing of some of the video clips, especially the main interview. Video that is staged and framed to work well in landscape mode, often doesn’t look as good in a square frame. You could manually move each clip around to adjust the framing, and sometimes you will have to do it, but there is an effect made to automatically fix problems like this.
In the Tools panel, click on the Track Select Forward tool
 .
.-
Hold down Shift and click on the first interview clip on the Video 1 track, this selects all the clips that track.
NOTE: If you do not hold down Shift when using the Track Select Forward or Track Select Backward tools, they will select clips on all unlocked tracks.
- Open the Effects panel (Window > Effects).
- In the Effects panel’s search field type auto reframe
-
Double–click on the Auto Reframe effect to apply it to all of the highlighted clips.
A status bar will appear at the bottom right of the Timeline as the effect is processing. Because of the nature of this effect and the number of clips it has to apply to, it may take Premiere Pro some time to complete this operation.
NOTE: We tried Auto Reframe on the B–Roll clips but it didn’t work very well, so next we’ll manually adjust them.
Once Auto Reframe has finished, play though some of the speaker clips to see how it worked. Pretty good.
Choose the Selection tool
 .
.-
Move the Timeline playhead to 58:00 and:
- Select the Photoshop Demo clip.
- Open the Effect Controls panel (at the top left, next to the Source panel’s tab).
- Change the first value of Position to 120
-
Move the playhead to 46:05 and:
Select the Dan with Software image (you animated this in a previous exercise).
- In the Effect Controls panel, move the playhead in the mini–timeline to the beginning of the clip.
Change the first value of Position to 55.
To the right of Position, click the Go to Next Keyframe button
 to move the playhead to the next keyframe.
Change the first value of Position to 1820
-
Play the video to see what you’ve done so far.
There is more we could do, but it’s more of the same kinds of changes. So you don’t have to continue of you feel like you understand the process.
Optional Bonus: More Practice
If you want more practice making adjustments, here are some you can do.
-
Move the playhead to 01:10:00 and:
- Select the Illustrator Demo clip.
- In the Effect Controls panel, change the first value of Position to 960
-
Move the playhead to 01:15:00 and:
- Select the InDesign Demo clip.
- In the Effect Controls panel, change the first value of Position to 960.
-
Move the playhead to 01:20:00 and:
- Select the Premiere Pro Demo clip.
- In the Effect Controls panel, change the first value of Position to 400.
Feel free to look over the video and make any other adjust as you see fit.
Choose File > Save or hit Cmd–S (Mac) or CTRL–S (Windows). This sequence is now ready for export.