Discover the steps to transform a panel into a docked toolbar and simultaneously view a document in multiple views, enhancing your productivity and workspace management.
This exercise is excerpted from past InCopy training materials and is compatible with InCopy updates through 2021. To learn current skills in Adobe Creative Cloud and graphic design, check out our graphic design classes in NYC and live online.
Creating Toolbars & Multiple Document Windows
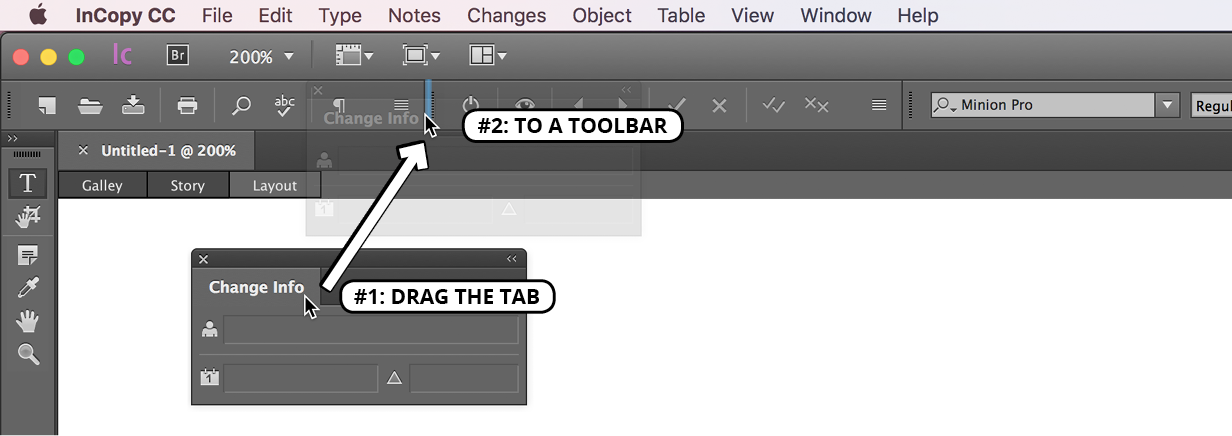
Turning a Panel into a Docked Toolbar
While toolbars sometimes display fewer options than a panel, they do save screen space. You can turn a panel (floating or docked on the side of the side) into a toolbar by dragging the name tab of a panel onto the toolbar at the top or bottom of the screen. Not all panels can become toolbars.

Simultaneously Seeing a Document in Multiple Views
Make sure a file is open.
In the Application Bar at the top of the screen, click the Arrange Documents button
 and choose New Window (or choose Window > Arrange > New Window).
-
As shown below, click the Arrange Documents button
and click Tile All in Grid. This puts the windows next to one another.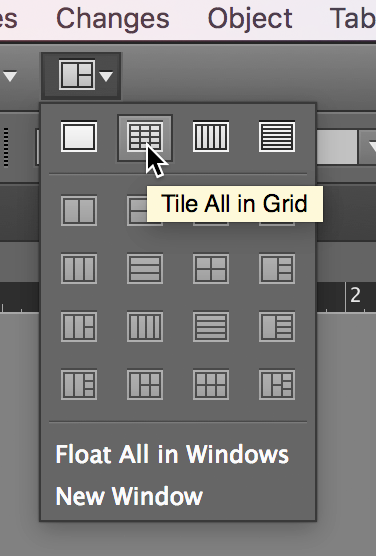
In one of the windows, choose your preferred view (for example Layout view).
In the other window, choose a different view (such as Story view).
A change made in one window will also be displayed in the other window.
