Understand how to convert embedded CSS using an inlining tool, how to test your HTML Email in various clients, and how to fix common issues that arise in Outlook.com, Gmail, Yahoo! Mail, Apple's iOS Mail and Outlook 2007/2010.
This exercise is excerpted from Noble Desktop’s HTML Email training materials and is compatible with updates through 2021. To continue learning HTML Email with hands-on training, check out our coding bootcamps in NYC and live online.
Topics Covered in This HTML Email Tutorial:
Using an Inlining Tool to Convert Embedded CSS, Testing in Various Email Clients, Fixes for Outlook.com, Gmail, Yahoo! Mail, Apple’s IOS Mail, & Outlook 2007/2010
Exercise Preview
Exercise Overview
Inline CSS is recommended for HTML email because it’s supported across all email clients. As we saw in the first exercise, however, it can be quite tedious to write. We sped up the coding process by writing embedded CSS in the Jive Factory newsletter but these styles will not work across all email clients. Fortunately there are automated solutions for converting embedded CSS to inline styles.

Most email marketing services such as Mailchimp or Campaign Monitor, provide inlining tools that you can use before sending out your campaigns. For this particular newsletter, we’ll use Zurb’s (Foundation for Email) Inliner. An inliner is a script that will convert CSS from embedded to inline, which is a must for sending to clients such as Gmail. It is an incredible time saver and is completely free.
Once the CSS has been inlined, we’ll show you a quick and efficient way to send a test email to look out for errors and inconsistencies across popular mail clients.
Converting to Inline Styles
Let’s use Zurb’s inliner to create the final code we will use for the email. You’ll be using a new folder of provided files for this exercise (Jive Factory Ready for Testing). It contains the same Jive Factory email you’ve been working on in previous exercises.
- Close any files you have open in your code editor to avoid confusion.
- In your code editor, open events-issue21-summer.html from the Jive Factory Ready for Testing folder. Be sure to go into the right folder!
- In events-issue21-summer.html, select all the code by pressing Cmd–A (Mac) or CTRL–A (Windows).
- Copy it (Cmd–C (Mac) or CTRL–C (Windows)).
- Open Chrome and go to get.foundation/emails/inliner.html
- Paste the code into the field under HTML (Cmd–V (Mac) or CTRL–V (Windows)).
- Scroll down and uncheck Compress HTML (next to the Inline! button).
- Click the Inline! button.
- At the top right of the Final Email HTML field click the Copy to Clipboard button.
- Switch back to your code editor.
- Create a new file. (In most code editors, go to File > New File.)
- Paste the new code into the file.
-
Save the file as inlined-events-issue21-summer.html. Make sure to save it into Jive Factory Ready for Testing folder.
You’re now ready to send out a test email.
Sending a Test Email with Litmus PutsMail
PutsMail is an easy to use online tool for sending out test HTML emails. It’s run by Litmus, an industry-leader in email previews, analytics, and spam filter testing.
- With inlined-events-issue21-summer.html still open, select all the code in the document (Cmd–A (Mac) or CTRL–A (Windows)).
- Copy it (Cmd–C (Mac) or CTRL–C (Windows)).
- In Chrome, keep the Zurb Inliner page open and create a new tab.
- Go to putsmail.com
- Click Create a New Test Email.
- You’ll need to sign up for a free account (or you can sign in with an existing Litmus.com account).
- Once you’ve signed in, you should be on the New Email Test page. If you’re not there, go back to putsmail.com and click Create a New Test Email.
- In the Recipients field, type your Outlook.com (Hotmail), Yahoo Mail, and Gmail addresses.
- Click Add to save these addresses.
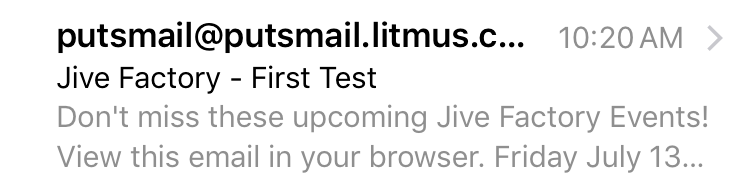
- In the Subject Line field, type Jive Factory—First Test
- Click in the Body (HTML) field and paste the code into the field (Cmd–V (Mac) or CTRL–V (Windows)).
-
If there’s I’m not a robot reCAPTCHA, check it and do whatever it requests.
NOTE: Do not check the box that moves the CSS inline. We have already done our inlining using Zurb’s tool.
Click Send Email to send out a test.
Opting in to Accept PutsMail Email Drafts
For your security, you will have to opt in to accept email drafts from PutsMail.
- In your web browser, check all three email accounts. You will get a message from putsmail@putsmail.litmus.com with the subject Would you like to receive email drafts?
- Click the link that says Yes, I’m happy to accept email drafts. You will be taken to the PutsMail website to confirm that you have opted in. You’ll have to opt in for all three accounts, after which they’ll send out the test messages.
Previewing Tests & Addressing Some Common Issues
-
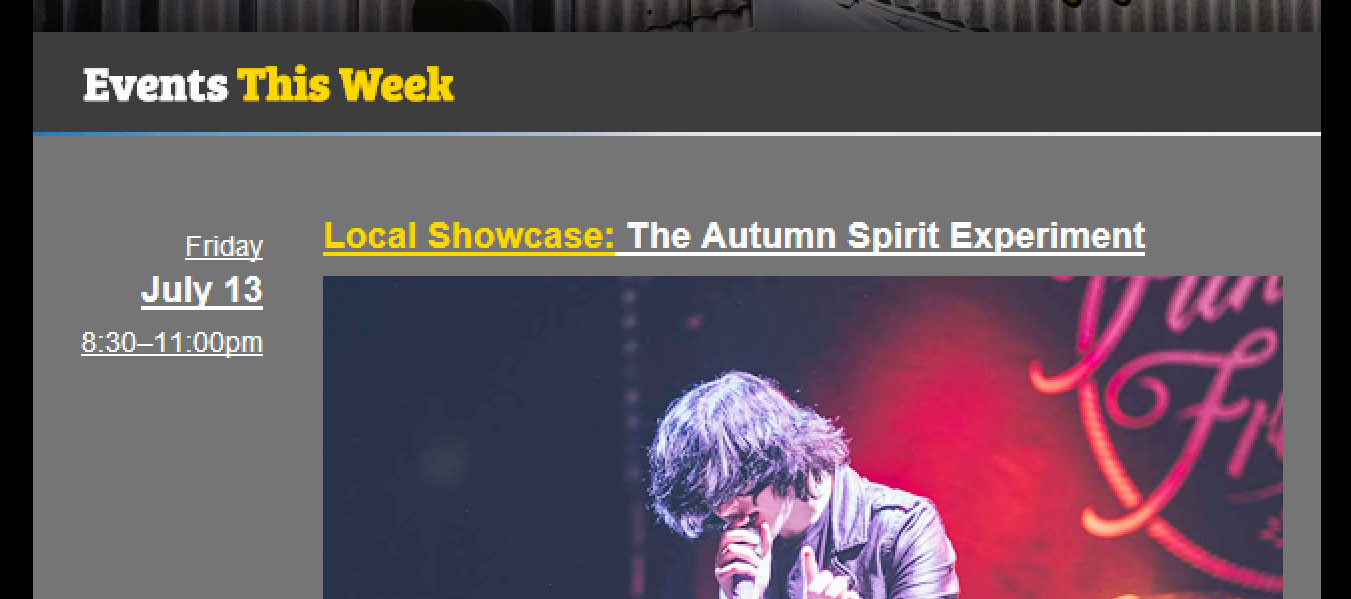
Check all three email accounts to see how the Jive Factory test email looks in each email client.
If the images do not load by default, be sure to admire the styled ALT text (if the email client displays it).
If you are using Gmail, you may have to look in the Promotions or Updates tab to find the newsletter.
More About Gmail’s Promotions Tab
It’s nearly impossible to trick Gmail’s algorithm to move an email out of the Promotions tab and into the Primary tab. Some industry professionals suggest that you use merge tags to include the recipient’s name and strip down your message to text only and a single link call-to-action. Mailchimp has extensively tested this theory, though, and it doesn’t always pan out. Even reaching your subscribers and having them move your messages to the Primary tab seems to work only part of the time.
- Check out the newsletter in Yahoo Mail.
-
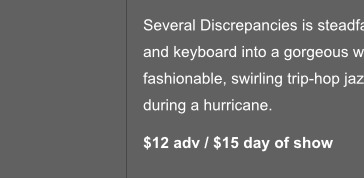
Take a moment to admire the catchy preheader in your Yahoo or Gmail inbox. If it’s possible for you to preview the email on a mobile device, you can see the preheader there as well:
-
If possible, preview the email in Outlook 2007 or Outlook 2010. You may still see that links are underlined (even though we didn’t want them to be). Additionally, it’s a subtle issue, but if you look closely, there may be extra space between tables:

-
If possible, preview the email in Apple’s Mail app on an iOS device such as an iPhone or iPad.
Let’s return to our newsletter’s code and start fixing some of the issues we saw.
Fixing the Table Spacing in Outlook 2007/2010
Let’s fix the extra space between tables in Outlook 2007/2010. The space is there because Outlook 2007/2010 renders space for table borders even when you set borders to a zero width. Additionally, the CSS border-collapse property’s default value is separate by default. This causes an unsightly gap. Let’s collapse the borders.
- Return to your code editor. You should have two files open: events-issue21- summer.html and inlined-events-issue21-summer.html.
- We are going to edit the original newsletter with the embedded styles: events- issue21-summer.html. Return to the code in this file, taking time to double-check that you are in the right file.
-
Below the rule for anchor tags, add the following new rule to the CSS, like so:
a { color: #ffffff!important; text-decoration: none!important; } table { border-collapse: collapse; } -
This should do the trick! Save the file.
NOTE: Outlook can also sometimes add a bit of spacing on the left and right side of a table. This will typically break the layout if you are trying to position tables side-by-side. Although this is not an issue for us in this newsletter, should you ever encounter this issue, there is a fix: set the vendor-specific (Microsoft Office only) mso-table-lspace and mso-table-rspace CSS properties to a zero value.
Inlining the Email Again
In order to effectively resolve the remaining issues we’ve encountered, we’ll need to embed styles to the final, inlined file.
- Let’s run the inliner one more time before we send out a second test. Select All the code in the file.
- Copy it.
- Switch back to Chrome.
- Switch to the Zurb Inliner tab (or go to get.foundation/emails/inliner.html if you closed it).
- If there’s anything in the HTML field, select it all and delete it.
- Paste the code into the field under HTML (Cmd–V (Mac) or CTRL–V (Windows)).
- Scroll down and uncheck Compress HTML (next to the Inline! button).
- Click the Inline! button.
- At the top right of the Final Email HTML field click the Copy to Clipboard button.
- Return to your code editor.
- Switch to (or open) inlined-events-issue21-summer.html. Take a moment to double-check that you are in the right file (for the inlined code).
- Select all the code (Cmd–A (Mac) or CTRL–A (Windows)).
- Paste (Cmd–V (Mac) or CTRL–V (Windows)) the new inlined code over the old.
- Save the file.
Resolving Some Final Issues with Embedded CSS
Outlook 2010 is underlining our links, which we don’t want. Also, some email clients may add links to your emails (for phone numbers, addresses, dates, etc.). So it’s a good practice to add a link style to try to ensure your links match your design. The link style(s) must be in the head tag of the final, inlined file to help ensure they work.
-
At the top of inlined-events-issue21-summer.html, add a style tag:
<title>Summer Events at The Jive Factory</title> <style> </style> </head> -
Write the following new rule in the style tag:
a { color: #ffffff!important; text-decoration: none!important; } - This looks just like the code we added in the earlier Adding & Styling Links exercise! When we inlined these rules, they were only applied to existing anchor tags. But we need to target links that an email client adds to the email after it’s opened.
Save the file.
Optional: Retesting
We’re ready to send a second test email.
- With inlined-events-issue21-summer.html still open, select all the code (Cmd–A (Mac) or CTRL–A (Windows)).
- Copy it (Cmd–C (Mac) or CTRL–C (Windows)).
- In Chrome switch back to the PutsMail tab, or go to putsmail.com
- At the top of the page click New Test.
- You should still see your email addresses listed below the Recipients field. If not, enter your Outlook.com (Hotmail), Yahoo Mail, and Gmail addresses and click Add to save these addresses.
- In the Subject Line field, type: Jive Factory—Second Test
- Click in the Body (HTML) field and paste the code into the field (Cmd–V (Mac) or CTRL–V (Windows)).
- Click Send Email to send out a test.
- In your web browser, check all three email accounts again to see that the email looks good.
- If you can check the email in Outlook 2010, you’d see that the links are no longer underlined.
- The email should look great in all email clients. At this point it should be safe to send out to the masses. Congratulations on a job well done! You may return to your code editor and close all the files.
NOTE: In iOS Mail you may also notice a hairline border between the two columns in the event tables. This is a known issue. Hairline borders appear when a background color or image is applied to individual table cells or table rows. Sometimes the border is barely visible and actually disappears and reappears at different zoom levels.
If these hairline borders are noticeable enough to negatively affect your design or layout, nesting the problematic table in a new table featuring a background color that matches that of the inner table is a clunky, but viable solution to this issue. We feel that the border looks perfectly serviceable for this particular email, so we’ll leave the layout as is.