Dive into this comprehensive tutorial to learn about HTML email essentials, including converting local image paths to absolute URLs, adding and styling ALT text, and incorporating a preheader message for effective marketing emails.
This exercise is excerpted from Noble Desktop’s HTML Email training materials and is compatible with updates through 2021. To continue learning HTML Email with hands-on training, check out our coding bootcamps in NYC and live online.
Topics Covered in This HTML Email Tutorial:
Converting Local Image Paths to Absolute URLs, Adding ALT Text, Styling ALT Text, Adding a Preheader Message
Exercise Preview
Exercise Overview
Before you send out an HTML email campaign to begin testing your code, there are some “preflight” steps you must take to make sure the email will perform as expected, both technically and from a marketing perspective. This exercise will walk you through these final tasks: making certain all image links are absolute URLs, double-checking that all images contain ALT text, styling the ALT text for maximum impact, and adding an appropriate preheader.

- We’ll be using a new folder of provided files for this exercise. It contains the same Jive Factory email you’ve been working on in previous exercises. Close any files you may have open in your code editor to avoid confusion.
- In your code editor, open events-issue21-summer.html from the Jive Factory Ready for Preflight folder. Be sure to go into the right folder!
Changing to Absolute Image URLs
Right now, all image paths use relative links to local files. HTML emails require absolute paths to URLs (webpages) and images that are stored on a server. We’ve already uploaded all the images to our remote web server, so we need to update the image paths. The easiest way to fix this is to do a Find and Replace.
-
Open the Find and Replace feature (your menu options may be named differently depending on your code editor):
- In Visual Studio Code: go to Edit > Replace.
- For other code editors: try Cmd–F (Mac) or CTRL–F (Windows).
-
We’ll start with the images. Enter the following (the Find and Replace labels may be named differently in your code editor):
Find: images/Replace: http://thejivefactory.com/nl/images/NOTE: To be organized, on our website we have all files for emails in an nl folder (nl stands for newsletter) so they don’t get mixed with the website files. This is not required, but we recommend keeping them separate.
- Proceed to Replace All, and a total of 7 replacements should be made.
-
Save the file and preview the newsletter in a browser to check the images.
If the images do not show up, it’s most likely due to a typo. Return to your code editor, go to Edit > Undo and try the Find and Replace again, double-checking the spelling.
Adding ALT Text
On standard webpages, the ALT attribute is used within all img tags to make content more accessible for visually impaired users or users who have images turned off altogether. The attribute is often called ALT text because it provides alternative text-based content.
Many email clients block images by default, so ALT text is important for getting your message across. In the following steps, you will learn not only how to add ALT text, but learn about the importance of styling ALT text to create a more eye-catching email and improve your open and click-through rates.
Not all images need ALT text—usually just the ones that have words in the graphics or provide useful information to the users. Let’s add ALT text to the main banner image as well as the two section images for this and next week’s events.
Return to your code editor.
-
Find the banner image (around line 61) and add the following ALT attribute:
<img src="http://thejivefactory.com/nl/images/banner.jpg" height="224" width="644" ALT="The Jive Factory Event Calendar"> -
Find the events-this-week image (around line 69) and add the bold ALT attribute:
<img src="http://thejivefactory.com/nl/images/events-this-week.jpg" height="52" width="644" ALT="Events This Week"> -
Find the events-next-week image (around line 135) and add the bold ALT attribute:
<img src="http://thejivefactory.com/nl/images/events-next-week.jpg" height="52" width="644" ALT="Events Next Week"> - Save the file.
- To take see the ALT text, we have to disable images. We can do that Chrome’s settings. Keep this page open, and create a new tab in Chrome.
- At the top right of Chrome’s window click the Settings button
 and from the menu choose Settings.
 - At the top, in the Search Settings field type in image
- Click on Site Settings.
- Click on Images.
- Click the toggle button to the right of Show all (recommended).
- Keep this tab open, but switch back to the tab for your email.
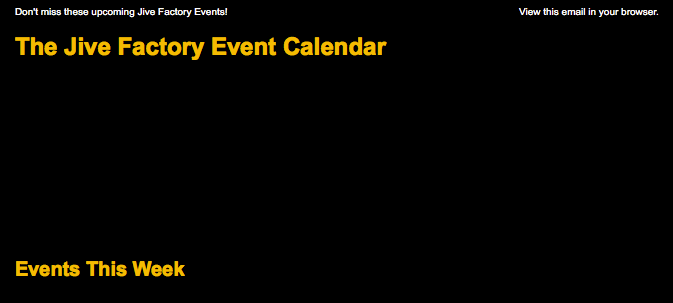
Reload the page, and you should now be able to see the banner ALT text The Jive Factory Event Calendar. You can’t see the ALT text for either of the event sectioning images because they are not paragraphs or links and the default text is black. Let’s add some CSS that changes the text color, etc. to fix this.
Styling ALT Text
We can style ALT text to make it more impactful. We’ll start with the logo.
- Return to your code editor.
-
Above the rule for .event td, add the following new rule:
.logo { font-family: Arial, Helvetica, sans-serif; font-weight: bold; font-size: 24px; color: #fcb802; }.event td { padding: 20px 15px 10px; } -
Around line 67, add the logo class to the banner img as shown in bold:
<img class="logo" src="http://thejivefactory.com/nl/images/banner.jpg" height="224" width="644" ALT="The Jive Factory Event Calendar"> - Save the file.
- Return to Chrome and reload the page.
- The images should still be disabled, but now you should now see the now formatted banner ALT text. Much improved! Let’s do something similar with the events-this-week and events-next-week images.
- Return to your code editor.
-
Copy the rule for .logo and paste it below the first:
.logo { font-family: Arial, Helvetica, sans-serif; font-weight: bold; font-size: 24px; color: #fcb802; }.logo { font-family: Arial, Helvetica, sans-serif; font-weight: bold; font-size: 24px; color: #fcb802; } -
Edit the second rule for .logo as follows (changes are in bold):
.logo { font-family: Arial, Helvetica, sans-serif; font-weight: bold; font-size: 24px; color: #fcb802; } .section-img { font-family: Arial, Helvetica, sans-serif; font-weight: bold; font-size: 20px; color: #fcb802; } -
Let’s add the .section-img class to both section images. First, around line 81, add the following bold code to the
<img>tag:<img class="section-img" src="http://thejivefactory.com/nl/images/events-this-week.jpg" height="52" width="644" ALT="Events This Week"> -
Find the second section image around line 147 and add the following bold code:
<img class="section-img" src="http://thejivefactory.com/nl/images/events-next-week.jpg" height="52" width="644" ALT="Events Next Week"> - Save the file.
-
Return to Chrome and reload the page to see all the styled ALT text. The email now looks much more inviting and informative even without the images.
NOTE: Keep in mind that support for styled ALT text varies across email clients. Styled ALT text is more evenly supported across webmail clients (like Gmail and Yahoo Mail, for instance) than desktop clients (like various versions of Outlook).
- We’re finished testing the ALT text so we might as well enable images once again. Switch back to the Settings tab that should still be open in Chrome.
- Click the toggle button to the right of Do not show any images.
- Switch back to the tab with your email.
Reload the page and you should be able to see the banner and section images.
Adding a Preheader & a “View This Email Online” Link
For recipients who may have trouble viewing HTML messages, it is a good idea to provide a link to an online version of the email. In the early days of HTML email marketing, this link was the first thing you would place at the top of the page to ensure that everyone could access the content.
We still want to include this very important link but we will do so after a brief preheader message. A preheader is the bit of text that follows the subject line when an email is viewed in the Inbox. It’s a sneak peek about what the email contains before you open the message and it can often improve the open rate far more than an “Email not displayed properly?” message possibly can. Let’s see how.
- Return to your code editor.
-
We’ve prepared the preheader for you in a code snippet. Open content-preheader.html (Jive Factory Ready for Preflight > snippets).
The preheader content is contained inside a new 2-column table. The first column has the preheader message content and the second column has the link to view the newsletter online.
- Select all the content and copy (Cmd–C (Mac) or CTRL–C (Windows)) it.
- Close the file.
- Return to events-issue21-summer.html.
-
We want the preheader to be the first piece of content on the page, inside the large wrapper table that holds the black background, and above the header table. Paste the code snippet around line 69, as follows:
<td align="center" bgcolor="#00,000"> <table class="preheader" width="644" cellpadding="0" cellspacing="0" border="0"> <tr> <td align="left" width="400"> <p>Don't miss these upcoming Jive Factory Events!</p> </td> <td align="right" width="244"> <p><a href="https://thejivefactory.com/nl/events-issue21-summer.html" target="_blank">View this email in your browser.</a></p> </td> </tr> </table> <table width="644" cellpadding="0" cellspacing="0" border="0" align="center"> <tr> <td align="left"> <a href="https://thejivefactory.com/index.html" target="_blank"> <img class="logo" src="http://thejivefactory.com/nl/images/banner.jpg" height="224" width="644" ALT="The Jive Factory Event Calendar"> </a> -
In the styles, above the .footer rule, add the following rule shown in bold:
.preheader p { font-size: 10px; }.footer { -
Save the file and reload the page in Chrome.
The final newsletter will need to be uploaded to the server so email recipients can actually take advantage of this link. Keeping this in mind, let’s get rid of the white margin around the body of the document. The white margin will not be visible in the actual email we will send out but it looks unsightly in the standard web version of the newsletter.
- Return to your code editor.
-
Add the following new rule, above the h1 rule:
<style> body { margin: 0; } h1 { font-family: Arial, Helvetica, sans-serif; - Save the file and reload the page in Chrome. Much better!
We’ve already uploaded a finished version of the newsletter to the server. Go ahead and test the link to the browser version of the newsletter (at the top right).
ALT Text Length in Webkit
Webkit browsers and email clients like Safari, Apple Mail, and Chrome will only display ALT text if it fits within one line, based on the image width. If webkit browser users will be a major part of your audience, you may want to consider shortening the ALT text to one line.
