Improve your HTML skills with this comprehensive tutorial, covering topics such as coding links to open in a new tab, styling links, adding a footer to your webpage, and creating links in event tables.
This exercise is excerpted from Noble Desktop’s HTML Email training materials and is compatible with updates through 2021. To continue learning HTML Email with hands-on training, check out our coding bootcamps in NYC and live online.
Topics Covered in This HTML Email Tutorial:
Coding Links to Open in a New Tab or Window, Styling Links, The!important Rule
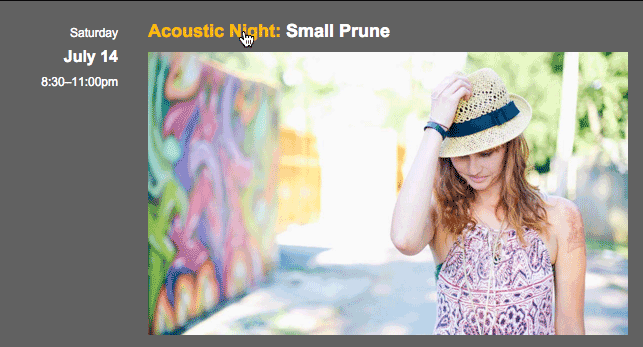
Exercise Preview
Exercise Overview
In this exercise, we will add links to the Jive Factory website so email recipients can click through to get information about the venue and various events. We’ll also style the links using a technique that ensures cross email client support for our desired link styles.

-
We’ll be using a new folder of provided files for this exercise. It contains the same Jive Factory email you’ve been working on in previous exercises, except we’ve added more events.
Close any files you may have open in your code editor to avoid confusion.
In your code editor, open events-issue21-summer.html from the Jive Factory Ready for Links folder. Be sure to go into the right folder!
Adding a Footer
Around line 143, find the
<!—end listing—>for the last event listing.-
Below that comment, add a new table (for the footer) as shown below in bold:
<!—end listing—> <table> <tr> <td></td> </tr> </table> </td> -
Let’s set the table width to be the same 644px width as the rest of the content and strip out the default padding and spacing. Add the following bold attributes to the table tag:
<table width="644" cellpadding="0" cellspacing="0" border="0"> <tr> <td></td> </tr> </table> -
We’ll want this content to be centered in the footer. Add the following attribute to the td tag and open up the tag to make room for content:
<table width="644" cellpadding="0" cellspacing="0" border="0">
   <tr>
      <td align="center">

      </td>
   </tr>
</table>
Save the file.
To save you time, we’ve put the footer’s text into a file for you to copy/paste. From Jive Factory Ready for Links > snippets, open content-footer.html.
Copy all the text inside content-footer.html.
Close content-footer.html.
Switch back to events-issue21-summer.html.
-
Paste the footer text into the empty table cell you added a moment earlier, like so:
<table width="644" cellpadding="0" cellspacing="0" border="0"> <tr> <td align="center"> All content © The Jive Factory. | 580 Lispenard St. New York, NY 10012 | Open All Week 4pm–4am | Unsubscribe </td> </tr> </table>NOTE: A method to unsubscribe from commercial email is required by anti-spam laws. Typically your email marketing service (such as Mailchimp, Campaign Monitor, Constant Contact, etc.) will automatically add a footer (below and outside the main content of the email) with an unsubscribe link and probably some other info. Consult your email marketing service for more info.
-
Now we need to style the content. First, add the following class to the td tag:
<td align="center" class="footer"> All content © The Jive Factory. | 580 Lispenard St. New York, NY 10012 | Open All Week 4pm–4am | Unsubscribe </td> -
Next, scroll up to the CSS toward the top of the document and, at the bottom of the styles (around line 39), add the following new rule:
.footer {
   font-family: Arial, Helvetica, sans-serif;
   font-size: 10px;
   font-weight: bold;
   color: #fcb802;
   padding: 20px;
}
Save the file and preview the page in a browser. Scroll down to see the footer.
Adding Links to Images & Removing a Default Border
Almost all the content in the email, aside from the band biographies, will be links. We don’t want to miss a click opportunity!
-
Let’s start with the banner image. Locate the banner image (around line 55) and wrap it in the following link tag (in bold):
<a href="https://thejivefactory.com">
   <img src="images/banner.jpg" height="224" width="644">
</a>
NOTE: All website and image links must be an absolute URL (not a relative path to another file in your website) to work properly in the finished email. For now it’s easier to work with local images, but we’ll update all the image links (in the next exercise) with a Find and Replace.
-
While we are here, let’s use the target attribute to make this link open in a new browser window or tab when emails are viewed in web-based email clients. Add the following attribute to the anchor tag:
<a href="https://thejivefactory.com" target="_blank"> <img src="images/banner.jpg" height="224" width="644"> </a> - Save the file and preview the page in a browser.
- Click the header image and a new tab should open with the Jive Factory website.
In your code editor, return to the CSS toward the top of the document and find the img rule (around line 20).
-
Some older email clients place an ugly blue border around all images that are linked. In the img rule, add the code shown below in bold:
img {
   display: block;
   border: 0;
}
Save the file.
Creating Links in Event Tables
Let’s create links for an event. There are multiple appropriate pieces of content that an email recipient may want to click: the time and date of each event, the main heading, the band image, and the ticket price.
h1 and p tags are block elements that stack on top of each other, as opposed to span and a tags which inline elements that go next to each other in a line.
Some email services (such as Mailchimp) do not allow block elements (like the p tag) inside inline elements (like the a tag), therefore we must place links inside those elements rather than wrapping them around the outside. This forces us to have multiple links (inside each block element), rather than one link wrapping multiple block elements.
-
We’ll start by adding a link around the date and time content of the first event. Find the td tag around line 72 and wrap its content in an anchor tag, as follows:
<td align="right" valign="top" width="130"> <p> <a href="https://thejivefactory.com/autumn-experiment.html" target="_blank"> Friday<br> <span class="date">July 13</span><br> 8:30–11:00pm </a> </p> </td> -
Wrap the heading with the same link. Starting around line 82, modify the first event, like so:
<td align="left"> <h1> <a href="https://thejivefactory.com/autumn-experiment.html" target="_blank"> <span class="intro">Local Showcase:</span> The Autumn Spirit Experiment </a> </h1> -
Around line 87, wrap the band image with the appropriate link, like so:
</h1> <a href="https://thejivefactory.com/autumn-experiment.html" target="_blank"> <img src="images/autumn-experiment.jpg" height="284" width="480"> </a> <p>The Autumn Spirit Experiment is the avant-gaze-ers' attempt at soaring, shimmering, indie pocket rock. -
Around line 91, wrap the $5 adv / $7-day of show paragraph’s text in a link, as follows:
<p class="tickets"> <a href="https://thejivefactory.com/autumn-experiment.html" target="_blank"> $5 adv / $7-day of show </a> </p> </td> -
Save the file and preview the first event in the newsletter in a browser. Notice that all the linked text is now colored (instead of the white it’s supposed to be) and underlined. This is the default text style for links in all major browsers and most email clients.
We’ll fix the styling in a moment, but for now test the links to make sure they work.
NOTE: We’d need to add links to the other events, but that’s busy work we won’t make you do.
Styling the Links
Let’s change the linked text to white so it’s easier to read. Back in your code editor, scroll up to the CSS toward the top of the document.
-
Add the following new rule below the img rule:
img {
   display: block;
   border: 0;
}
a {
   color: #ffffff;
   text-decoration: none;
}
Save the file and preview the links in a browser.
Return to your code editor.
-
We recommend taking an extra precaution and flagging these with a special property that essentially says “do not override”. Add the following bold code:
a {
   text-decoration: none !important;
   color: #ffffff !important;
}
The !important property must be placed at the end, immediately before the semicolon. This declaration provides a way for us to give a CSS value more weight than it naturally has and (in most cases) override third-party styles that email clients inject into our code.
Save the file.
