Master the workflow of moving 3D layers between After Effects and Cinema 4D in this detailed tutorial which covers AE to C4D export, text export options, extruding text, and the Cineware effect.
This exercise is excerpted from Noble Desktop’s Cinema 4D Lite training materials and is compatible with Cinema 4D updates through 2023. To learn current skills in Cinema 4D with hands-on training, check out our Cinema 4D in After Effects Bootcamp, Motion Graphics Certificate, and video editing classes in-person and live online.
Topics Covered in This Cinema 4D Tutorial:
AE to C4D Export, Text Export Options, Extruding Text, the Cineware Effect
Exercise Preview
Exercise Overview
In this exercise you’ll learn the workflow for moving 3D layers between After Effects and Cinema 4D.

Previewing the Final Video
Let’s see a preview of what you’ll be making. If you’re in After Effects, keep it open but switch to your Desktop.
On the Desktop, navigate to Class Files > C4D in AE Class > AE Text to C4D > Preview Movie and double–click Hard Candy Animation.mp4.
-
Notice the following:
- There are two 3D models in the scene.
- There is an animated light and camera in the scene.
Replay the video if you need to, and close it when done.
Getting Started
In Adobe After Effects, if you have a project open, choose File > Save.
Choose File > Close All Projects.
-
Choose File > Open Project and:
- Navigate to Desktop > Class Files > C4D in AE Class > AE Text to C4D
- Double–click on Hard Candy—Started.aep to open it.
-
Choose File > Save As and:
- Name the file Your Name—Hard Candy
- Save it into Desktop > Class Files > C4D in AE Class > AE Text to C4D.
Exporting to C4D
Cinema 4D Lite files can be created directly in After Effects using the Export command. This allows you to create cameras, lights, 3D layers and animation all in After Effects and then use C4D just to integrate native 3D models and textures. For a lot of new users, this is an easier introduction to C4D since it allows them to leverage their knowledge of AE better.
-
Move the playhead to the beginning of the timeline and press the spacebar on your keyboard to preview it.
- Stop the preview at any time by pressing the spacebar again.
You’lll notice that this project consists of a camera and light animating to reveal the text hard candy. The text is currently flat but would look much better if it was an actual extruded 3D object with a cool texture on it.
-
Choose File > Export > Maxon Cinema 4D Exporter and:
- In the dialog box click the radio button for Extrude Text as Shapes—Highest fidelity export
- Click OK.
NOTE: When you export a After Effects composition to Cinema 4D all of the 3D layers are converted into native C4D objects. The settings of your lights and cameras and footage layers, their position in 3D space and even their animation are all converted and preserved by the export process. The way AE links to files allows us to make changes in C4D and see them when we return to AE.
- Navigate to Desktop > Class Files > C4D in AE Class > AE Text to C4D > Media > C4D
- Change the file name to Hard Candy Text.c4d
- Click Save
-
In the Project panel click on the 03—C4D folder to select it and:
- Press Cmd–I (Mac) or CTRL–I (Windows) or choose File > Import > Import File
- Navigate to Desktop > Class Files > C4D in AE Class > AE to C4D > Media > C4D
- Double–click on Hard Candy Text.c4d
-
Drag Hard Candy Text.c4d into the Timeline and place it below the Spot Light layer.
- It looks pretty bad right now, we’ll fix this once we extrude the text in C4D.
Press Cmd–S (Mac) or CTRL–S (Windows) or choose File > Save
-
With the C4D layer selected press Cmd–E (Mac) or CTRL–E (Windows) or choose Edit > Edit Original.
Note: You’ll have to wait for Cinema 4D to open. If this is your first time opening Cinema 4D you will be prompted to either login with a Maxon account or create one.
If you skipped the section in Exercise 1A where you set Cinema 4D preferences do this now
-
The Timeline is located right below the Perspective viewport. Move the playhead to 02;00 (2 seconds) or later so you can see the hard candy text revealed.
NOTE: If the timeline still displays in frames, CTRL–click (Mac) or Right–click (Windows) on the timeline and choose Options > Use Time Format
-
In the Object Manager (it’s the panel named Objects) click the plus sign
 next to the first item.
Note: The layers in AE have been converted into nested items in C4D. The first item, which is named after your project and comp is a null object that is the parent of all the other items in the project. The items that can be directly converted are visible while others are nested inside of other null objects.
-
Click the plus sign
next to the hard candy object. This reveals all of the shape that made up the hard candy layer in AE.Note: Click on the Hard Candy object in the Object Manager and look in the Attribute Manager located below the Object manager to see that hard candy is a Null object.
-
Click on the h(0) object to select it and notice that the Attribute manager tells you it is an Extrude Object.
Note: In C4D text objects are splines which have no appearance so an Extrude Object is necessary to make them render.
-
Click back on the hard candy null to select it.
The text is extruded but most of it is located below the Floor Comp. We’ll have to move the null up to reveal the 3D text.
Click on the Move tool
 or press E on the keyboard to activate it.
-
Click the Coordinate System button
 to switch from object coordinates to world coordinates
Note: you can also press W on the keyboard to make this change.
-
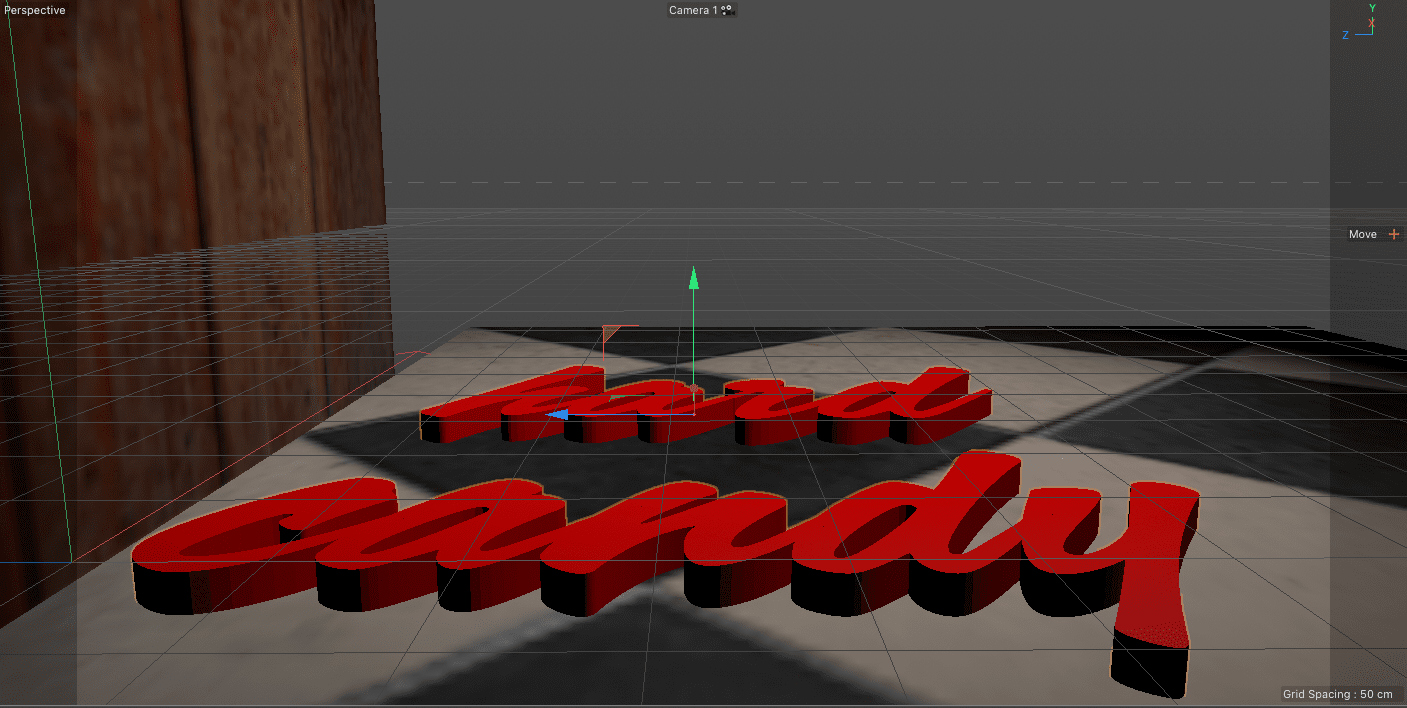
In the Perspective view, hover over the Green arrow gizmo and drag it up until you can see the extruded text.
NOTE: You can enter an exact value Coord. tab of the Attribute Manager, we changed the Y value to -860
Click the minus button
 next to hard candy to collapse it.
-
Click the plus sign
next to the Floor Comp null object to reveal the plane for the floor and:- Click off the green check to the right of the plane to hide it.
-Click the minus button next to Floor Comp null to collapse it.
- Click off the green check to the right of the plane to hide it.
-
Click the plus sign
next to the Wall Comp null object to reveal the plane for the wall and:- Click off the green check to the right of this plane to hide it.
-Click the minus button next to Wall Comp null to collapse it.
- Click off the green check to the right of this plane to hide it.
Press Cmd–S (Mac) or CTRL–S (Windows) or choose File > Save Project.
Return to After Effects. Once in AE you may have to wait for the preview to refresh.
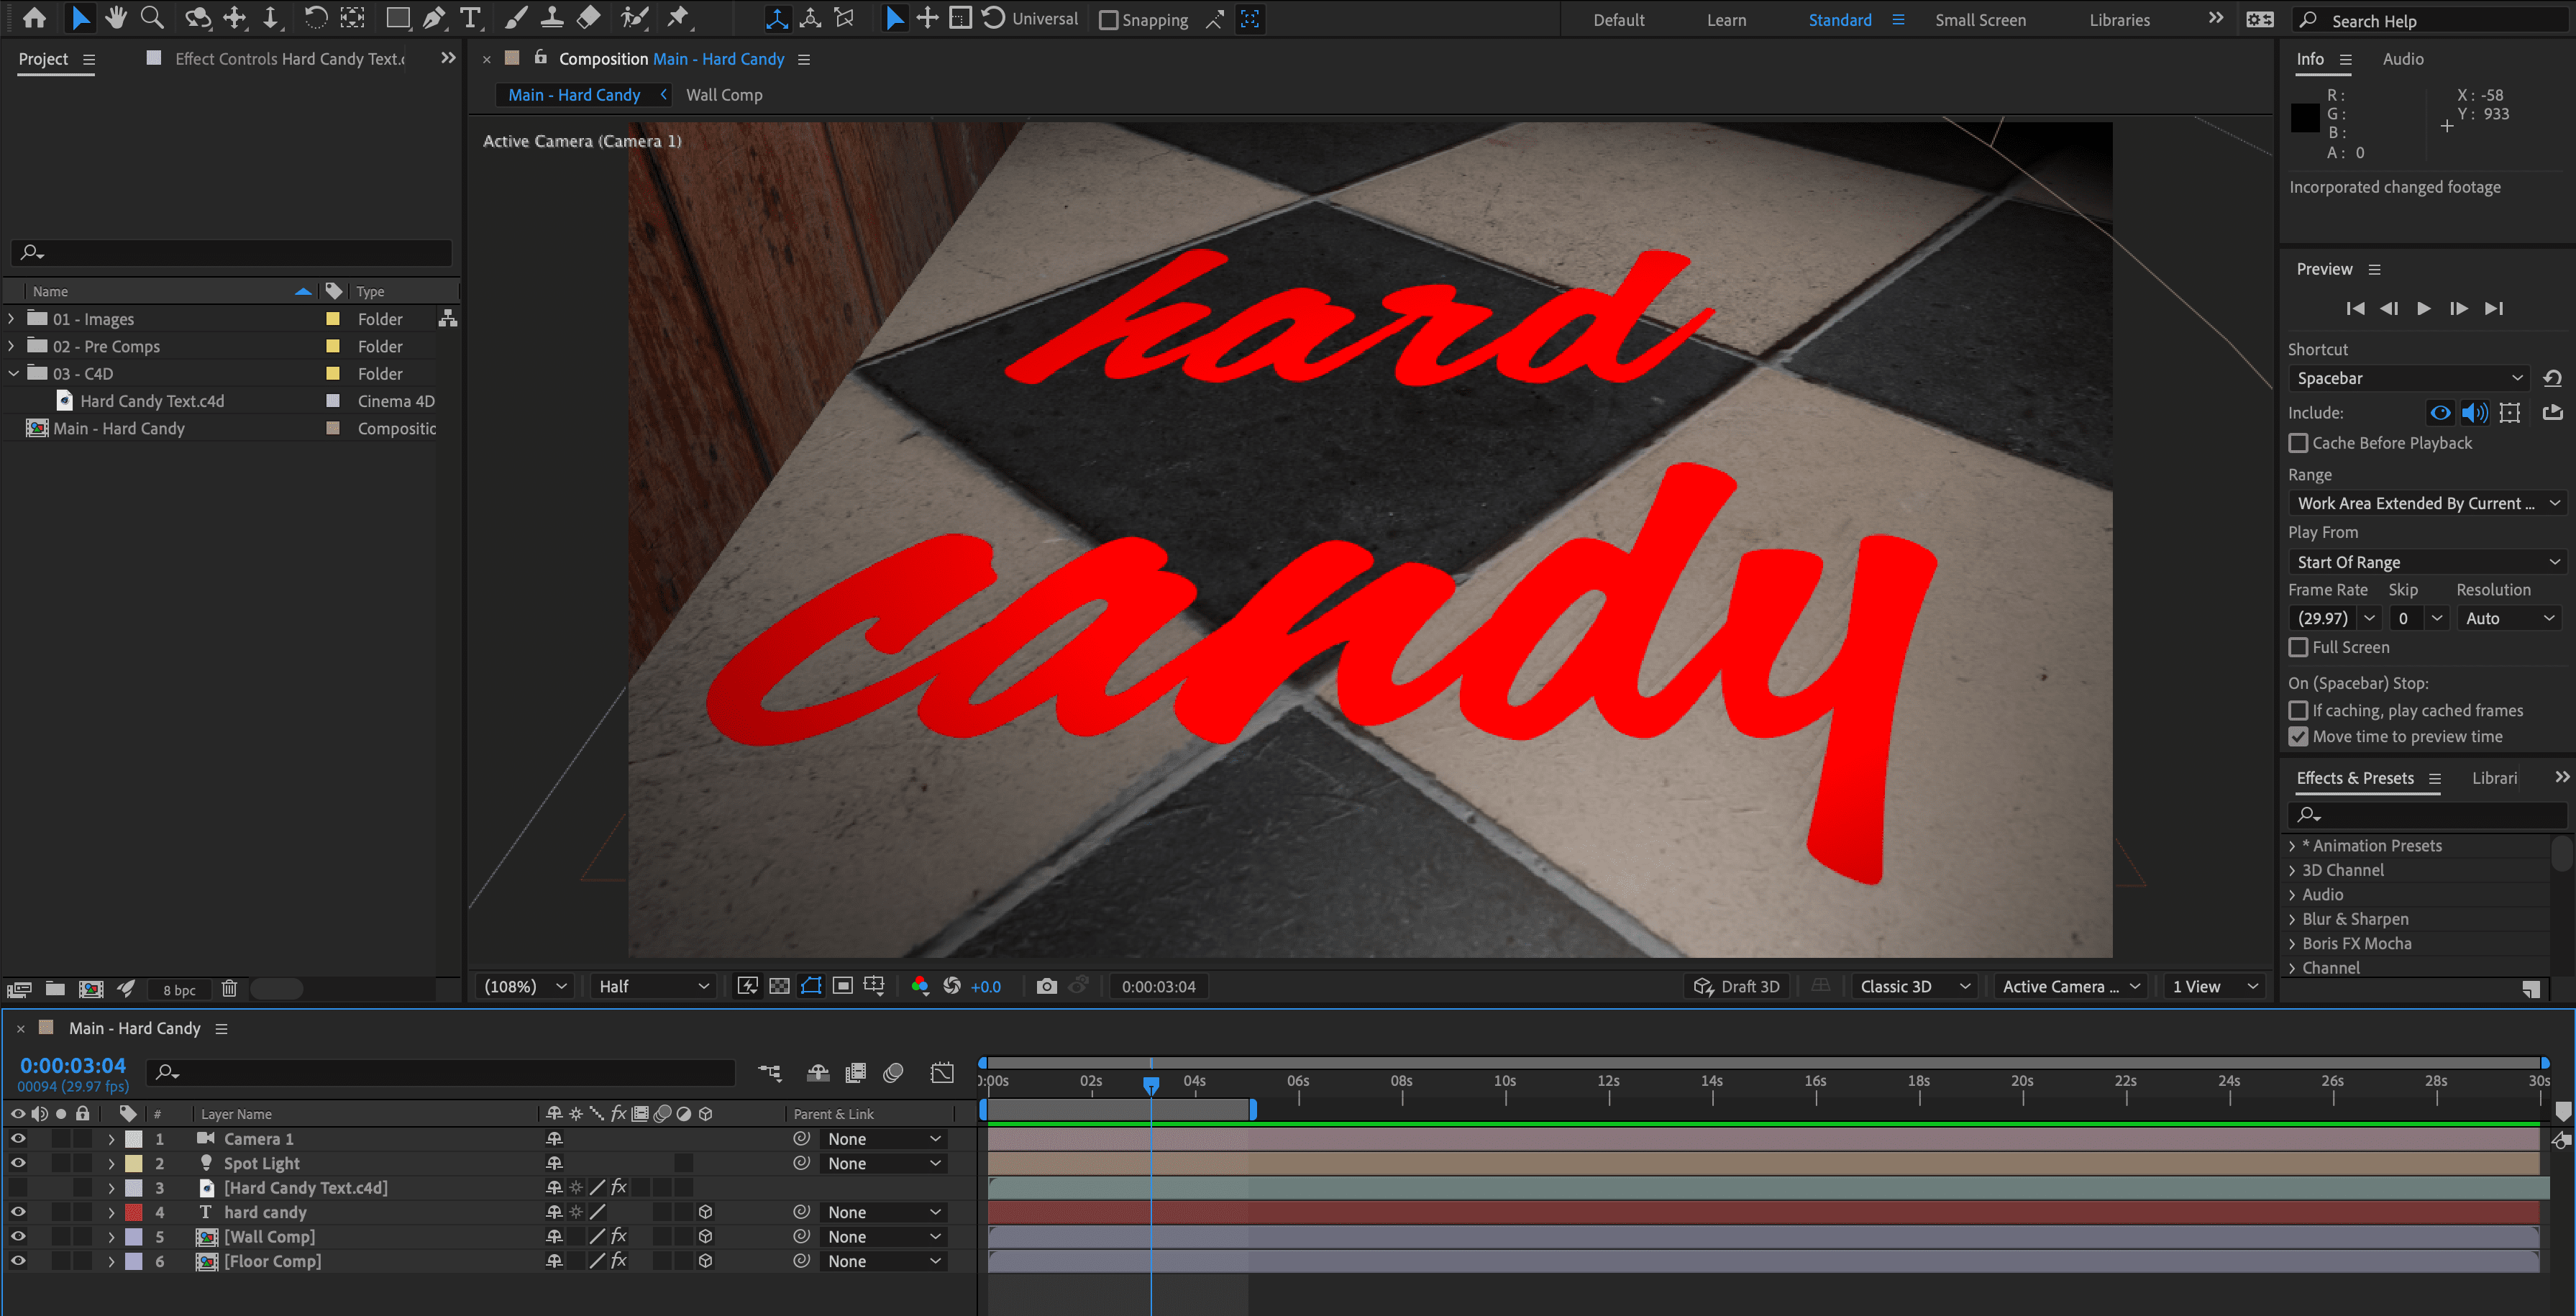
Adjusting the Cineware Effect in After Effects
The Cineware effect was created by Maxon, the makers of Cinema 4D to allow After Effects to import native C4D files. It has many setting to allow you to control how AE renders the C4D file. The default rendering mode preview pretty quickly but does so by giving you a low res look.
Make sure the [Hard Candy Text.c4d] layer is selected and locate the Effect Controls panel.
-
In the Render Settings group locate the Renderer menu and change it to Current (Draft).
This gives us a better preview without the 3D grid and with accurate shading.
NOTE: From lowest quality to highest quality the renderers are: Viewport(Draft), Viewport, Current (Draft), Viewport. In general the higher quality renderers take longer to preview.
In the Timeline, turn off the eye switch
 for the hard candy text layer to hide it.
-
Press spacebar to preview the animation with the 3D text from C4D.
- Press spacebar again at any time to stop the preview.
Press Cmd–S (Mac) or CTRL–S (Windows) or choose File > Save to save your After Effects project.
Adjusting Extrusion Settings in C4D
The default settings that are used when AE exports to C4D aren’t always going to give you the best results. Converting the text to outlines (splines) preserves the layout of the animation but introduces blocky edges into the extruded model.
-
Return to the Hard Candy Text.c4d file in Cinema 4D.
Note: If you closed C4D you can highlight the .c4d layer in After Effects and press Cmd–E (Mac) or CTRL–E (Windows) or choose Edit > Edit Original.
-
Locate the hard candy null object
 in the Object Manager and click on the plus button to expand it.
We’ll clean up the extrusions first since there are a couple of extra objects that were created during the export process.
-
Click on the XXX(10) object to select it.
- Hold down Cmd (Mac) or CTRL (Windows) and click on the (4) object to select it as well.
- Press the Delete (Mac) or Backspace (Windows) key on the keyboard to delete both objects.
-
CTRL–click (Mac) or Right–click (Windows) in the Object Manager and choose Unfold All from the menu that appears.
- Scroll down until you can see all of the Extrusions
 and Splines
  inside of hard candy.
Note: You may need to drag the bottom of the Object Manager panel to make it large enough to see everything.
- Scroll down until you can see all of the Extrusions
-
Double–click on the h(0) Extrude object and rename it hard candy. Click Return (Mac) or Enter (Windows) to finalize the change.
We’re going to consolidate all of the splines into this single extrude modifier.
-
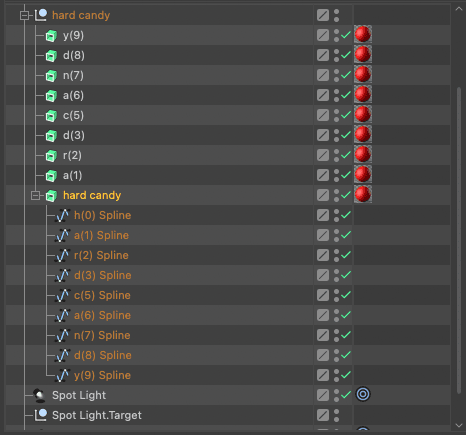
Drag all of the other spline objects into the hard candy extrude object. Arrange them so that h(0) is the first one in the stack and y(9) is the last.
Note: Don’t worry that only the first spline is extruded we’ll fix this in a bit.
-
Click on the y(9) extrude
object, hold Shift and click on the a(1) object to select all of the extrude objects in between:- Press Delete (Mac) or Backspace (Windows) to them all.
-
Click on the hard candy Extrude Object.
- In the Attribute Manager click on the Object tab.
- Click on the Hierarchical switch. This applies the extrusion to all of its children splines.
-
Press Cmd–R (Mac) or CTRL–R (Windows) or press the
 button to render the active viewport.
Notice that the edges of the letters are faceted especially where they are rounded.
Click on the h(0) Spline object hold Shift and click on the y(9) Spline object to select all of the splines that are being extruded.
-
In the Attribute Manager click on the Object tab and change Number to 24
- Press Cmd–R (Mac) or CTRL–R (Windows) to render again. Notice how the edges are now much smoother.
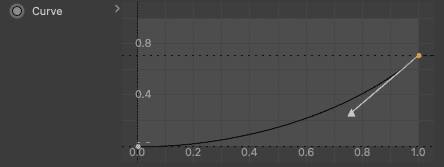
In the Object Manager click on the hard candy spline object and in the Attribute Manager click on the Caps tab.
-
Make the following changes to the cap attributes:
- Set Bevel Shape to Curve
- Set Size to 5 cm
-
In the Curve attributes adjust each anchor point until you have a downward sloping curve.
The back of the text is never seen so it’s bevel settings are irrelevant. There is a settings in the Attributes called Separate Bevel Controls that lets you set different bevels for each cap.
-
Press Cmd–R (Mac) or CTRL–R (Windows) or press the
button to render the active viewport.The text now looks much more interesting.
Press Cmd–S (Mac) or CTRL–S (Windows) or choose File > Save Project.
Return to After Effects and preview the finished animation by pressing Spacebar on your keyboard.
Press Cmd–S (Mac) or CTRL–S (Windows) or choose File > Save to save your After Effects project.