Learn how to import and crop images, round corners, and more in this detailed Adobe XD tutorial.
This exercise is excerpted from Noble Desktop’s past web design training materials and is compatible with Adobe XD updates through 2020. We now teach Figma as the primary tool for web and UX & UI design. To learn current skills in web design, check out our Figma Bootcamp and graphic design classes in NYC and live online.
Topics Covered in This Adobe XD Tutorial:
Importing a Photo As an Image Fill (crop a Photo), Rounding Corners
Exercise Preview

Exercise Overview
In this exercise, you’ll learn how to insert photos and crop them.

Importing a Photo As an Image Fill (Cropping a Photo)
- In Adobe XD, go to File > Open from Your Computer or hit Cmd–Shift–O (Mac) or CTRL–Shift–O (Windows).
- Navigate into Desktop > Class Files > Adobe XD Class > Pulse and double–click on Home Page—Ready for Photos.xd to open it.
- Zoom to 100% by hitting Cmd–1 (Mac) or CTRL–1 (Windows).
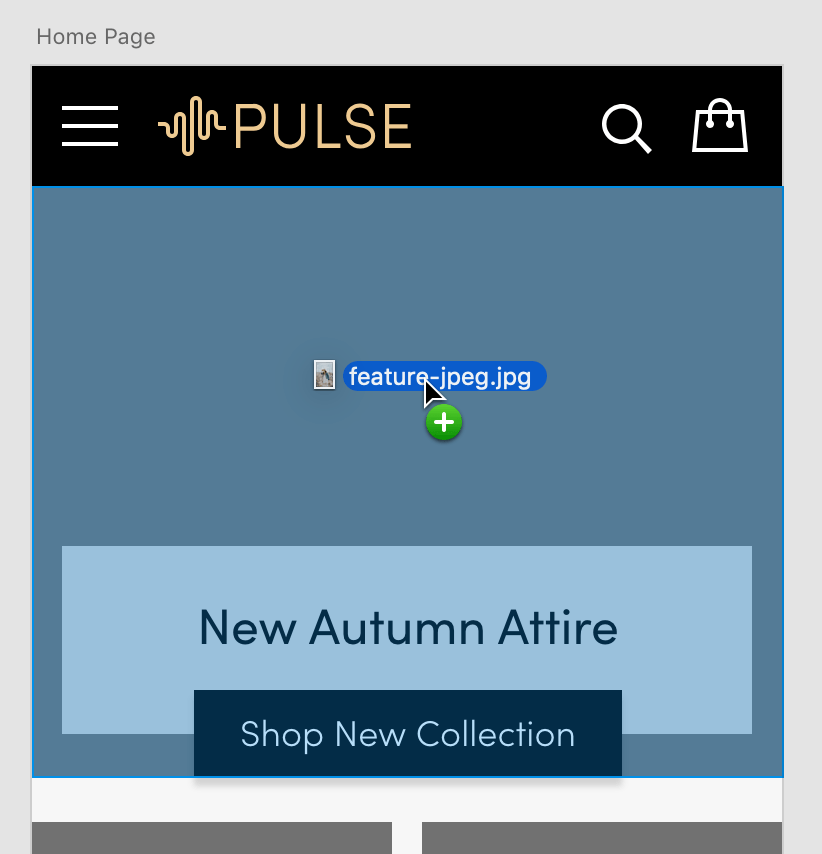
- Notice there are three dark gray rectangles. We want to put photos into these boxes. Make sure you can see the entire top dark gray box (behind New Autumn Attire), because this is where we’ll put the first photo.
- To create an image fill we must drag and drop an image onto the rectangle from the Desktop. Keep the file open and visible in XD, but switch to the Desktop (the Finder on Mac or Windows Explorer on Windows).
- Navigate into Desktop > Class Files > Adobe XD Class > Pulse > Pulse Photos.
- Make sure you can see the Desktop window and the top dark gray box (behind New Autumn Attire) at the same time.
-
As shown below, drag feature-jpeg.jpg onto the top dark gray box (behind New Autumn Attire) and release when the box highlights blue.
- Keep the window open on your Desktop, but switch back to XD.
- Grab any one of the corner resize handles and drag around to see how the image scales to always fill the box.
-
To cancel the resize hit Esc or if you already let go, undo it by hitting Cmd–Z (Mac) or CTRL–Z (Windows).
Image fills act similar to a background image in a webpage that’s set to cover the area. It scales up or down to fill the area, and it’s center aligned (vertically and horizontally) so the edges may be cropped.
-
Let’s make the photo smaller to add some white space around it.
Hold Option (Mac) or ALT (Windows) and drag the left-middle resize handle in slightly until it snaps to the layout grid and the semi-transparent white box behind New Autumn Attire. By holding this keystroke it will pull in both the left and right sides at once!
- We added 15 pixels of space on the left/right. Let’s move it down using keystrokes. With the image selected, press Shift–Down Arrow to move it down 10 pixels.
- Press the Down Arrow 5 more times
- To verify that it’s now 15 pixels away from the navbar, keep the image selected.
- Hold Option (Mac) or ALT (Windows) and hover over the navbar. The distance between the two elements should be displayed in the space between them. Cool!
- Drag up the bottom-middle handle so it snaps to the bottom of the semi-transparent white box behind New Autumn Attire.
- Let’s add a drop shadow to the photo. If the photo is no longer selected, click on it to select it.
- In the Property Inspector check on Shadow.
- Click on the word Shadow to open the color picker.
- To the far right of Hex, set transparency to 50% to make the shadow darker.
- Click on the word Shadow again to close the color picker.
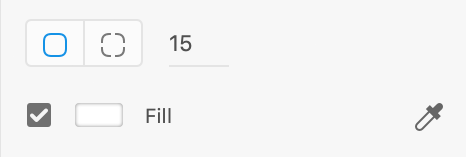
- In the Property Inspector below Shadow, set B (blur) to 15 to soften the shadow.
-
We changed our mind and like the photo better without a shadow. In the Property Inspector uncheck Shadow to turn it off.
NOTE: If we bring the shadow back later it will remember the settings we used.
-
Let’s round the corners of the photo. With the image selected, notice there are dots inside each of the four corners (not the resize handles at the very corner). As shown below, drag any of those dots towards the middle of the photo.

-
All four corners should now be rounded. In the Property Inspector, above Fill is the corner radius amount (as shown below). Let’s change it to a specific value. Set it to 15 and hit Return (Mac) or Enter (Windows) to apply it.
Positioning Photos Within a Shape & Custom Rounded Corners
There are two more dark gray rectangles that we want to fill with photos (for Women and Men). Instead of importing the photos via drag and drop, let’s see a second way.
- Go to File > Import.
- Navigate into Desktop > Class Files > Adobe XD Class > Pulse > Pulse Photos and double–click on woman-side-facing.jpg to import it.
- With the photo still selected, cut it by hitting Cmd–X (Mac) or CTRL–X (Windows).
- Click on the dark gray box (for Women).
- To put the photo into the shape, choose Edit > Paste Appearance.
- The photo should now only be visible within the rectangle. Let’s size and position it better inside. Double–click on the photo to see the entire image.
-
Resize the photo (you do not need to hold Shift) and drag it into position like the example below. (Click off the image to see the final crop.)
- Click in an empty part of the artboard to make sure nothing is selected.
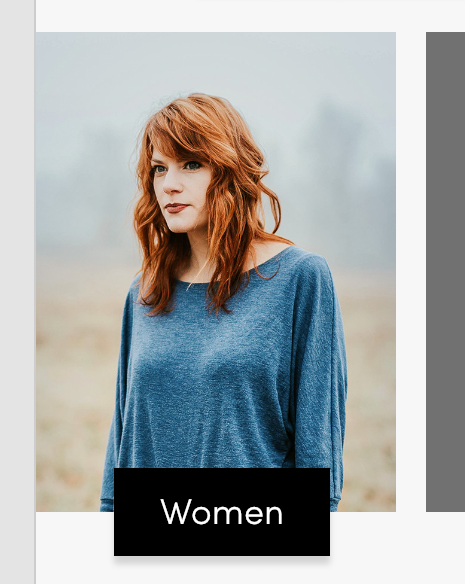
- Let’s round the corners of this photo. Click once on the Women photo to select it.
- In the Property Inspector, above Fill set the Corner Radius to 15 and hit Return (Mac) or Enter (Windows) to apply it.
-
Let’s remove the rounding from the two corners on the left side (while leaving the rounding on the two corners on the right side).
Hold Option (Mac) or ALT (Windows), grab the corner radius dot inside the top-left corner and drag it toward the corner until it’s no longer rounded.
- Repeat the process for the bottom-left corner. Hold Option (Mac) or ALT (Windows), grab the corner radius dot inside the bottom-left corner and drag it toward the corner until it’s no longer rounded.
- Click in an empty part of the artboard to see the final result. Cool!
Save the file.
Masking Vs. Image Fills
There are two ways to crop photos: as an image fill (as you just learned about) and as a photo with a mask. Image fills were more limited in earlier versions of XD so we often preferred using masks instead, but Adobe improved image files and we now prefer them.
If you want to create a photo with a mask, import a photo by itself (don’t put it into a shape) and a draw a shape that you want use as a mask. Select both the photo and mask shape and choose Object > Mask with Shape.
Updating Photos
Now that we see this photo in our layout, we don’t like how both women are looking to the left. Let’s swap out the bottom photo with a different photo.
- Select the bottom photo (for Women).
- CTRL–click (Mac) or Right–click (Windows) on the Women photo and choose Replace Image.
- Navigate into Desktop > Class Files > Adobe XD Class > Pulse > Pulse Photos and double–click on woman-front-view.jpg to choose it.
- If needed, adjust the size and position of the new photo (double–click on the photo so you can adjust the photo’s size/position).
-
When done, click on an empty part of the artboard to deselect
TIP: You can also update a photo by dragging and dropping a new photo from your Desktop onto the photo in XD.
Optional Bonus: More Practice
- There’s one more photo to import and crop (for Men). Click on an empty part of the artboard to make sure nothing is selected.
- Go to File > Import.
- Navigate into Desktop > Class Files > Adobe XD Class > Pulse > Pulse Photos and double–click on man.jpg to import it.
- With the photo still selected, cut it by hitting Cmd–X (Mac) or CTRL–X (Windows).
- Click on the dark gray box (for Men).
- To put the photo into the shape, choose Edit > Paste Appearance.
- The photo should now only be visible within the rectangle. Let’s size and position it better. Double–click on the photo to see the entire image.
-
Resize the photo and drag it into position so it looks like the example below:
- Click in an empty part of the artboard to make sure nothing is selected.
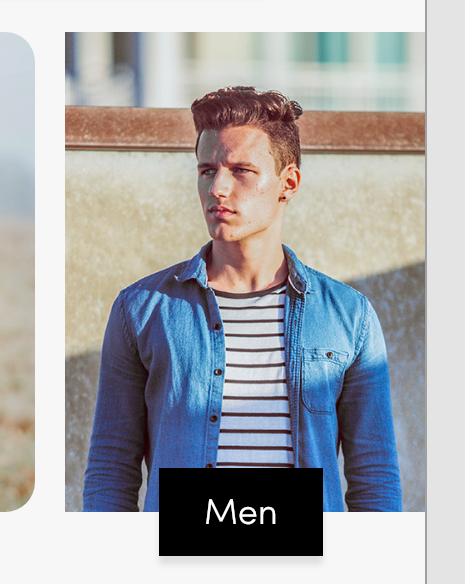
- Let’s round the corners of this photo so it looks like a mirror of the Women photo next to it. Click once on the Men photo to select it.
- In the Property Inspector, above Fill click the Different radius for each corner button
 to reveal four amounts (one for each corner).
 -
Set the four corner radius amounts to 15 0 15 and hit Return (Mac) or Enter (Windows) to apply it.
NOTE: The amounts start at the top-left corner and go clockwise. In order they are: top-left, top-right, bottom-right, bottom-left
- Click on an empty part of the artboard to deselect and see the final layout.
Save the file and close it.
