Expand your Adobe XD skills with this tutorial covering the creation and editing of character styles, including a step-by-step exercise and tips for working with character styles.
This exercise is excerpted from Noble Desktop’s past web design training materials and is compatible with Adobe XD updates through 2020. We now teach Figma as the primary tool for web and UX & UI design. To learn current skills in web design, check out our Figma Bootcamp and graphic design classes in NYC and live online.
Topics Covered in This Adobe XD Tutorial:
Creating & Editing Character Styles
Exercise Preview
Exercise Overview
In this exercise, you’ll learn about creating and editing character styles.

Creating Character Styles
- In Adobe XD, go to File > Open from Your Computer or hit Cmd–Shift–O (Mac) or CTRL–Shift–O (Windows).
-
Navigate into Desktop > Class Files > Adobe XD Class and double–click on iTastify Design Done.sketch to open it.
NOTE: Notice that this is a Sketch file, and XD can open it! The conversion may not be perfect, so be sure to inspect your files closely if you’re converting them.
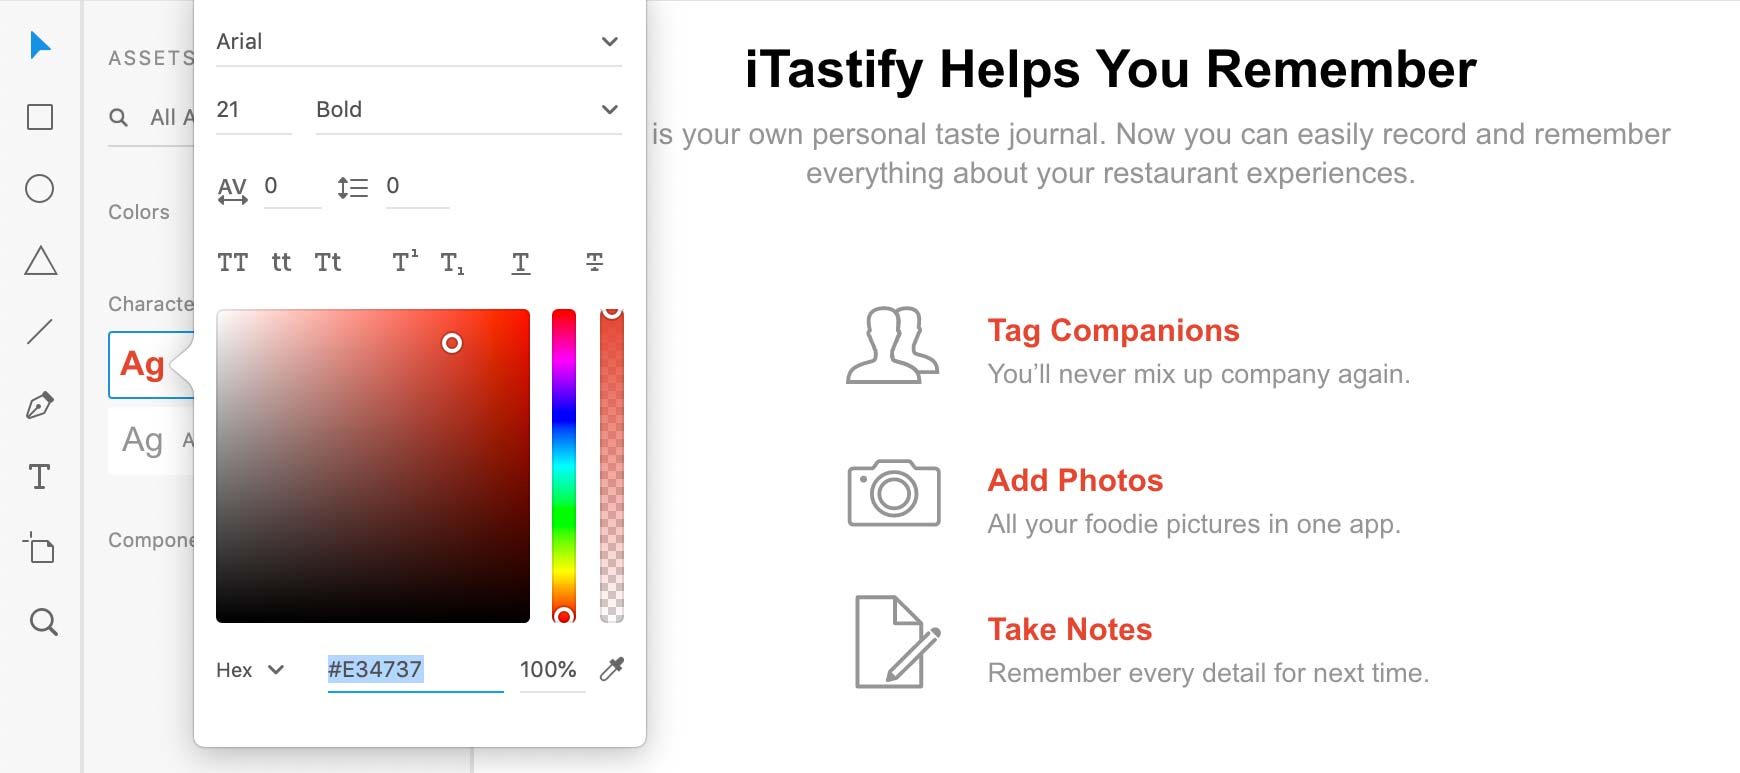
- Zoom in on the iTastify Helps You Remember section (below the hand holding an iPhone).
- There are 3 features, each with an icon and 2 lines of text. Try clicking on any of them to see the whole section is grouped.
- CTRL–click (Mac) or Right–click (Windows) on any of them and choose Ungroup.
- Click in an empty area of the artboard to deselect the text.
- To open the Libraries panel, at the bottom left of the window click the
 icon.
icon. - Select the Tag Companions heading of the first feature.
- In the Libraries panel, click the + button to the right of Character Styles to save it as a style.
Let’s see another way to create a style. CTRL–click (Mac) or Right–click (Windows) on the feature’s description: You’ll never mix up company again and choose Add Character Style to Assets.
Editing Character Styles
- Click in an empty area of the artboard to make sure nothing is selected.
- In the Libraries panel, CTRL–click (Mac) or Right–click (Windows) on the Arial—21pt style and choose Edit.
-
Drag to choose any new color (it doesn’t matter what you choose) and notice that the color changes on all 3 headings!
Character Styles work a lot like we saw with Colors in the previous exercise. When you edit a style, XD will change every place that exact same text formatting appears in the entire file. You didn’t have to apply the style to create a link as you do in many other apps. Think of this more like a search and replace for type styling. Pretty cool!
- Click on an empty part of the artboard to close the style options.
- In the Libraries panel, CTRL–click (Mac) or Right–click (Windows) on the Arial—20pt style and choose Edit.
-
Change the size from 20 to 18 and hit Return (Mac) or Enter (Windows) to apply the change.
Notice all three descriptions change, because there styling matched the character style. How easy was that?
Click on an empty part of the artboard to close the style options.
Naming Character Styles
It would be easier to remember what these styles were for if they had a name.
- Make sure nothing is selected.
-
Double–click on the Arial—21pt style name, type in feature name and hit Return (Mac) or Enter (Windows) to apply the change.
NOTE: You must be in List View
 to see/edit a style name.
 Double–click on the Arial—18pt style name, type in feature description and hit Return (Mac) or Enter (Windows).
Tips for Working with Character Styles
When you select text, XD does not highlight the matching style in the Libraries panel. If you want to find out which style the text matches, or find all text that matches a specific style, you can do so as follows:
- In the Libraries panel CTRL–click (Mac) or Right–click (Windows) on a style and choose Highlight on Canvas. A blue border will appear on any text using that style.
- On the artboard CTRL–click (Mac) or Right–click (Windows) on some text and choose Reveal Character Style in Assets. Now you know which style to edit!
