Learn the essentials of using Adobe Bridge, including creating HTML and Flash galleries, installing the Output Module, and saving your gallery, in this comprehensive tutorial.
This exercise is excerpted from past Adobe Bridge training materials and is compatible with InCopy updates through 2016. To learn current skills in Adobe Creative Cloud and graphic design, check out our graphic design classes in NYC and live online.
Topics Covered in This Adobe Bridge Tutorial:
More Using the Output Workspace, Creating HTML Galleries, Creating Flash Galleries
Exercise Preview
Exercise Overview
Making a web gallery with Bridge is a snap and a nice way to share your work with others. The Output panel lets you assemble an online photo gallery with just a few mouse clicks.

Installing the Output Module
The Output module was included in earlier versions of Bridge but no longer comes pre-installed with Bridge CC. Luckily Adobe still offers it as a separate download. If you did the previous exercise you’ll already have it installed and can jump to the next section. Otherwise, here’s how to get it.
Quit Bridge if it’s currently running.
Go to tinyurl.com/bridge-omcc
Download and install it using the instructions on that webpage.
Once installation is complete, launch Bridge. If it asks about enabling the extension, click Yes.
Creating an HTML Photo Gallery
Navigate into the Bridge Files folder, then into the Australia Photo Shoot folder.
Choose Edit > Select All.
Go to Window > Workspace > Output.
Go to Window > Workspace > Reset Workspace.
At the top of the Output panel, click the Web Gallery button.
From the Template menu, choose HTML Gallery.
At the top of the Output panel, click on Preview in Browser to see a real preview of the gallery in a web browser.
In the web browser, click the thumbnails to cycle through the images. Not bad for a couple minutes of work, but how about something a little… flashier?
Creating a Flash Photo Gallery
At the top of the Output panel, from the Template menu choose Lightroom Flash Gallery.
For Style, choose Flash gallery (default).
-
In the Site Info section, enter the following settings:
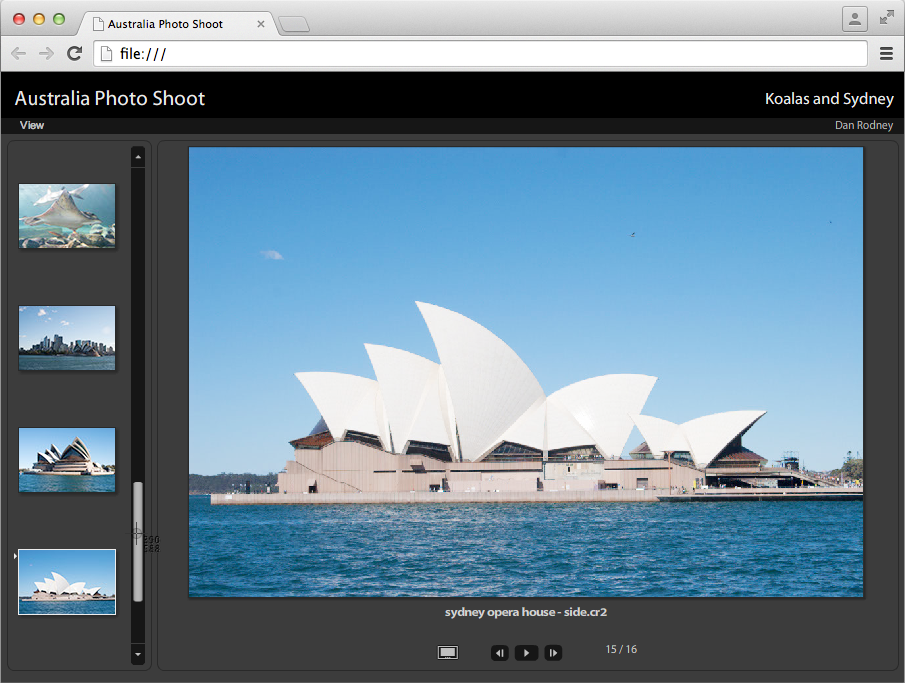
Site Title: Australia Photo Shoot Collection Title: Koalas and Sydney Collection Description: (Delete any text and leave this blank) Contact Info: (Your Name) Email or Web Address: (Your Email) Copyright Info: All Rights Reserved NOTE: The copyright info won’t be visible on the page, but it’s written into the metadata of each image.
-
Scroll down the Output panel to the Appearance section and set:
Slideshow Size: 800px Gallery Image Size: 750px Thumbnail Size: 100px Quality: 70 Layout: Left At the top of the Output panel, click the Preview in Browser button.
The gallery will open in your default web browser. Use the navigation at the bottom or click the thumbnails to look over all the photos. You can even use the Arrow keys to navigate the thumbnails in this webpage! You may have to click a thumbnail first before you can use the keystrokes though.
Saving the Gallery
-
Back in Bridge, at the bottom of the Output panel under Create Gallery change the Gallery Name to Australia Photo Shoot.
NOTE: How is this different from the Site Title we set earlier? The Gallery Name appears in the titlebar of the web browser. The Site Title appears on the page.
Under the Gallery Name, click Browse to choose a destination.
Navigate to the Bridge Files folder.
Create a new folder and name it Australia Gallery.
Click Open (Mac) or OK (Windows).
At the bottom of the Output panel, click Save and let the Bridge do its work. When it says the gallery has been created, just click OK. Who would have ever thought such a fancy gallery could be so easy to create?