Learn how to effectively utilize Adobe Bridge by managing metadata, creating templates, assigning keywords, and navigating through images in this comprehensive tutorial.
This exercise is excerpted from past Adobe Bridge training materials and is compatible with InCopy updates through 2016. To learn current skills in Adobe Creative Cloud and graphic design, check out our graphic design classes in NYC and live online.
Topics Covered in This Adobe Bridge Tutorial:
Assigning Metadata to Files, Metadata Templates, Keywords
Exercise Preview
Exercise Overview
Metadata is information about a file such as author, copyright, keywords, etc. Bridge allows you to easily see this information as well as edit it. This information can also be used in powerful searches that let you find exactly the files you need.

NOTE: To prevent the metadata from getting lost, Adobe stores metadata in the file itself when possible. If it’s not possible, an .xmp metadata file (called a sidecar file) will be created in the same location as the original file. You don’t see it when working in Adobe Bridge, but you will in other applications. If moving files in the Mac Finder or Windows Explorer (instead of Bridge) be sure to also move the.xmp file or else the metadata will be lost. When moving files via Bridge, these.xmp files are moved automatically for you.
Navigating to a Folder
- Make sure your workspace is set to the Essentials default:
- Go to Window > Workspace > Essentials.
- Then go to Window > Workspace > Reset Workspace.
At the top left of the window in the Favorites panel, click on Desktop.
-
At the bottom right of the window drag the zoom slider a little to the right to make it easier to read the longer names.

In the main section of the window, double–click on the Class Files folder to open it.
Go into the Bridge Files folder, then into the Collection of Files folder.
Adding Copyright Info
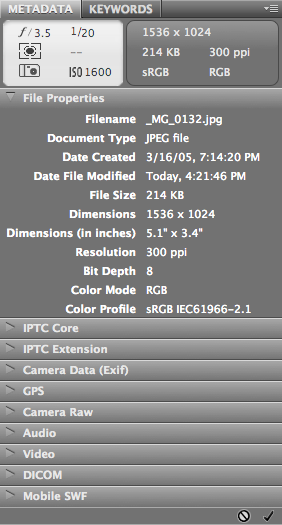
Select the first photo thumbnail on the left in the top row (
_MG_0132.jpg).At the bottom right of the window is a Metadata panel. Open the IPTC Core section and scroll down until you see Creator: website(s).
In the empty right-hand column, click once and you’ll see a field appear with a cursor blinking in it.
Type in: http://www.danrodney.com
Scroll down the Metadata panel until you see Rights Usage Terms.
Click in the empty right-hand column and type in: written consent required
Click on the image’s thumbnail again to apply the change. Bridge may ask if you want to apply the changes. Just click Apply.
Making a Metadata Template
The same metadata that has been added to this image needs to be applied to other images. We can do this using templates.
With the same photo you were working with still selected, at the top right of the Metadata panel go into its menu
 and choose Create Metadata Template.
At the top, name the template Dan Rodney Copyright
-
Now we must choose what information gets saved into the template. Check on the checkboxes next to the three items we previously set:
- Creator
- Creator: website(s)
- Rights Usage Terms
Click Save.
Applying a Metadata Template to Other Images
Select all of the koala photos by clicking on the first koala photo and then Shift–clicking on the last koala photo.
In the Metadata panel, click the panel menu
and choose Append Metadata > Dan Rodney Copyright.If a message appears asking if you want to continue, check Don’t show again and then click Yes.
Assigning Keywords
Keywords allow you to describe files with relevant, plain English terms so that you can find them more easily at a later time.
Click on the first New York City night shot photo.
Shift–click on the last of the four New York City night shot photos.
At the bottom right of the window click on the Keywords tab.
Click in the empty checkbox to the left of New York.
Select the picture of the Sydney Opera House.
The keyword we want to assign doesn’t exist so we must create it. Click on the Places section name—NOT its checkbox—to select it.
At the bottom click the New Sub Keyword button
 .
.Type in Sydney and hit Return (Mac) or Enter (Windows) to accept it.
Click the empty checkbox to the left of Sydney to assign it to the photo.
Finding Images Via Keywords & Other Metadata
Go to Edit > Find (Cmd–F (Mac) or CTRL–F (Windows)).
The Look in menu should already say Collection of Files.
In the first menu under Criteria choose Keywords.
The second menu should say contains, so click into where it says Enter Text and type: New York
-
Click Find.
The results of the search will appear in your window. You should see the four New York City night shots.
-
In the top left corner of the screen click the Go Back button
 to go back to the Collection of Files folder.
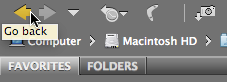
Go to Edit > Find (Cmd–F (Mac) or CTRL–F (Windows)).
Under Criteria, in the first menu choose All Metadata.
The second menu should say contains, so click into where it says Enter Text and type the model of the Canon camera that took some of these photos: 20D
Click Find.
The window will display the Australian photos. The other images aren’t displayed because they were shot on a Digital Rebel XT.
Hit the Go Back button
so you are back looking at the Collection of Files. See how useful Metadata can be!
Dealing with Multiple Computers
If you copy files to another computer or a server, will others be able to see the keywords? Yes! But the Keyword Sets (the folders) will not appear. Instead, the keywords will all be listed under the Other Keywords Set. Remember that Keyword Sets are just for organizing the keywords. So the most important things—the keywords themselves—are retained.
Of course, if multiple people are assigning keywords it would be nice for all of them to have organized keyword sets. Luckily, there is a way to transfer the list of keywords. The Keyword Sets are stored in the Adobe Bridge Keywords.XML file. To find it, go to:
| Mac: | Hard Drive/Users/your user name/Library/Application Support/Adobe/Bridge CC (To find the Library, in the Finder hold Option and choose Go > Library.) |
| Windows: | C:\Users\(username)\AppData\Roaming\Adobe\Bridge CC |
Once the file is edited, or replaced with an updated version, re-launch the Bridge to update the keywords list.