These instructions for the older version 20. Refer to our other instructions to install the latest version of SSMS.
Here’s how to install the older SQL Server Management Studio (SSMS) version 20, the free app you use to run SQL Server queries.
Download & Install the Free App: Microsoft SQL Server Management Studio
- Go to the Download SQL Server Management Studio download page.
- Click the link that says Download SSMS 20.2 (it should be under the 20.2 heading).
- Open the downloaded file. How you do that depends on the web browser you use but it’s usually in the Downloads panel. Here’s how it may look:


- If asked to allow this app to make changes to your device, click Yes.
- If it says the computer needs to be restarted before setup can continue:
- Click Restart.
- Once your computer has restarted, you may be able to go into the Downloads folder and launch the SSMS-Setup-ENU.exe file, or go back to the Download SQL Server Management Studio page and again click the link that says Download SSMS 20.2.
- Once the file has re-downloaded, open it.
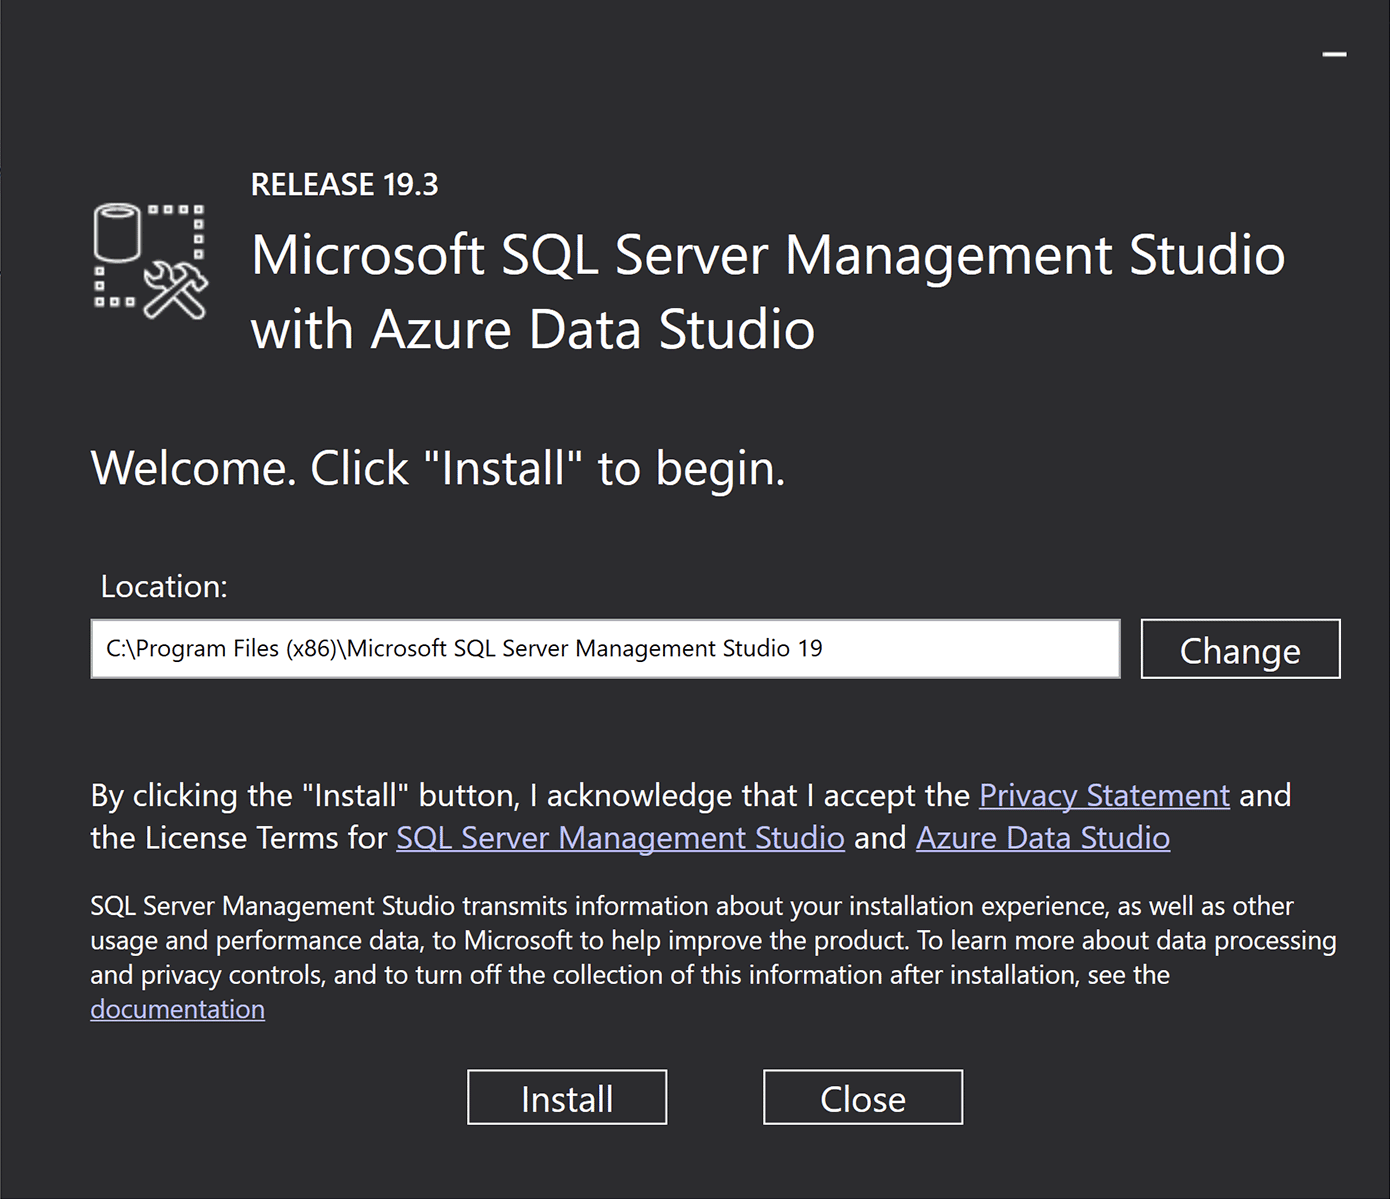
- You should now see the install screen for Microsoft SQL Server Management Studio with Azure Data Studio:

- Click Install.
- If asked to allow this app to make changes to your device, click Yes.
- Once the install has completed, if it says a restart is required, click Restart.
Launch the SQL Server Management Studio App
To make sure your installation was successful, open the app by doing the following:
- Go into your
 Windows Start Menu and in the list of All apps, go into the Microsoft SQL Server Tools folder and click on SQL Server Management Studio.
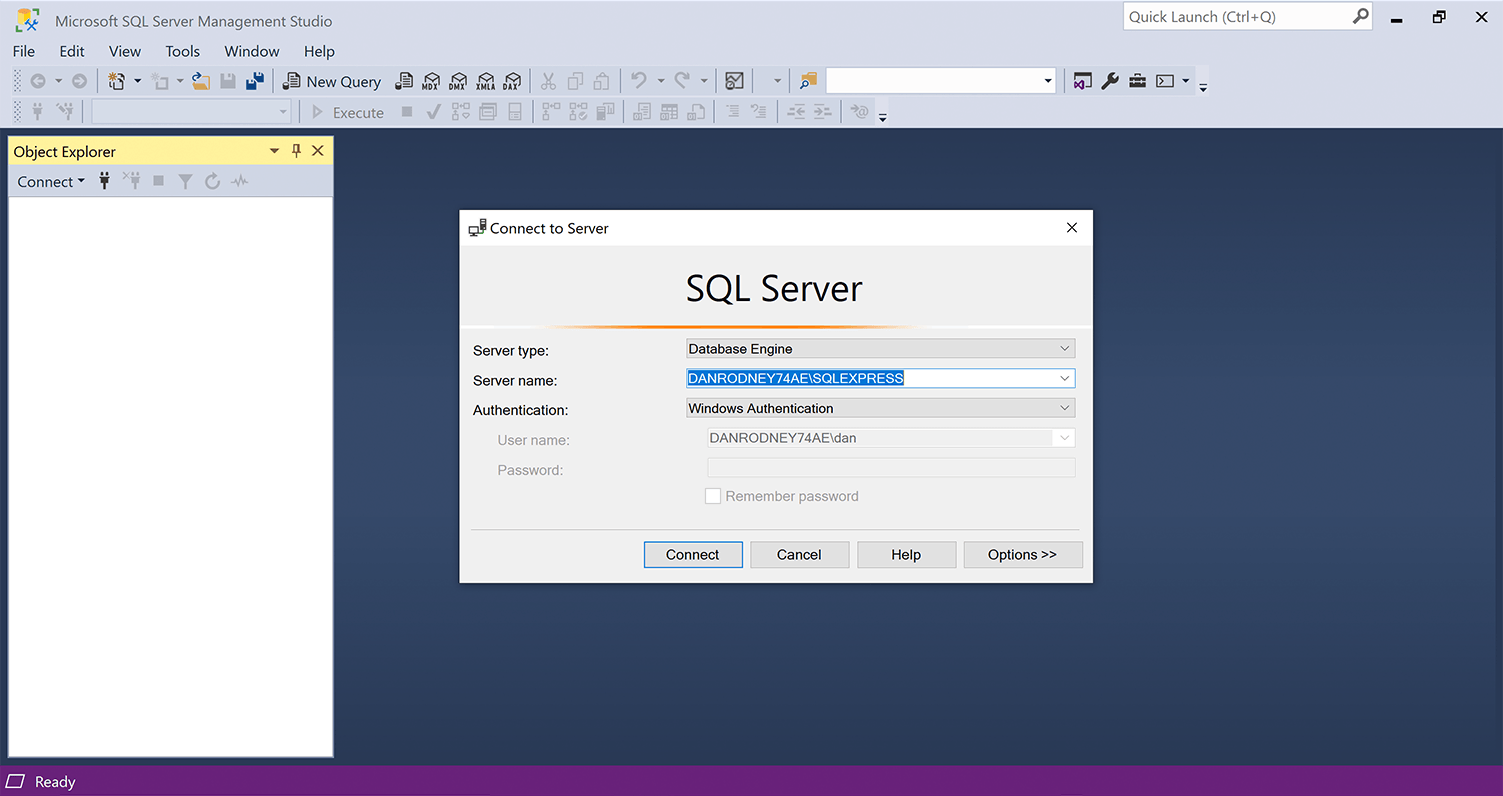
 - The Microsoft SQL Server Management Studio app should launch, and look like this:

- Congratulations, you are done!
To close the app, you can click Cancel and then close the window.
For more information and training on the use of SQL Server Management Studio, consider enrolling in Noble Desktop’s SQL Server Bootcamp or search for a local SQL class using the Classes Near Me tool.