Master the utilization of Sketch Libraries to effectively reuse and update assets across multiple Sketch files with this comprehensive tutorial, covering topics from creating shared libraries to updating text styles.
This exercise is excerpted from Noble Desktop’s past web design training materials and is compatible with Sketch updates through 2021. Noble Desktop now teaches Figma as the primary tool for web and UX & UI design. To learn current skills in web design, check out our Figma Bootcamp and graphic design classes in NYC and live online.
Topics Covered in This Sketch Tutorial:
Creating & Using Shared Libraries, Color Variables
Exercise Preview
Exercise Overview
In this exercise, you’ll learn how Sketch Libraries allow you to reuse (and update) assets such as symbols and styles across multiple Sketch files and computers.

Adding a Library
- In Sketch, go to File > Open Local Document.
-
Navigate into Desktop > Class Files > Sketch Class > Libraries and double–click on Pulse Library.sketch to open it.
Sketch Libraries are not a special kind of file. They are regular Sketch files that contain assets (symbols, text styles, layer styles, and colors) that you want to share and re-use across multiple Sketch files (and possibly computers).
- In the Sidebar on the left of the window, click on Components at the top.
- The 4 icons near the top of this panel are for Symbols, Text, Layer, and Colors. Click each of the 4 icons to see that we have already made some of each.
- Choose File > Add as Library.
The preferences window will open, showing the file is now a Library. There’s nothing else to do, so close the preferences window.
Using Text Styles from a Library
- In Sketch, go to File > Open Local Document.
- Navigate into Desktop > Class Files > Sketch Class > Libraries and double–click on Men.sketch to open it.
- Select the Men’s Fall Fashion heading.
- In the Inspector, click on the No Text Style menu and in Pulse Library > main text click on heading.
- Select the line fresh men’s styles for the fall season
- In the Inspector, click on the No Text Style menu and in Pulse Library > main text click on subheading.
Do a File > Save.
- Let’s do this again in another file. Go to File > Open Local Document.
- Navigate into Desktop > Class Files > Sketch Class > Libraries and double–click on Women.sketch to open it.
- Select the New Autumn Attire heading.
- In the Inspector, click on the No Text Style menu and in Pulse Library > main text click on heading.
- Select the line cozy women’s styles for the fall season
In the Inspector, click on the No Text Style menu and in Pulse Library > main text click on subheading.
Updating Text Styles in a Library
- Select the New Autumn Attire heading.
- In the Inspector’s Appearance section, below the text style’s menu click the … More button and choose Edit Style in Library.
- The Pulse Library.sketch file will open.
-
At the top-left of the Toolbar, click on the Canvas button
 .
.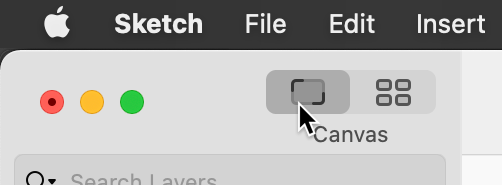
You should see a Style Guide artboard that we made. It’s a collection of the text styles and colors we’ve already created in the document. This lets us easily see and edit things.
- Click once on the Heading text to select it.
- In the Inspector, change the font weight from Arial Regular to Bold.
- In the Inspector, under Fills, click the color box to open the color picker.
-
At the bottom of the color picker in the This Document colors, click on the 3rd color swatch (a dark brown).
NOTE: Later in this exercise we’ll show you how to save colors like this.
- This only changed the selected layer, but we need to update the style. In the Inspector, below the heading menu click the Update button
 .
. - Do a File > Save.
- Switch back to the Women.sketch file (you can see a list of open files at the bottom of the Window menu).
-
To update:
- In macOS Big Sur & later: At the top right of the Sketch window the Notifications button
 should have a red number on it. Click the Notifications button and choose Library Updates Available.
 - Prior to macOS Big Sur: At the top right of the Sketch window you should see it say Library Updates Available, click that button.
- In macOS Big Sur & later: At the top right of the Sketch window the Notifications button
-
In the dialog that opens you’ll see the previous and new versions of any assets that have changed, so you’ll know what’s being changed.
Click Update Components.
- You should now see that the heading text appearance has changed (it’s now bold and a darker brown).
- Switch back to the Men.sketch file.
-
To update:
- In macOS Big Sur & later: At the top right of the window, click the Notifications button and choose Library Updates Available.
- Prior to macOS Big Sur: At the top right of the window, click Library Updates Available.
- In macOS Big Sur & later: At the top right of the window, click the Notifications button
- In the dialog that opens, click Update Components.
Again you should see the heading appearance change.
Using Symbols from a Library
- In the Toolbar, click the Insert button
 and under Symbols choose Pulse Library > navbar.
 - Place the navbar at the top of the artboard.
- With the navbar selected, hit Cmd–C to copy it.
- Switch to the other file Women.sketch.
- Hit Cmd–V to paste the navbar.
Updating Symbols in a Library
You edit symbols from a library the same way you do a regular symbol, except it will open the original library file.
-
On the artboard, double–click on the navbar to edit it.
NOTE: You could also select it and hit Return, or click the Edit in Library button in the Inspector.
- In the message that appears, click Open in Library.
- The original Pulse Library.sketch file will open (the one on your computer, which we defined earlier as a library).
- Click somewhere outside the artboard so nothing is selected.
- Click on the navbar’s background.
- In the Inspector, under Fills, click the color box to open the color picker.
- At the bottom, if you don’t see This Document colors, you might see Migrated Global Colors. Click on that menu and choose This Document colors.
- At the bottom of the color picker in the This Document colors, click on the 3rd color swatch (a dark brown).
- Do a File > Save.
- Switch back to the Women.sketch file.
-
To update:
- In macOS Big Sur & later: At the top right of the window, click the Notifications button and choose Library Updates Available.
- Prior to macOS Big Sur: At the top right of the window, click Library Updates Available.
- In macOS Big Sur & later: At the top right of the window, click the Notifications button
- In the dialog that opens, click Update Components.
- You should now see the navbar’s background is brown instead of black.
- Switch to the Men.sketch file.
-
To update:
- In macOS Big Sur & later: At the top right of the window, click the Notifications button and choose Library Updates Available.
- Prior to macOS Big Sur: At the top right of the window, click Library Updates Available.
- In macOS Big Sur & later: At the top right of the window, click the Notifications button
- In the dialog that opens, click Update Components.
You should again see the navbar update.
NOTE: If you no longer have the original library (maybe it was accidentally deleted) you can unlink a symbol from the library.
Using a Color Variable (Color Swatch) from a Library
In the Toolbar, click the Insert button
and select Shape > Rectangle.- Draw a rectangle somewhere below the text. It does not matter the size or position.
- In the Inspector, under Fills, click the color box to open the color picker.
- At the bottom of the color picker we want to see the Pulse Library colors. If you’re seeing This Document colors, click on the This Document menu and choose Pulse Library.
-
Click on the 2nd swatch (a medium brown).
NOTE: If you edit a color variable it will update all colors throughout a file!
Updating Colors in a Library
- Switch back to the Pulse Library.sketch file (you can see a list of open files at the bottom of the Window menu).
- We have a new color that we did not save into this document’s colors (so our other files don’t have access to it).
- At the top of the Sidebar, click on the Style Guide page.
- On the Style Guide artboard, select the blue box on the right of the row of colors.
- In the Inspector, under Fills, click the color box
 to open the color picker.
 - Near the bottom, click Create Color Variable to add the new color swatch.
- A name field will appear. Name it complement and hit Return to accept it.
- Do a File > Save.
- Close the library file, we’re done with it.
- You should be back in the Men.sketch file.
- Make sure the brown rectangle is selected.
- In the Inspector, under Fills, click the color box to open the color picker.
-
You should see the new blue swatch, so click on it. (If you don’t see it, the menu bottom probably says This Document or Migrated Global Colors, click on that menu and choose Pulse Library. Now you’ll see the blue swatch.)
NOTE: Notice how we didn’t have to update to get the new color? That’s because the colors are stored in the Library, not in each document. To edit the color variables, you must edit them in the Library file.
Find & Replace Color)
While you can edit color variables to globally update a color, if you need to globally change one color to another (such as one color variable to another), you can do a find/change as follows:
- Choose Edit > Find and Replace Color.
-
Click the color swatch next to Find.
You’ll see a list of colors used in the current file. Choose the one you want to change.
-
Click the color swatch next to Replace with.
You can either mix up a new color, or choose an existing swatch from your Global, Document, or Library colors.
When done click Replace.
Removing a Library
When you no longer want to use a Library, you can remove it from Sketch. This only removes it from Sketch’s interface. You’ll still have the Library file and could add it back again if you need it later.
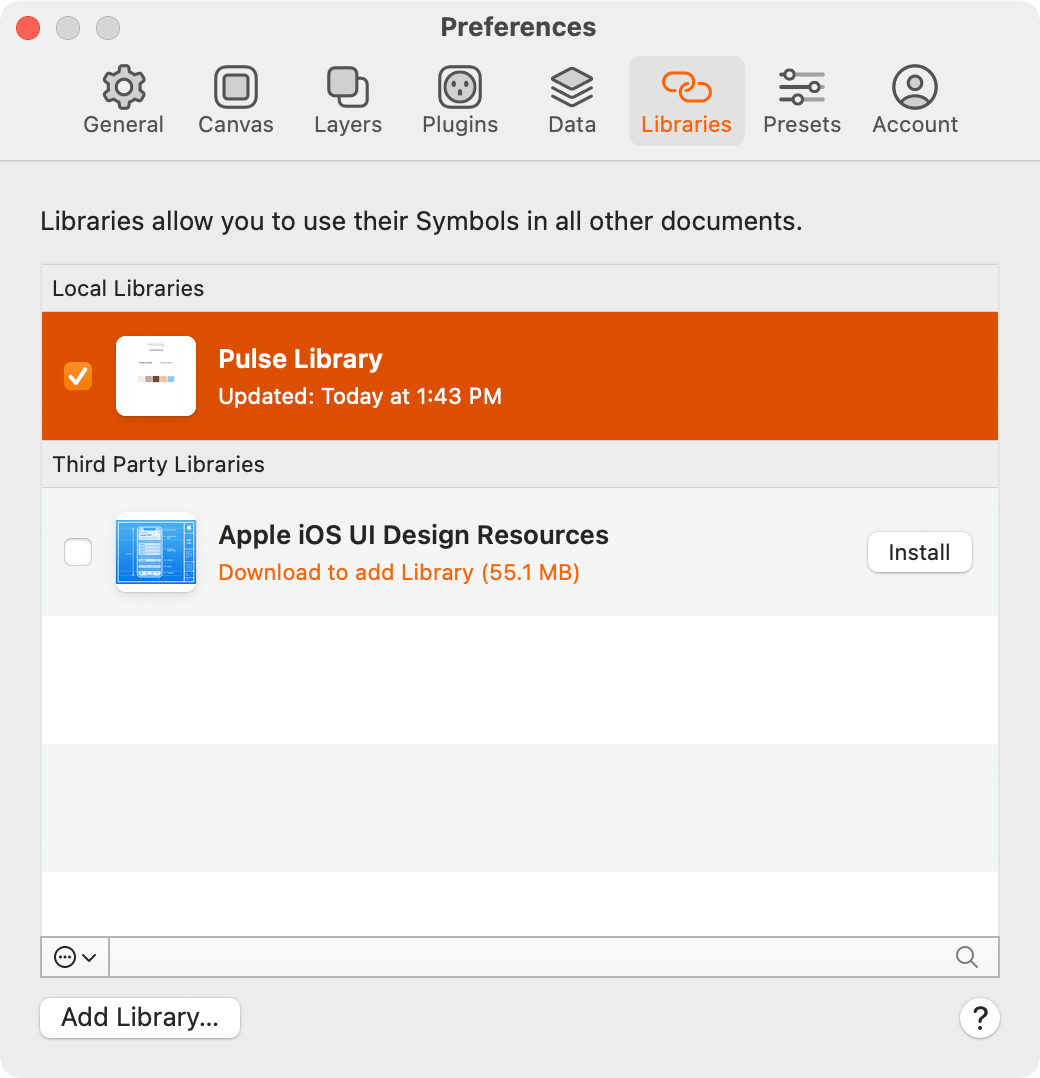
- Go into the Sketch menu and choose Preferences.
- Click on the Libraries tab.
- Right–click (or Control–click) on Pulse Library.sketch and choose Remove Library.
- When it confirms, click Remove Library again. (Don’t worry, this does NOT delete the original library file!)
- Close the preferences window.
Local Vs. Cloud (Workspace) Libraries
In a later exercise you’ll learn how to upload documents to Sketch Cloud, where they can exist as regular files or cloud libraries.
Cloud library files will automatically appear in the Libraries tab of Sketch’s Preferences (where you can install them if you wish). With a Sketch subscription, the cloud (workspace) libraries can be shared with other people.
What are the differences between cloud libraries and the local libraries we learned about in this exercise? For the most part they work the same, but how you get updates is different. With local libraries you have to have access to the Sketch file, either on your computer or on a network drive. If the library is on a shared network drive, multiple people can share the file… but they need to have that drive available to be able to use it.
What if some people work offsite? Cloud libraries make it easier for people to share a library without needing access to a specific network. Anyone on the team can access the cloud library via the internet.
