Dive into the world of Test Driven Development (TDD) with Ruby on Rails through this tutorial, where you will learn writing tests for your application and building an app using TDD techniques.
This exercise is excerpted from Noble Desktop’s past web development training materials. Noble Desktop now teaches JavaScript and the MERN Stack in our Full Stack Development Certificate. To learn current skills in web development, check out our coding bootcamps in NYC and live online.
Topics Covered in This Ruby on Rails Tutorial:
Adding Gems for Testing, Test #1: Ensuring the User Can Visit the Easels Homepage, Test #2: Ensuring the User Can Create a To-do Via a Form
Exercise Overview
No tour of Ruby on Rails would be complete without a look at writing tests. You may have noticed while generating models, controllers, and other content in earlier exercises, that Rails generated corresponding files that went into the test folder. The idea is that as you build functionality into your application, you would also write tests to ensure that everything works as intended. These tests can be especially helpful when making large changes to your application—sometimes, a significant change to one part of the application can affect something that seems unrelated—and a good test suite (or series of tests) can help catch this.
Some test fanatics go even further, and write their tests before writing a single line of code. Advocates of this style of development maintain that it creates cleaner, more flexible code that is easier to maintain. This approach is commonly referred to as Test Driven Development (TDD), and it is very popular within the Rails community.

In this series of four exercises we’re going to build an app using TDD: a small task management app that lets users track items as complete or incomplete on their own personal to-do list.
Developing new features using TDD involves writing tests that fail until you write the bare minimum production code that makes your test pass. This approach essentially acts as your personal assistant in developing an app in which all the parts function as intended while meeting the client’s requirements.
In this exercise you’ll write two tests that check for the most basic functionality. First we’ll check whether the user can see the application’s homepage. Then we’ll ensure they can use a form to add a task to a task list.
Getting Started
Open the Finder and navigate to the Class Files folder.
Open Terminal (in Applications > Utilities) if it isn’t already open.
Type
cdand a single space (do NOT press Return yet).Drag the yourname-Rails Bootcamp folder from the Finder to the Terminal window.
Make sure you’re in Terminal and hit Return to change into the new folder.
-
Rails ships with a default testing suite called test-unit, but it is not very popular with developers. Rails is flexible and designed so that you can choose any test suite you like. We are going to use the popular RSpec gem for our tests. To create an app with all the standard folders minus the test folder (abbreviated as T), type the following in Terminal, then hit Return:
rails new easels -T Take a brief look at the Terminal output to see that Rails generated all the default app components, minus any test files.
We need to create our database schema before getting started with tests. Run:
rails db:migrateAdding Gems for Testing
In order to get all our testing tools set up, we’re going to have to add them to our application as gems.
Open a browser and navigate to: rubygems.org
In order to do tests we’ll use RSpec, a widely-used testing framework. RSpec is a comprehensive test suite similar to the default test-unit, though it’s meant to have a slightly more readable syntax. In the search bar on the RubyGems page, search for rspec rails.
Click on rspec-rails (it should be the first result).
-
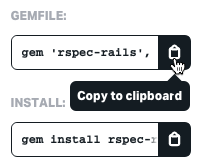
On the right, notice how popular this gem is. Whoa! To copy the code for the latest version of this gem, under GEMFILE click the Copy to clipboard button as shown:
Leave the browser window open so we can search for more gems later.
In your code editor open the new easels app folder that should have been created (from Desktop > yourname-Rails Bootcamp).
Open the Gemfile.
Look around line 31. You’ll see some code like this:
group :development, :test do
    # Call 'byebug' anywhere in the code to stop execution and get a debugger console
    gem 'byebug', platforms: [:mri, :mingw, :x64_mingw]
end

  group :development do
  …
Rails makes it possible to load certain gems only in certain environments. Up until now we’ve been working exclusively in the development environment, which is optimized for local development on your computer. We’ve also touched on the production environment, which is your live site, and we’ll dive deeper into that when we deploy to Heroku later in this course. For now, the environment we are most interested in is the test environment. Test is a completely separate environment just for running your test suite.
- We only want to load our test-related gems in the test environment. So, after the development group beginning on about line 36, add a new group for test gems only:
group :test do

end-
Inside of this group, paste the rspec-rails gem code (don’t worry if the version is newer than what is shown in this book—just paste the code):
group :test do
   gem 'rspec-rails', '~> 5.0.0'
end
If you look closely, you’ll see that we’re not actually adding the RSpec gem, but rspec-rails. We do this because this gem can exist independently of Rails. We could use it as a testing framework for other Ruby applications that don’t use Rails. Because we are using Rails, we need to load this Rails-specific version of RSpec.
NOTE: You can visit relishapp.com/rspec/rspec-rails/docs to learn more about the rails-specific version of RSpec, read the documentation, and see examples.
Go back to the RubyGems page in your browser.
In the navbar, towards the top, search for capybara.
-
Click on capybara (it should be the first result).
Capybara is a simulated web browser. It uses testing language with an understandable syntax to simulate browser requests to the Rails server, helping create responsive tests that mimic user interaction with a web app. This is known as behavior-driven development.
Under GEMFILE click the Copy to clipboard button
 .
.-
Return to the code editor and in the Gemfile paste the code into the test group (for the test environment) as shown in bold:
group :test do
   gem 'rspec-rails', '~> 5.0.0'
   gem 'capybara'
end
NOTE: You can visit rubydoc.info/GitHub/jnicklas/capybara to read the documentation and see how it can work with RSpec and other test suites.
Back in the RubyGems page, search for database cleaner.
-
Click on database_cleaner (it should be the first result).
Anytime we create a test, we’re going to be creating data in the test version of our database. Database Cleaner helps wipe and rebuild the test database between test runs so that the changes that one test creates don’t contaminate others and we always have a fresh database.
Under GEMFILE click the Copy to clipboard button
.-
Back in the code editor in the Gemfile, paste the code into the test group:
group :test do
   gem 'rspec-rails', '~> 5.0.0'
   gem 'capybara'
   gem 'database_cleaner'
end
NOTE: You can visit GitHub.com/DatabaseCleaner/database_cleaner to read the documentation and see how it can work with RSpec and other test suites.
Save the file.
Test #1: Ensuring the User Can Visit the Easels Homepage
Switch back to Terminal and type
cd easelsto go to the right directory.Type
bundle installin the command line to install the added gems.We can’t write any tests until we tell RSpec to create the appropriate files, including a folder to work in. There are some generate commands that come with RSpec. Run
rails g rspec:installto create the RSpec files.Let’s take a quick look at what RSpec created for us. Switch to your code editor.
-
Open the spec folder. This is where we’ll write our tests. Feel free to take a quick look at the two helper files it created. We could put some settings for our respective tests in rails_helper.rb but the default settings in that file are fine.
NOTE: In the vendor folder, there is also an.rspec file which also has a few settings.
-
In the spec folder, create a new folder called features. TIP: If you are using Sublime Text, you can CTRL–click or Right–click on the spec folder and choose New Folder. At the bottom name it features and hit Return.
There are many different kinds of tests in Rails. You can test any component of your app such as models and controllers. We created a features folder because we’re going to do something called a feature test. These are high level acceptance tests making sure that the app’s general features work. You can get much more fine grained in the tests that you perform but generally just doing the high level tests will give you confidence that all aspects of your app are functioning.
-
Run the following command in Terminal:
rails g rspec:feature user_visits_homepage
This command will create the spec/features for us, and inside of that folder it will create a file called user_visits_homepage_spec.rb. Let’s open that file.
-
Inside user_visits_homepage_spec.rb is some basic markup providing the outline of an RSpec feature file:
require 'rails_helper'

  RSpec.feature "UserVisitsHomepages", type: :feature do
pending "add some scenarios (or delete) #{__FILE__}"
end
We add require
"rails_helper"first so this essential file will load into our tests. We then add a feature followed by one or more scenarios (such as success or failure). -
Let’s clean up the language a bit and add our first scenario:
RSpec.feature "user visits homepage" do
   scenario "successfully" do
   end
end
Note that we erased the ‘pending’ line.
The feature name matches our filename. As a best practice, we are modeling the test around what action the user is performing. We’re testing a successful scenario. We could also test for what happens when it fails but that isn’t necessary.
-
Add the two steps that comprise the successful scenario:
scenario "successfully" do
   visit root_path

   expect(page).to have_css 'h1', text: 'To-Dos'
end
We want the user to be able to visit the root_path of our site (the homepage). To ensure they are seeing the minimum expected code, we also specified the page should have a CSS h1 selector with the text of To-Dos. This syntax comes from Capybara (which is required for RSpec feature tests).
Save the file and switch to Terminal.
-
Type the
rspeccommand. This executes all the tests in our test suite.As indicated by the red F at the top of the output, the test fails.
-
Let’s read through the red error messages to see why it failed. Notice the following:
- The first line tells us the Failure/Error happened in the visit root_path step (the first of two). This means the user cannot access the homepage yet.
- The next line displays a NameError for an undefined local variable or method
root_path. This means we have to set up a route to this root_path which we haven’t done yet.
Back in your code editor, open config > routes.rb and notice that we don’t have any routes yet.
Delete all the commented code (around lines 2–55).
-
Add the following bold code:
Rails.application.routes.draw do

   root 'todos#index'

end
Save the file and switch to Terminal.
-
Run
rspec.The test still failed but for a different reason. Now we have a RoutingError for uninitialized constant TodosController. It’s looking for a controller that doesn’t exist. We need to go ahead and create it.
Run
rails g controller todosat the command line.-
We want to run the test again. To enter the previous command (as shown), hit the Up Arrow key on the keyboard. Do this twice to get the previous command.
rspecThis time it failed because it couldn’t find an
'index'action for TodosController. Earlier we rooted to todos#index in routes.rb so we need to add this index action to the controller. Switch to the code editor.
-
In app > controllers > todos_controller.rb add the index action as shown in bold below:
class TodosController < ApplicationController

   def index
   end

end
Save the file and switch to Terminal.
-
Run
rspecRemember that you can hit the Up Arrow key. We won’t remind you again.You may be frustrated that it’s still throwing errors but Test Driven Development involves slowly making progress, correcting the errors one step at a time. The current error message is not about the controller, which means that component is working! The ActionController::MissingExactTemplate line means we now need a corresponding view.
Back in the code editor, in the app > views > todos folder, create a new view file for the index page: index.html.erb
Switch back to Terminal.
-
Run
rspecagain.We got a different Failure/Error this time! Previously it failed at the first of our two steps (which checks whether it can render the homepage). Now it is checking the CSS to see whether we have an h1 with the text of To-Dos, but it’s not there.
Back in the blank index.html.erb write
<h1>To-Dos</h1>on the first line.Save the file and switch to Terminal.
-
Run
rspecOur test passed! We can tell because there’s no red code and at the beginning, there is a green period (.) instead of a red F. We can successfully reach our app’s root page.
To verify the successful results in a browser, type
rails sin Terminal to start the server.In a web browser, go to localhost:,000 (the root path of the app) to see the Easels homepage. You should see the To-Dos h1!
Switch back to Terminal and hit CTRL–C to stop the server.
Test #2: Ensuring the User Can Create a To-Do Via a Form
- In the Terminal, run:
rails g rspec:feature user_creates_a_todo-
In the new file, set up our next feature test (remember that we first need to load in rails_helper):
require "rails_helper" Rspec.feature "User Creates a Todo", type: :feature do scenario "successfully" do end end -
What steps does the user need to be able to take to successfully create a to-do? They should be able to visit the root_path, fill out a form by adding the title of their to-do, save the to-do to the database, then see their new to-do on the index page. To help us remember this sequence of steps, add the following comments:
scenario "successfully" do #visit front page #user creates a to-do via a form #user saves the to-do to the database #verify that the page has our to-do end -
Add the following test code using Capybara (the browser simulator) syntax. Make sure that under the second step (fill out a form), you capitalize
"Title"as form labels in Rails are capitalized by default:#visit front page visit root_path #user creates a to-do via a form click_on "Add a New To-Do" fill_in "Title", with: "paint house" #user saves the to-do to the database click_on "Add To-Do" #verify that the page has our to-do expect(page).to have_css ".todos li", text: "paint house" Save the file and switch to Terminal.
-
Run the our test suite:
rspecWe now see one passing test and one error (.F). We can get to the homepage but we can’t fill out the form yet because Capybara can’t find a link or button called
"Add a New To-Do". -
Back in the code editor, in app > views > todos > index.html.erb type the bold embedded Ruby code exactly as shown (the link code must match what we wrote in our test spec):
<h1>Todos</h1>

<%= link_to "Add a New To-Do", new_todo_path %>
This code lets us add a new To-Do item by linking to the Add a New To-Do button that will take us to the new_todo_path.
Save the file and switch to Terminal.
-
Enter:
rspecThe test now fails the very first step (don’t worry, this often happens). We can no longer visit the root_path because we did not define the local method
new_todo_path. This method is a path to add a new to-do. To make the view render correctly, we need to create that path in our controller via resourceful routes. -
In the code editor in config > routes.rb make todos a resource (providing it with resourceful routes):
root to: "todos#index"
resources :todos
Save the file and switch to Terminal.
-
Type
rails routesin the command line.As you know from previous projects, Terminal prints out seven resourceful routes. Now we have a new_todo path (using the new action) as one of our routes!
-
Enter:
rspec. Remember you can hit the Up Arrow until you see the command.)Now we’re back to not being able to click on
"Add a New To-Do"(which means we can access the homepage again). It couldn’t find the'new'action for the TodosController. To resolve the issue, we need to add this action to our controller. -
In the code editor, in todos_controller.rb add the new action as shown in bold (around line 6):
def index
end

def new
end
Save the file and switch to Terminal.
-
Enter
rspecNow the reason we can’t click the
"Add a New To-Do"link because we have a missing template (view file) for todos/new. Let’s create that template now. In app > views > todos create a new file and name it new.html.erb (remember that this filename is standard for Rails pages using the new action).
Switch back to Terminal.
-
Enter:
rspecIt fails again, but we’re further along now! This time our feature test fails because we tried to fill in the Title field with
"paint house"but it couldn’t find the Title field. We need to go ahead and create the form. -
In new.html.erb (which should be blank) add the following embedded Ruby form code, making sure the capitalization for the submit button is the same as in your test:
<%= form_with model: @todo do |f| %>
   <%= f.label :title %>
   <%= f.text_field :title %>
   <%= f.submit "Add To-Do" %>
<% end %>
Save the file and switch to Terminal.
-
Enter:
rspecWe can no longer successfully click on the
"Add a New To-Do"link. Something in our form must be triggering this error because it says the first argument cannot contain nil or be empty. -
Back in new.html.erb, examine the first line:
<%= form_with model: @todo do |f| %>We have an issue with our model because we haven’t defined the @todo variable. It is currently equal to nothing. We need to define it in the controller.
-
Switch to app > controllers > todos_controller.rb and fix the problem by defining the @todo variable that holds the new action, as shown in bold:
def new
   @todo = Todo.new
end
Save the file and switch to Terminal.
-
Enter:
rspecWe still can’t click on
"Add a New To-Do". We get a rather cryptic NameError that says we have an “uninitialized constant TodosController::Todo”. There’s not a lot of detail to illuminate why there’s a problem with the controller, but the most likely reason is we don’t have a create action (which saves the info we’ve passed in). -
In todos_controller.rb add the following code (around line 10):
def new
   @todo = Todo.new
end

def create
end
Save the file and switch to Terminal.
-
Enter:
rspecAgain we get the same error. The other reason we get this failure is that we’re calling a Todo model but we actually haven’t created that model yet.
-
In the command line, generate a new todo model that has a title attribute:
rails g model todo titleNOTE: If you want to take a brief look at the migration, look at db > migrate to can see how it’s creating a :title field for us (which accepts a string value).
Still in Terminal, type
rails db:migratein the command line.-
Enter:
rspecNow we can’t click on the
"Add To-Do"button which saves the user’s to-do task. We’re moving further along! We have a missing template in todos/create. This means it’s trying to use the create action. In Rails, the create action adds data to the database but doesn’t have a page that displays. This means we need to add a redirect instead of creating a new template. -
In todos_controller.rb add the following bold redirect to the homepage:
def create
   redirect_to root_path and return
end
Save the file and switch to Terminal.
-
Enter:
rspecThe create action is working now because we got a different error. The test fails on the final step: the expected CSS and text is not here, which means we’re creating a record but it’s not being displayed. In order to get around this failure, let’s set up our unordered list of to-do items on our index page.
-
In index.html.erb, add embedded Ruby code that loops through all the to-dos and displays them all:
<h1>To-Dos</h1> <ul class = "todos"> <% @todos.each do |todo| %> <li><%= todo.title %></li> <% end %> </ul> <%= link_to "Add a New To-Do", new_todo_path %> -
Save the file, switch to todos_controller.rb, and add the following bold code for the index action (because we’re on the index page):
def index
   @todos = Todo.all
end
NOTE: In a later exercise when we perform a different test we will redefine this variable, setting it up so each user can only see their own to-dos. But this will do for now (remember that we need to write the minimum code needed for a test to pass).
Save the file and switch to Terminal.
-
Enter:
rspecThe expected CSS and text is still not here. Unlike the previous time we got a failure on this final step, it seems like we’re going through all the steps properly. We have our form and the controller understands what it’s looping through. It looks like our to-do is not being saved correctly.
-
We need to go into our controller and add a bit of code to make sure our to-do saves. Add the following bold code to todos_controller.rb:
def create
      @todo = Todo.create(todo_params)
      redirect_to root_path
   end

private

   def todo_params
      params.require(:todo).permit(:title)
   end

end
Our to-do should save properly now! Save the file and switch to Terminal.
-
Enter:
rspecFinally our test passed! We resolved the snafus and our to-do was successfully saved to the database. As you can see, sometimes you will get unexpected errors. While it is annoying to troubleshoot them, it’s better to see them in the development stage.
As you saw in this exercise, test driven development involves writing tests that initially fail. Each error message points us further toward our goal of writing just enough code to get past the previous failure and move forward to the next failure. In the next exercise, we’ll add another feature test that ensures each user only sees their own to-dos.