Dive into this comprehensive Ruby on Rails tutorial to learn about various aspects like formatting Rails, coding simple styles, redirecting the site root page, editing the CSS, and adding basic security.
This exercise is excerpted from Noble Desktop’s past web development training materials. Noble Desktop now teaches JavaScript and the MERN Stack in our Full Stack Development Certificate. To learn current skills in web development, check out our coding bootcamps in NYC and live online.
Topics Covered in This Ruby on Rails Tutorial:
Formatting Rails, Coding Simple Styles in Rails, Coding Title Bar Titles, Redirecting the Site Root Page, Editing the CSS, Adding Basic Security
Exercise Preview
Exercise Overview
In this exercise, you will learn how to make basic formatting changes to the recipe application we created in the previous exercise. You must complete the previous exercise before starting this one.

Open Chrome.
Navigate to localhost:,000/recipes
-
You should see the recipes site you started building in the previous exercise. If you get an error and it can’t connect to the server you’ll have to restart the server as described in the following sidebar.
Restarting the Rails Server
In Terminal type
cdand a space.Drag the cookbook folder onto the Terminal window (so it will type out the path for you). It’s in Desktop > Class Files > yourname-Rails Class.
In Terminal hit Return to change directory.
In Terminal type
rails serverand hit Return.- Open Chrome and navigate to localhost:,000/recipes
Formatting Rails
In the browser, you should see the basic recipe file that we created. It is completely functional but lacks design. Let’s make a few adjustments so it looks a bit better.
Keep the recipe site’s browser window open until we tell you to close it. You’ll be using it through the exercise.
For this exercise we’ll with working with the cookbook folder located in Desktop > Class Files > yourname-Rails Class > cookbook
We suggest opening the cookbook folder in your code editor if it allows you to (like Sublime Text does).
-
In your code editor, open cookbook > app > views > recipes > index.html.erb
This file will look familiar to anyone who knows HTML. However, the .erb file extension indicates that the file also has some embedded Ruby code. You will notice some different tags in Ruby code.
NOTE: .rb stands for Ruby; .erb stands for Embedded Ruby.
-
Arrange your screen so that you can see both the recipe site’s browser window and your code editor, side-by-side.
Now that both things are open, let’s get to work. We are going to simplify the recipe index page by taking away the description and text fields. This is called modifying a view. (A view is a component of Rails that determines how a piece of content is going to be displayed on the site.)
-
In index.html.erb (in your code editor) let’s remove the unnecessary text. Delete the following lines of code. They are not next to each other in the code; you’ll have to find each line individually.
<th>Description</th>
<th>Ingredients<th>
<th>Directions<th>
<td><%= recipe.description %></td>
<td><%= recipe.ingredients %></td>
<td><%= recipe.directions %></td>
Save the file.
In Chrome, reload (Cmd–R) the page. The text you deleted should be gone, leaving Title and Prep time on the page. It may look a little bare for now, but it won’t once we have a whole list of recipes. Let’s work on formatting the actual recipe page.
Coding Simple Styles in Rails
To view an individual recipe page, click the Show link to the right of the recipe. This gives you the recipe view.
-
In your code editor, open app > views > recipes > show.html.erb
This shows us a simple HTML page. At the very top, there is a notice code line that allows you to add a notice to the page. (For example, we received such a notice after we successfully created the first recipe.)
Delete this line:
<strong>Title:</strong>-
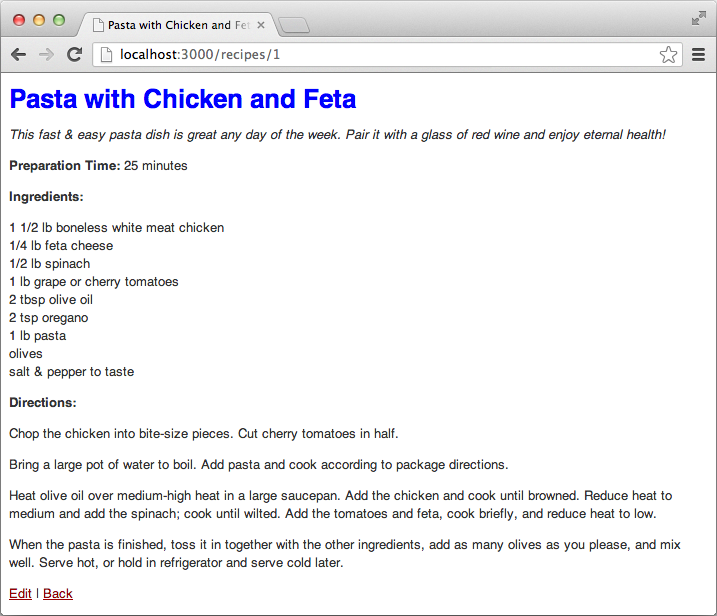
Let’s make each recipe title into a large header instead of a paragraph. Change the p tag into an h1 as shown in bold:
<h1>
   <%= @recipe.title %>
</h1>
Save the file.
-
Reload the page in Chrome. Doesn’t it look better?
In your code editor, delete this line:
<strong>Description:</strong>-
Add the following bold code to italicize the recipe description:
<em><%= @recipe.description %></em> Replace Prep time: with Preparation Time:
Save the file.
Reload the page in Chrome. That’s looking better, but there are still some improvements to be made.
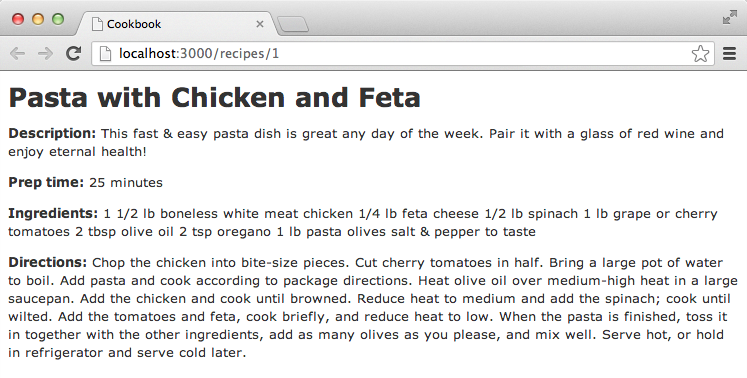
Notice that Ingredients are not on multiple lines. View the source code: Right–click or CTRL–click in an empty part of the browser window and select View Page Source.
-
In the ingredient list notice that the text is on different lines in the code, but there are no break
<br>tags.We need to translate these line breaks so Ruby will output break tags. We can do this very easily with something called
simple_format. -
In your code editor, still editing the show.html.erb file, find the following Ruby tag and add the bold code as shown:
<%=simple_format @recipe.ingredients %> Save the file and reload the browser.
The ingredients are now on multiple lines. If you check the source code again, you will see that Rails has automatically added
<br />HTML tags for each line.-
Let’s do the same thing for the Directions. In your code editor, still editing the show.html.erb file, add the bold code to the directions tag:
<%=simple_format @recipe.directions %> Save the file and reload the browser. See how much better it looks!
Coding Title Bar Titles
We want the recipe title in the URL to match whichever recipe is open at the time.
-
In your code editor, open cookbook > app > controllers > recipes_controller.rb
NOTE: We are about to edit the controller file. The function of the controller is to fetch data from the model and to show it to the user. A property of a controller is called an action.
Around line 12, find
def show. We are now on the Show page, and we want to set an additional variable called title.-
Add the following bold code:
def show
   @title = @recipe.title
end
This means: If there’s a recipe and it has a title, then we’re going to assign it to the special variable called
title. Save the file.
We have created a variable but now we have to display it. To do that we have to go to the global template for our app. In your code editor, open app > views > layouts > application.html.erb.
-
Add the following bold code.
<title> <%= @title + ' | ' if @title%> Cookbook</title>NOTE: The tall figure in the code above is called a pipe, and it is typed by pressing Shift–Backslash (
\) key, located directly above the Return key on the keyboard. It’s often used when writing code. Also make sure to type a space on either side of the pipe, separating it from the single quotes.An explanation of what we just typed:
- We use the equal to sign because we want this to print.
- We use the plus sign to add additional information.
- The single quotes denote that there is additional info (in this case, the separator.)
- Within the separator we add a pipe. This is a visual separator between the recipe title and the word cookbook.
-
if @titleassures the action will only happen if a title exists.
Save the file, reload the browser.
-
Look at the title bar at the top of the window (or the title in the current tab).
It should now say Pasta with Chicken and Feta | Cookbook. If a tab is too small to display the full title, mouse over the tab and pause for a tooltip to appear.
Remember that titles are important for search engines and bookmarks.
Redirecting the Site Root Page
-
In your browser navigate to localhost:,000
Our site is still displaying the Ruby on Rails Welcome page. Let’s change this so our website has its own homepage. To do this, we need to set the root of our site to open on the recipe index page.
In your code editor, open cookbook > config > routes.rb
-
Place your cursor near the bottom of the file, on the line above the
endstatement, and add a new line with the following code:root 'recipes#index' Save the file and reload the browser. Now a visitor who goes to the homepage will see the recipe index.
Editing the CSS
-
In your code editor, open app > assets > stylesheets > scaffolds.scss
NOTE: Notice this is a .scss (or Sass) file. Sass is a CSS preprocessor with many great features not found in CSS such as the ability to nest tags within each other. Rails will automatically compile Sass into a CSS file which is used by the final web app.
-
Let’s make some changes to the font styles. Find the following code (at the top) and delete the verdana font:
body, p, ol, ul, td { font-family: helvetica, arial, sans-serif; font-size: 13px; line-height: 18px; } -
Find the following code (starting around line 21) and change the color of the links (so they stand out more) by making the code replacements shown in bold below:
a {
   color: #f00; }

   a:visited {
      color: #900; }

   a:hover {
      color: #fff;
      background-color: #900; }
Great! You’ve just changed several properties of the page’s links: the color, the visited color, and the background color that appears behind a link when a visitor hovers their mouse over the link.
Save the file.
Reload your browser. Notice the font has changed from Verdana to Helvetica and the links now have a new red color scheme. Let’s add a bit more color to the page.
Switch back to editing scaffolds.scss in your code editor.
-
Insert a new rule above the a rule we just edited by adding the following bold code:
h1 { color: #00f; } a { color: #f00; } -
Save the file and reload the browser. Check out the blue color on the heading Listing recipes. If you haven’t used SCSS before, hopefully this has helped you see that it’s not too different from regular CSS. Any CSS code is also valid SCSS code. While there are many useful things that SCSS can do that CSS can’t, you do not have to take advantage of them unless you want to.
It’s also important to realize that, although Rails is able to build the scaffolding of an app very quickly, we are later able to customize it as much as we want.
Adding Basic Security
It’s a good idea to lock the application for use by authorized users only so random visitors can’t post spam to the system, etc. There are many user authentication systems in Rails, and we will talk about at least one of them later, but for now, a very basic way to keep the system private is to use http basic authentication. Let’s try it.
-
In your code editor, open app > controllers > application_controller.rb.
The application controller is the master controller that sits behind all the other controllers.
-
Near the bottom of the file, just above the
endline, add the following bold code:class ApplicationController < ActionController::Base http_basic_authenticate_with name: 'student', password: 'student' end -
Save the file and reload the browser. Notice that a user name and password are now required. Type in the username and password that we filled in above (student for both) and it works!
What if we wanted to allow some minimal participation by viewers so that they could comment and share the recipes? In that case we wouldn’t need to set security for the whole site but just in how the recipes function.
Switch back to editing application_controller.rb.
-
Delete the line we just typed:
http_basic_authenticate_with name: 'student', password: 'student' Save the file.
Open app > controllers > recipes_controller.rb
-
Near the top of the code, on a new line just under
before_action, add the following bold code. (Although it appears on multiple lines below, you should type it as one line of code with a single space after the comma.)class RecipesController < ApplicationController before_action :set_recipe, only: [:show, :edit, :update, :destroy] http_basic_authenticate_with name: 'admin', password: 'student', except: [:index, :show] -
Save the file and reload the browser. Note that a visitor can view and show a recipe, but if they click on Edit, a user name and password are required (user name: admin and password: student). Good thing our site is now secure!
Congratulations! You now have a functional web app up and running in Rails!
Switch back to Terminal.
Stop the server by hitting Control–C.