Dive into this comprehensive tutorial on how to use the Spot Removal tool in Lightroom, guiding you through the process of seamlessly removing a complex shape from an image and changing the source area for a flawless finish.
This exercise is excerpted from Noble Desktop’s past Lightroom training materials and is compatible with Lightroom updates through 2020. To learn current skills in Lightroom, check out our Photo Retouching Certificate and graphic design classes in NYC and live online.
Topics Covered in This Lightroom Tutorial:
Removing One Kayak from the Photo, Changing the Source Area
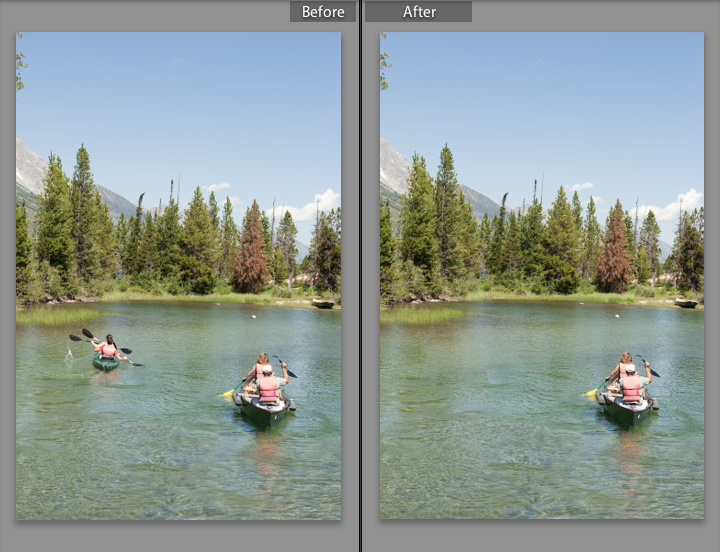
Exercise Preview
Exercise Overview
In this exercise, you’ll use the Spot Removal tool to seamlessly remove a large, complex shape from an image in no time at all.

Removing One Kayak from the Photo
Once again, we will work with one of the photos you imported in the first exercise.
In the Library module, select the kayaks photo (20110822_YourName_022).
Press the D key to switch to the Develop module.
Below the Histogram panel on the right, click the Spot Removal tool
 .
.At the top of the Navigator panel, click on 1:1 to view the image at 100%. Move the box over the image so you can see the leftmost kayak.
Press the right bracket key
]a few times to increase the brush size. (We recommend a brush size about as wide as the black part of the kayakers’ paddles.)-
Click and drag to paint over the kayakers, the splash, the wake, and the kayakers’ reflection (as shown to the left in the screenshot below). Don’t worry about being precise; while you are clicking and dragging, the selected area will just appear like a lumpy white blob (as shown on the right-hand image):
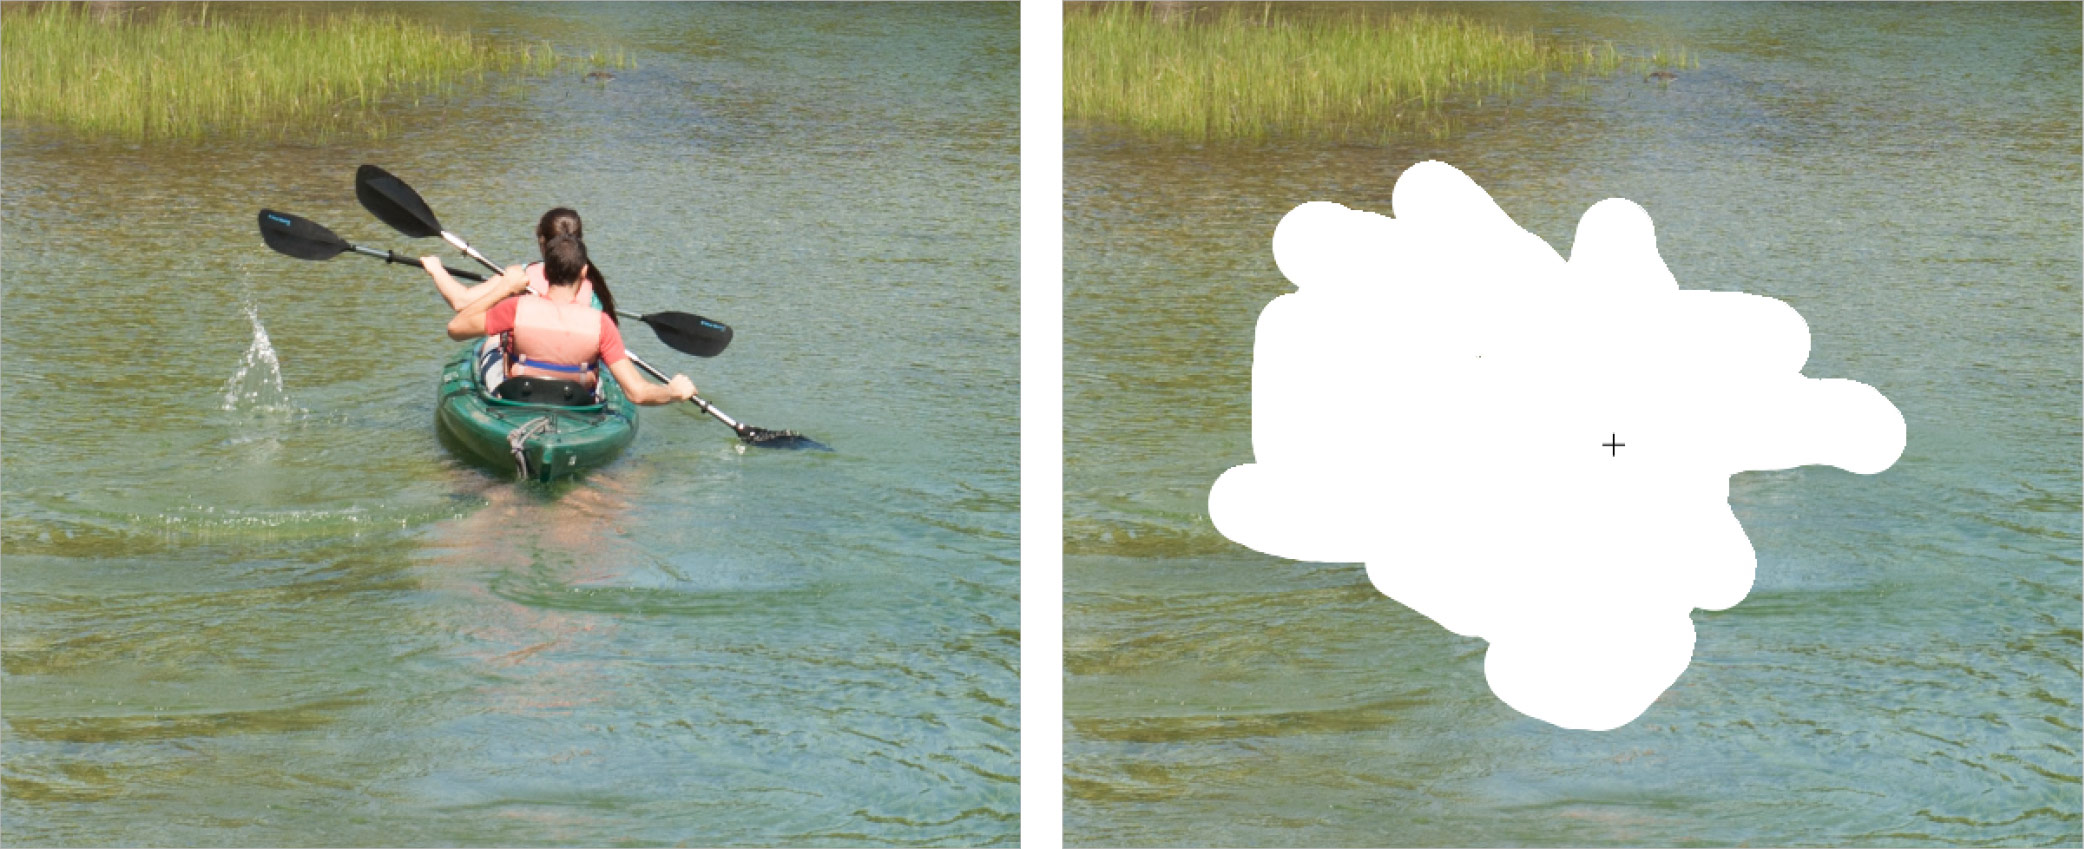
When you are done selecting everything, let go of the mouse. Lightroom will automatically sample an portion of water that it predicts will match the area.
Press the Z key to zoom out. Notice that Lightroom shows the outline of area the image it has sampled from to replace the leftmost kayak.
Click the Spot Removal tool
to hide the borders of the sampled areas.
Changing the Source Area
Although Lightroom does a good job automatically, we can fine-tune its work.
Click the Spot Removal tool
again to select it.Activate the area where the kayakers used to be by clicking its circle
 and a black dot will appear inside the circle
  to show it’s activated. A black dot will also appear in the area it is sampling from, the source.
-
Click on the source area’s circle
and drag the source area closer to the shore. As you drag, you will see a live preview in the area we are replacing. Try to make the effect look as seamless as possible, and take your time in choosing the best location to sample from. This is what we ended up choosing: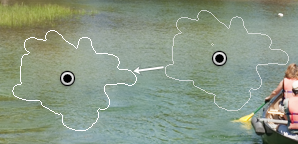
-
Take a close look at the result. The replacement may not be perfect—you might be better off using Photoshop if you wanted to disguise something really masterfully, but Lightroom’s Advanced Healing Brush is pretty powerful for a quick fix!
Water is a difficult material to clone or replace in a photograph, and this Spot Removal tool handles it well. It can handle smooth areas, or regular patterned areas, with even better results, so it’s a good thing to have in your toolbelt!
