Master the basics of Lightroom’s Library module with this comprehensive tutorial, covering topics such as importing photos, adding metadata, and renaming photos.
This exercise is excerpted from Noble Desktop’s past Lightroom training materials and is compatible with Lightroom updates through 2020. To learn current skills in Lightroom, check out our Photo Retouching Certificate and graphic design classes in NYC and live online.
Topics Covered in This Lightroom Tutorial:
Importing Photos, Adding Metadata, Renaming Photos
Exercise Preview
Exercise Overview
In this exercise, you will begin working in Lightroom’s Library module. You will learn how to import photos and add metadata such as copyright information.

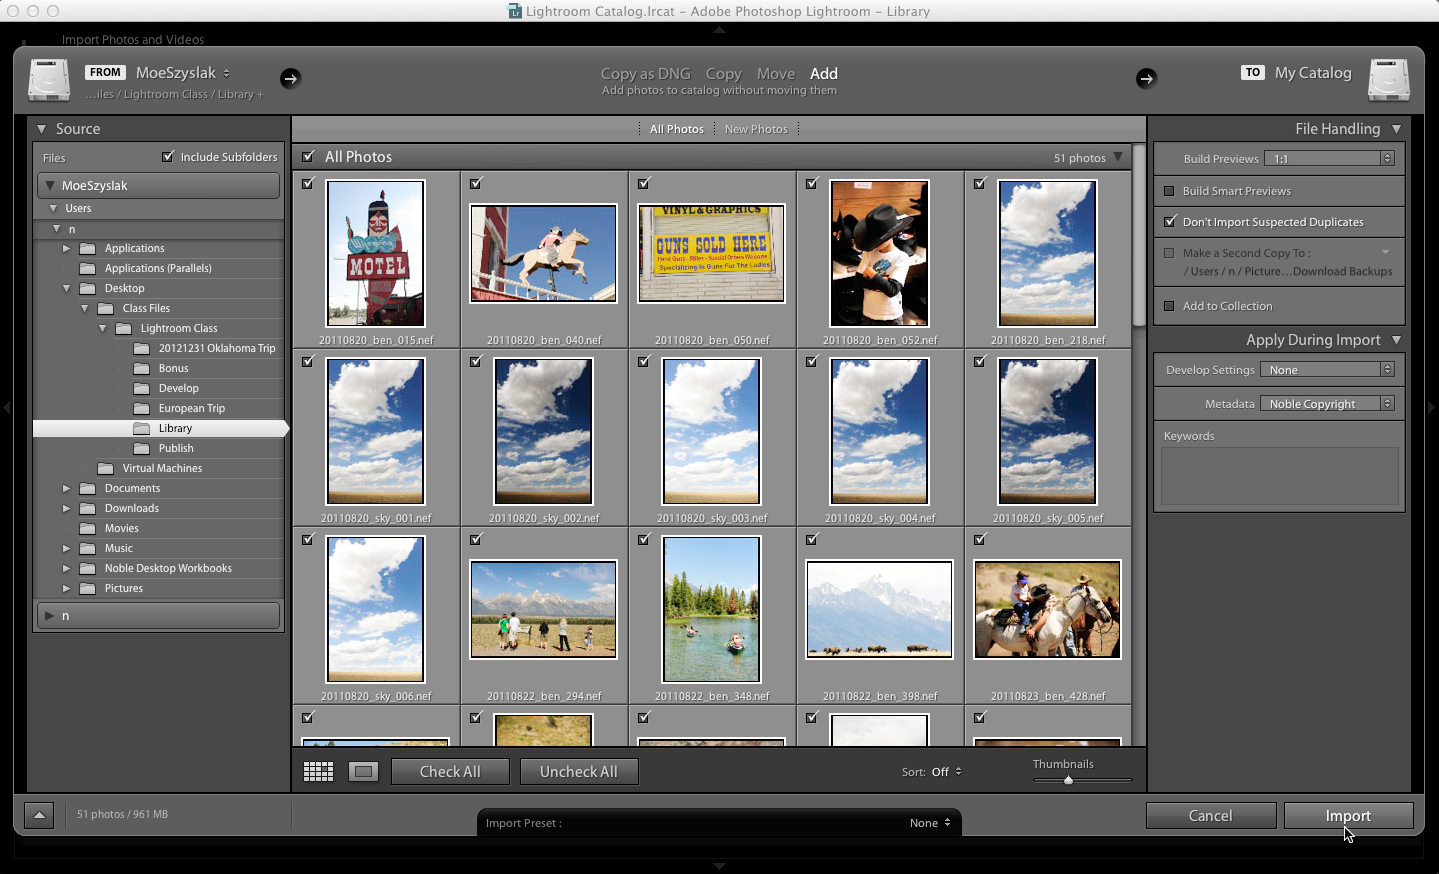
Importing Photos
We have prepared a folder of images for you to use in this exercise. Let’s import those images into Lightroom.
Launch Lightroom.
-
At the top right of the screen, if the Library tab isn’t highlighted, click on it to switch to the Library module.
This workspace is for viewing and managing your catalog of photos.
At the bottom of the left panel, click Import.
At the top left of the window that opens, under Source, expand the folder with the same name as your computer, then navigate to Desktop > Class Files > Lightroom Class > Library.
- The options for importing photos are located at the top middle of the screen. Notice there are four options for importing your photos:
- Copy as DNG: Converts photos to a DNG file type in a new location and then adds them to the catalog.
- Copy: Copies photos to a new location and adds them to the catalog.
- Move: Moves the photos to a new location and adds them to the catalog.
- Add: Adds photos to the catalog without moving or copying them.
-
Select Add. This option will add the photos to the catalog without moving them from their current location.

On the right side of the window, there are some additional panels with more import options. You may have to open the panels to see all the options. Click on File Handling and Apply During Import to open the panels.
- In the File Handling panel, set the following options:
- From the Build Previews menu, choose 1:1.
- If Build Smart Previews is checked, uncheck it. You will learn about these later.
- Check Don’t Import Suspected Duplicates.
Under Apply During Import, from the Develop Settings menu, choose None.
Adding Metadata
Let’s add some metadata to our images.
-
Under Apply During Import, from the Metadata menu, choose New.
A New Metadata Preset window will open. Here you can add metadata such as copyright information, that will be added to every photo you import.
- Set the following options:
- Preset Name: YourName Copyright
- Under IPTC Copyright, next to Copyright type Opt–G (Mac) or hold down the ALT key and on the numeric keypad type 0169 (Windows) to insert a copyright symbol ( © ), followed by YourName and Year.
- From the Copyright Status menu, choose Copyrighted.
- Under Rights Usage Terms, type: No use without photographer’s written permission.
- Under IPTC Creator, next to Creator type YourName.
- Add your appropriate information under Creator City, Creator Country, Creator Phone, Creator E-Mail, and Creator website.
Click Create.
In the Metadata menu, make sure YourName Copyright is now selected.
Click the Import button on the lower right to import the photos.
Renaming Photos
Now that the photos have been imported, let’s rename them.
Expand the Catalog panel on the left if it is not already open.
Click on All Photographs.
Go to Edit > Select All or hit Cmd–A (Mac) or CTRL–A (Windows) to select all the photos.
Go to Library > Rename Photos.
From the File Naming menu, choose Edit to open up the Filename Template Editor.
-
From the Preset menu, choose Custom Name—Sequence.
This will rename all our photos with some Custom Text followed by a dash ( – ) and a Sequence # as shown in the text box. Along with these presets, we can also create our own custom filename template.
In the text box, select and delete all the text.
- In the Sequence and Date section:
- If the Date menu (second menu) is already set to Date (YYYYMMDD), click the Insert button next to it to add this field to the text box.
- If not, from the Date menu choose Date (YYYYMMDD). The field will automatically be added to the text field.
In the text box, type an underscore (
_) after the date field that was just added.In the Custom section at the bottom, click the Insert button next to Custom Text.
In the text box, type another underscore (
_) after the custom text field that was just added.- In the Sequence and Date section:
- If the Sequence menu is already set to Sequence # (001), click the Insert button next to it to add this field to the text box.
- If not, from the Sequence menu, choose Sequence # (001). The field will automatically be added to the text field.
From the Preset menu at the top of the window, choose Save Current Settings as New Preset.
Name the new preset YourName Template.
Click Create.
Click Done.
-
Back in the Rename Photos window, set the following:
Custom Text: YourName Start Number: 1 Click OK to rename all the photos you had selected.
Click on any of the photos.
In the toolbar at the bottom of the screen, notice that the file has been renamed with the new filename format we specified. Awesome!
