Learn to develop your own iOS application with our comprehensive tutorial that covers topics such as using Xcode, Storyboards, Auto Layout, and adding buttons and labels to an app, and includes a hands-on exercise.
This exercise is excerpted from Noble Desktop’s past app development training materials and is compatible with iOS updates through 2021. To learn current skills in web development, check out our coding bootcamps in NYC and live online.
Topics Covered in This IOS Development Tutorial:
Using Xcode, Storyboards, Using Auto Layout, Adding Buttons & Labels to an App
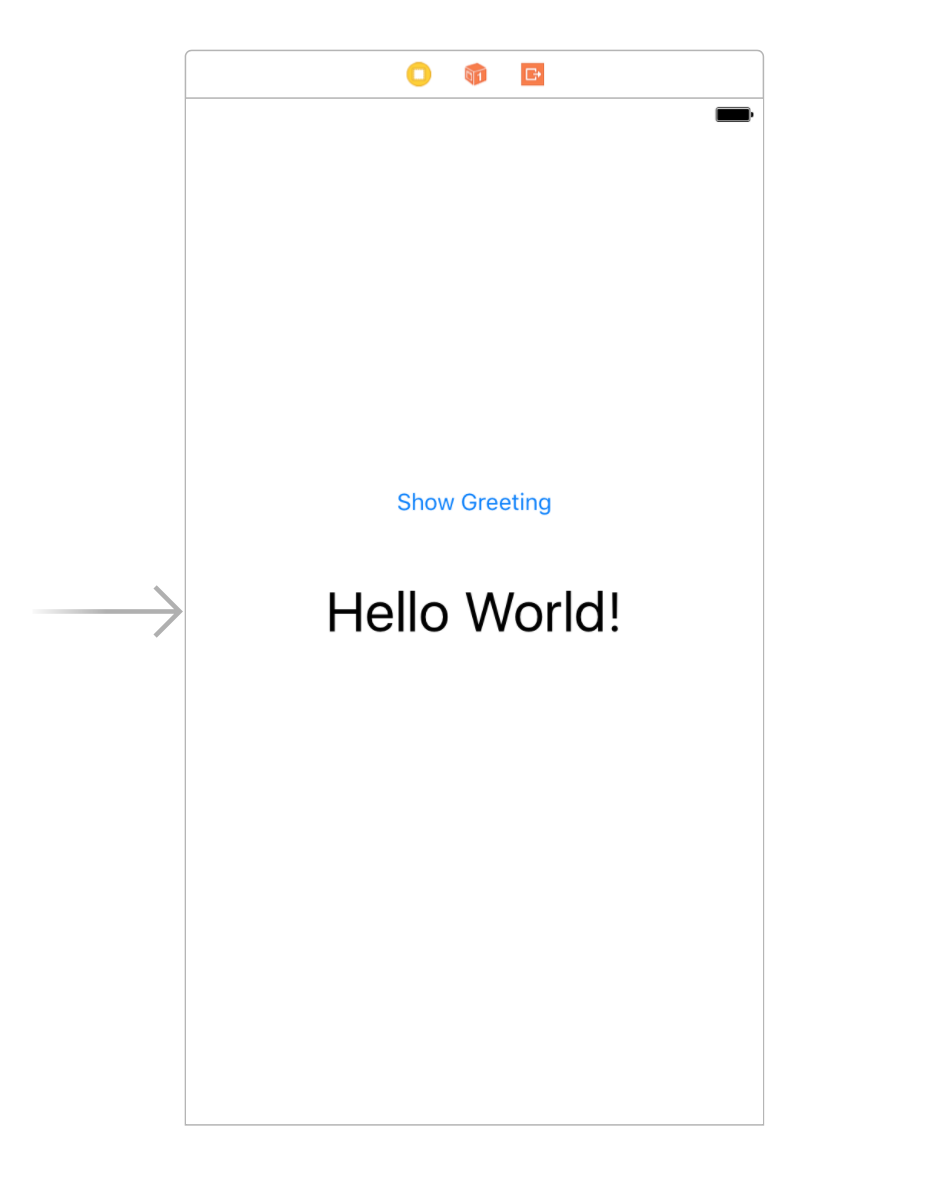
Exercise Preview
Exercise Overview
In this exercise you’ll create a very simple app that will display some text when you tap a button.

Getting Started
Launch Xcode (it’s in the Applications folder). If you do not currently have Xcode installed on your Mac, refer to the Setup section earlier in this workbook for installation instructions.
If you see the Welcome to Xcode window, in the center, click on Create a new Xcode project. If you don’t see the Welcome to Xcode window, go to File > New > Project.
Under iOS and Application double–click on App.
-
Set the following:
- Product Name: HelloWorld
- Team: None (do not change)
- Organization Identifier: Your Name
- Interface: Storyboard
- Language: Swift
- Leave Use Core Data unchecked. Core Data allows users to actually save data on their devices.
- We won’t be learning how to perform tests for this app, so uncheck Include Tests.
- Click Next.
- You’ll now be asked where you want to save the project. Navigate into the Desktop > Class Files > yourname-iOS App Dev 1 Class folder.
- Check Create Git repository on my Mac if it is not already checked. (This can be used to track changes you make over time.)
-
Click Create to finish specifying the location of the new Xcode project.
You should now see a summary of general information about your app. Most of it is used in the final stages of app development, when you’re ready to deploy your app to the App Store. First things first—let’s start developing this app!
Storyboard, View Controller, & Object Library
-
The section on the far left is called the Project navigator
 .
.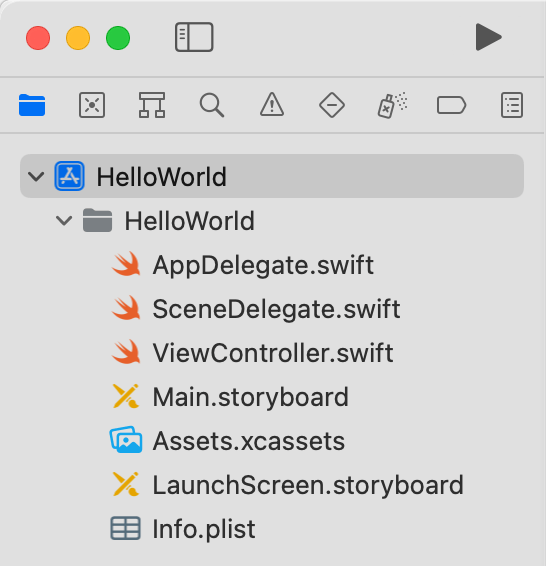
In the Project navigator, you’ll find a list of files Xcode created for us. We’ll explain each of these options over time.
- In the Project navigator’s list of files, click on Main.storyboard.
-
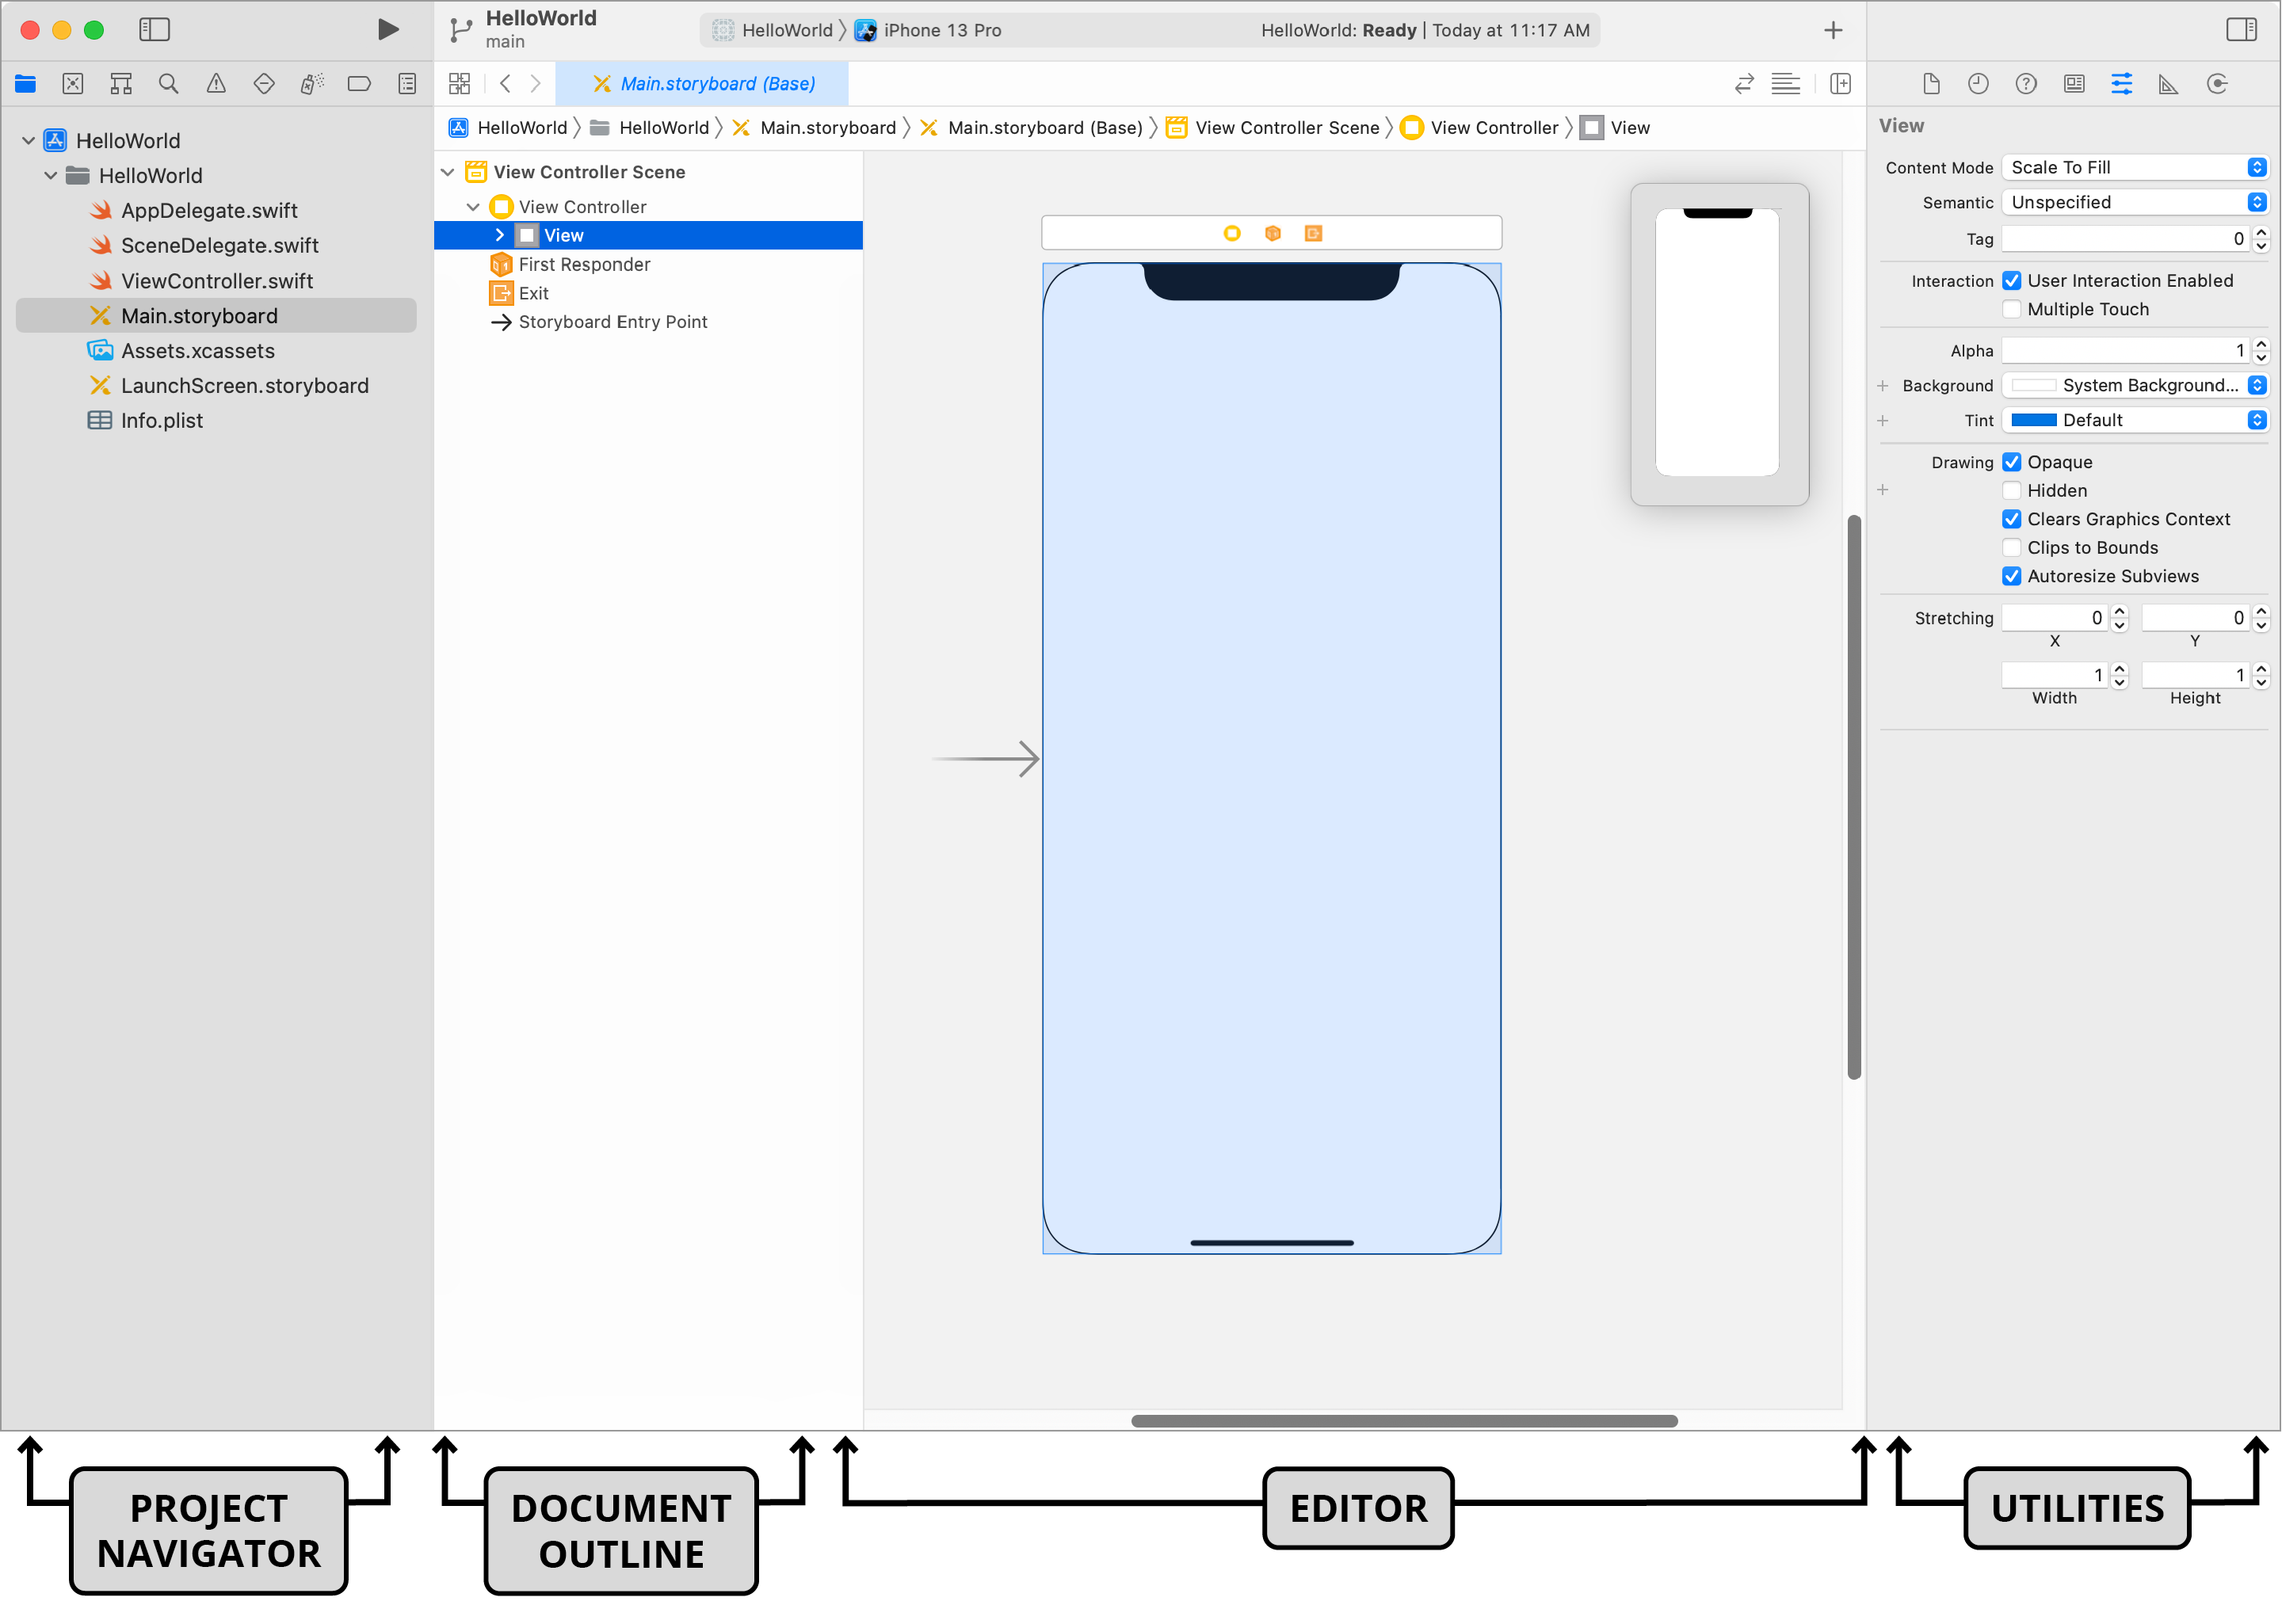
Let’s get to know Xcode’s interface a bit better. It is divided into several areas. These areas are not labeled on-screen, so we’ve labeled them in the screenshot below. If you don’t see a particular section, don’t worry, we’ll get to them soon.
-
The main center area is the Editor. This is where you will view and edit the contents of files.
The column to the right of the Project navigator (second column from the left) is the Document Outline. If you do not see this column, at the bottom left of the Editor area, click the Show Document Outline button
 to show it.
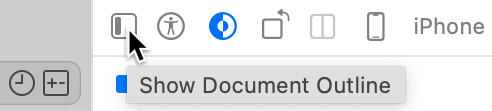
The column on the right-hand side of the window is the Utilities area, which includes Inspectors (which allow you to set options).
To the right of the Project navigator, go to the second column, the Document Outline area and click on View Controller. (You may have to expand View Controller Scene to see it.)
Xcode provides us with many pre-made objects that can be inserted directly onto the View. Towards the top right of the window (in the Editor area) click on the Object Library icon
 to see various objects we can use:
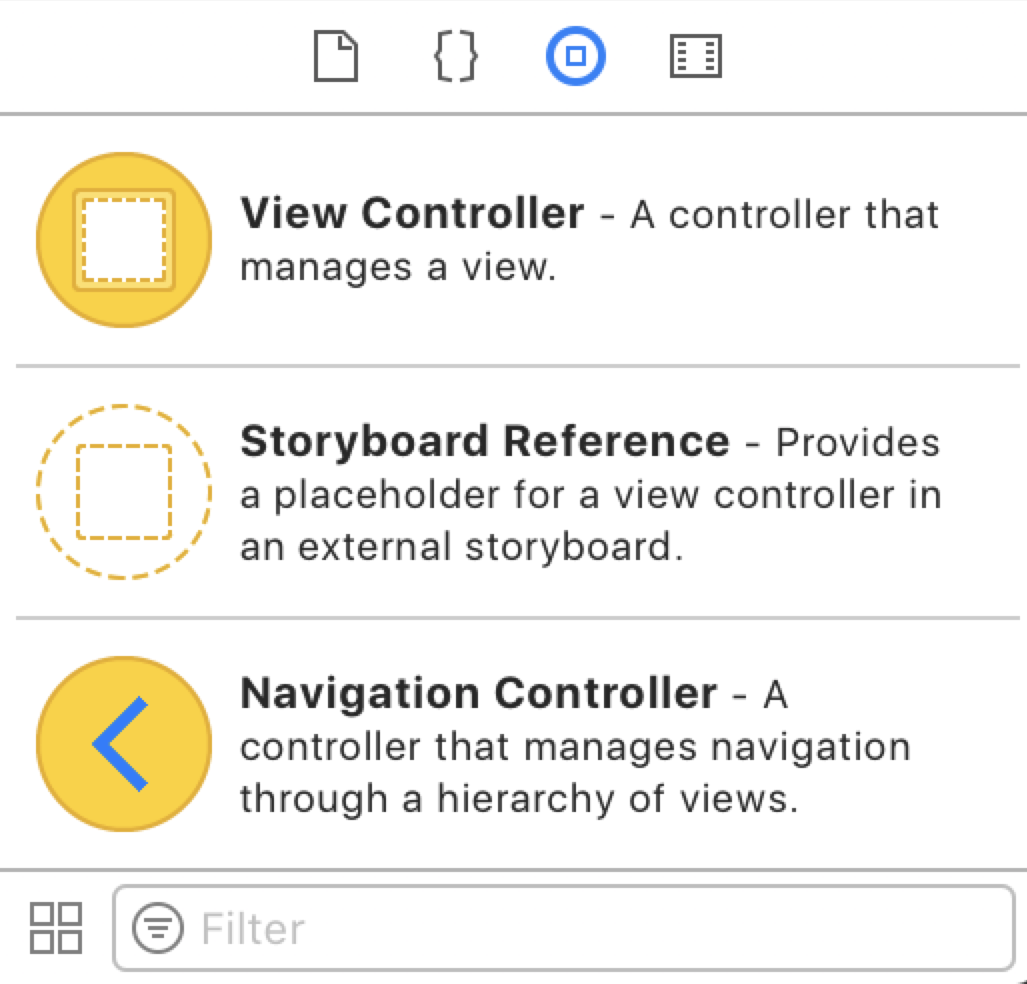
- Scroll through the list of objects to see some of the items available to us.
- We want to find the Button. Instead of scrolling through the long list to find it, at the bottom there’s a search field. In the search field, type button to filter the list. Now you can only see objects with button in their name.
-
Drag the Button from the Object library onto the center of the View in the Editor area, as shown below. Use the blue vertical guide that automatically appears to center the button exactly.
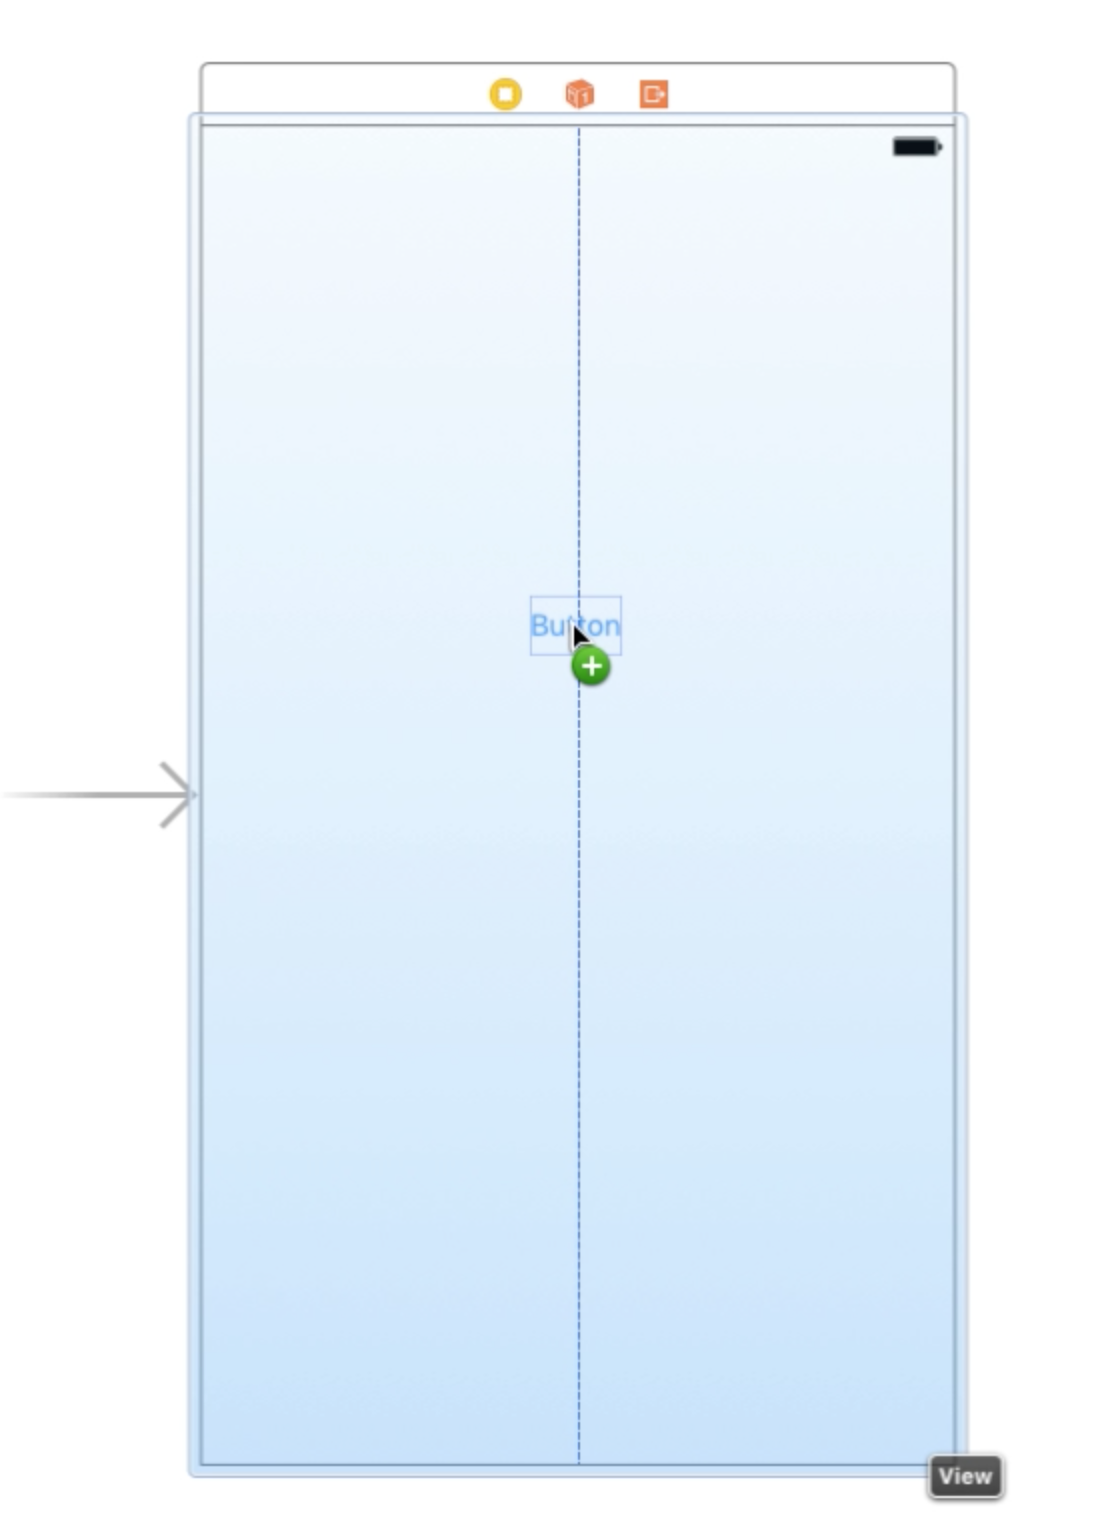
NOTE: Sometimes Xcode will take a moment to respond when you first pull an object out of the library. If you don’t see the object appear on the view right away, just keep holding the mouse button down and wait until Xcode catches up with you.
- Let’s preview this button before we do anything else to it. In the upper center of the screen, next to HelloWorld, select iPhone 13 Pro.
-
Hit the Run button
 to launch the Simulator. If this is your first time doing it, you could have to wait 60 seconds or more for the simulator to launch. Now’s a good time for a nap or a cup of coffee. Or both!
NOTE: If you have to scroll to see the entire view, go into Window > Physical Size.
- Once the simulator launches, find the Button text in the center. Click on it and you will see that it’s active, but only blinks, without doing anything.
- Switch back to Xcode.
-
Double–click on the Button text, and change it to Show Greeting. When you hit Return, the text will change and the button will resize.
Now we are going to add a label for the text that will display when we click Show Greeting. - In the Object library, type label in the search field to see the Label object.
- Drag a Label out and use the guides to center it horizontally underneath the Show Greeting button.
- To the right of the View Controller, at the top, are the Inspectors. Choose the Attributes inspector
 if it isn’t already selected.
 - To the right of Font you will see a little type icon
 . Click it!
 - Under Size change the number to 36, then click Done.
Still in the Attributes inspector, just below Text is the Label text. Change this to Hello World! (including the exclamation mark).
23.You may need to center the text in the label using the Attributes inspector. Near the top, next to Alignment, click the center button  .
.
Let’s preview in the Simulator just to see where we are at. It’s good practice to click the Stop button
 before clicking the Run button . Go ahead and do that now, and take a look at the screen.
Funtastic! Now let’s make the text label invisible so that the button can reveal it. Return to Xcode.
- Click on the Hello World! label, then in the Attributes inspector, scroll down until you see Drawing. Click on Hidden.
- Click Stop then click Run .
-
While in the Simulator, go into the menu Hardware > Rotate Left.
Notice that the location of the Show Greeting button will now be awkward or even off the screen. We can fix that by putting some constraints on the button and the label.
Adding Constraints
- Switch back to Xcode.
-
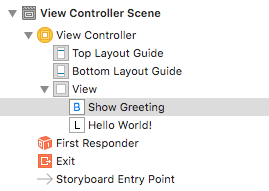
Click on the Show Greeting button. Notice in the Document Outline panel that Show Greeting is highlighted, and is just under View.
-
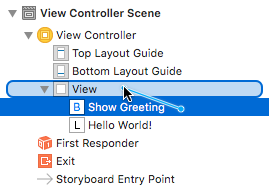
In the Document Outline, hold the Control key and drag from Show Greeting to View just above it. As you drag, a blue line will appear showing you the connection you are creating. Once you release the mouse, you’ll get a popup menu where you will select Center Horizontally in Safe Area.
NOTE: If you have a two-button mouse (or an Apple Magic Mouse set to work as two buttons) you don’t have to hold Control. Instead, you can drag with the Right mouse button instead of the left button. So either a Right mouse button–drag or a Control–drag will let you make the connection line.
You’ll know you succeeded when you see Constraints listed in the Document Outline under the Hello World! label.
- We also need to put some constraints on the label. Control–drag the Hello World label to the View. When you get the pop-up connection, choose Center Horizontally in Safe Area.
- Control–drag again from the label to the View and this time choose Center Vertically in Safe Area.
After you do this you may notice some yellow lines around the label. This is because the view does not match the constraints you just put in. In order to harmonize this, you need to click the little Update Frames button
 that is located at the bottom right of the Editor window.
- Let’s see how this looks by rotating the view in the Editor. You can do this by clicking on the Orientation
 icon.
icon. - If you need to zoom out to see the whole screen, use the menu Editor > Zoom and choose a smaller percent.
- You’ll see that the Show Greeting button is adrift. This is because we haven’t given it any vertical constraints. It basically doesn’t have enough information to place itself correctly. The button has horizontal constraints, but no vertical constraints.
- Switch back to the Portrait orientation by clicking the same Orientation icon.
- In the Storyboard, drag the Show Greeting button down so that it is centered right above the Hello World! label. The button should snap into a spot as you do right above the label!
-
In the Document Outline, hold the Control key and drag from the Hello World! label to the Show Greeting button. Once you release the mouse, from the pop-up menu, select Vertical Spacing.
NOTE: If you also see some yellow lines, remember to click the Update Frames button
at the bottom right of the Editor. Now try the rotation again by clicking on the Orientation
icon.
Connecting Code
We now have to program the button to show and hide the Hello World label.
- Let’s change our work area a little. First, at the top right, click on the Adjust Editor Options button
 and choose the Assistant option. That’s going to show the code for the scene.
- Let’s also make a little room by hiding the inspectors. You can do that by clicking the little button at the top right
 .
. -
Looking at the code, if you have an older version of Xcode installed, there is some that we don’t need here. Select the line that starts with override func didReceiveMemoryWarning(), and the three lines underneath that, to delete them.
override func didReceiveMemoryWarning() { super.didReceiveMemoryWarning() // Dispose of any resources that can be recreated. } - You can also delete the two lines that say // Do any additional setup after loading the view, typically from a nib.
-
You should be left with this code:
import UIKit

class ViewController: UIViewController {

   override func viewDidLoad() {
      super.viewDidLoad()
   }

}
This code is going to control the scene to the left. Think of the code as the director, who is going to direct, or guide the actors (the label and button) on the stage (the view). In order to control the actors, a connection needs to be made between the code and the actors, or objects.
-
As shown below, let’s Control–drag the Hello World label just below the class ViewController line. When you release the mouse, you’ll get a pop-up window.
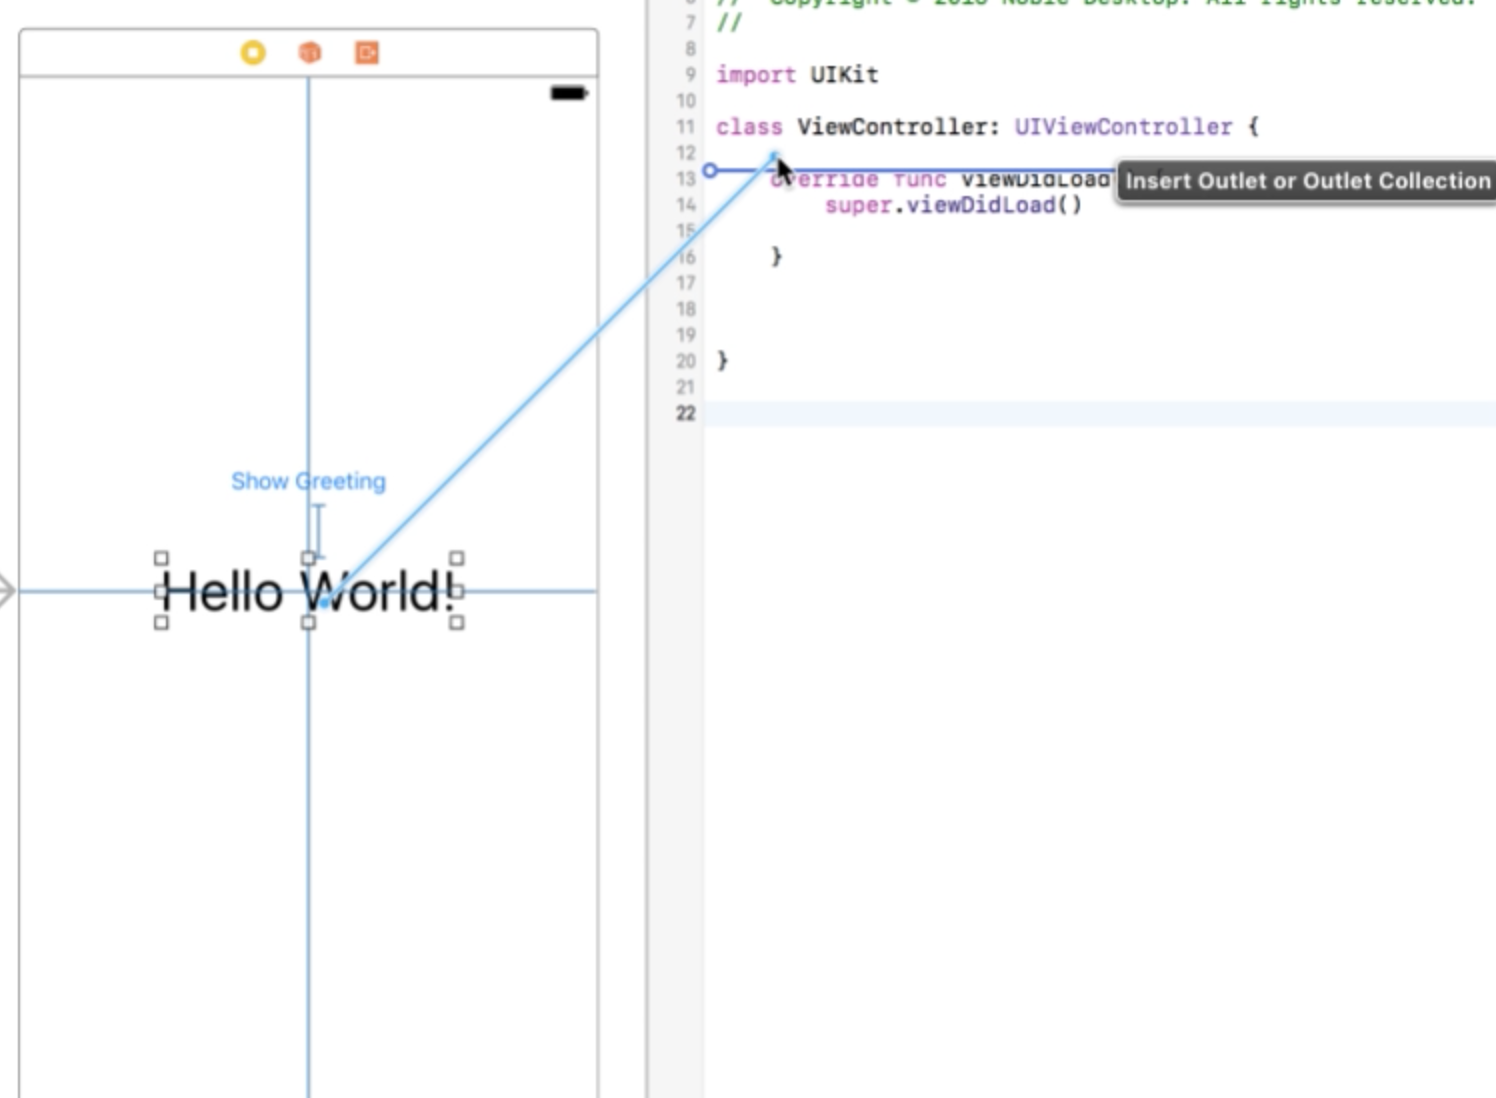
A prompt will appear. Under Name type in helloLabel, then click the Connect button.
-
You will see some code show up on the right:
import UIKit class ViewController: UIViewController { @IBOutlet weak var helloLabel: UILabel! override func viewDidLoad() { super.viewDidLoad() } } -
Make sure your code looks like the example above. You probably should add a linespace above and below that text so it is easy to read.
Now that we have defined the label as something called helloLabel, we can do things to it. We need to define the button as well, so we can have the code tell the button to show the label.
- Let’s Control–drag the Show Greeting button just below the @IBOutlet line. You’ll get a pop-up window when you do this.
- From the Connection menu, choose Action (because we want an action to happen when this button is tapped).
-
Under Name type in toggleGreeting, then click the Connect button. You will see some code show up on the right:
import UIKit

class ViewController: UIViewController {

   @IBOutlet weak var helloLabel: UILabel!

   @IBAction func toggleGreeting(_ sender: Any) {
   }

   override func viewDidLoad() {
      super.viewDidLoad()
   }

}
We just created a function.
NOTE: A function is a set of instructions that have one specific purpose. We define functions in code so that we can reuse them whenever we want.
In between the two curly brackets that were just created, hit a Return, so that you have some space to work with.
-
Type in:
@IBAction func toggleGreeting(_ sender: Any) {
   helloLabel.isHidden = false
}
isHidden is one of the properties of a button. It is built into the object. Think of people as objects. What properties do they have? They might have glasses, or shoes, or brown hair. We can access these properties of objects in Swift.
NOTE: We use a Boolean (true or false) argument to say whether the property is true. This property is either on or off (hidden or not).
So what we’ve just said is for the button to show the label when the button is tapped (we don’t want it hidden).
-
Run in the simulator and test it out.
You’ll see that the button works! (Or should!) But it doesn’t toggle the label off when we click it a second time.
- Go back to Xcode.
-
Change the text to this:
helloLabel.isHidden =!helloLabel.isHiddenMake sure your text is typed in exactly as above!
What we’ve just done is add the logical operator !, which means not.
So the line is now saying: Toggle the greeting to the opposite of what it is. Basically, if it is hidden, make it unhidden. If it is showing, hide it.
Run the app and test it!
Assuming all went well, what should you do next? Try the exercise again, but this time play around with some fonts and colors. They are all available in the Attributes inspector
. Repetition is key with Xcode or Swift, because there is so much to learn. If you want to continue to the next exercise go ahead. But consider returning to this, and every exercise, more than once.