Dive into a comprehensive GreenSock tutorial that covers using GSAP’s ScrollTo plugin, adding functionality to navigation buttons, and incorporating rollover effects using the CSSPlugin’s className property.
This exercise is excerpted from Noble Desktop’s past web development training materials created in partnership with GreenSock. It is compatible with GreenSock version 2. To learn current skills in web development, check out our coding bootcamps in NYC and live online.
Topics Covered in This GreenSock Tutorial:
Using GSAP’s ScrollTo Plugin, Adding Functionality to the Navigation Buttons, Adding Rollover Effects Using CSSPlugin’s ClassName Property
Exercise Preview
Exercise Overview
In this exercise, we will use GSAP’s ScrollTo plugin to code a navigation bar that scrolls to various positions on the page. We will also create an animated menu that makes use of the className property of GSAP’s CSSPlugin.

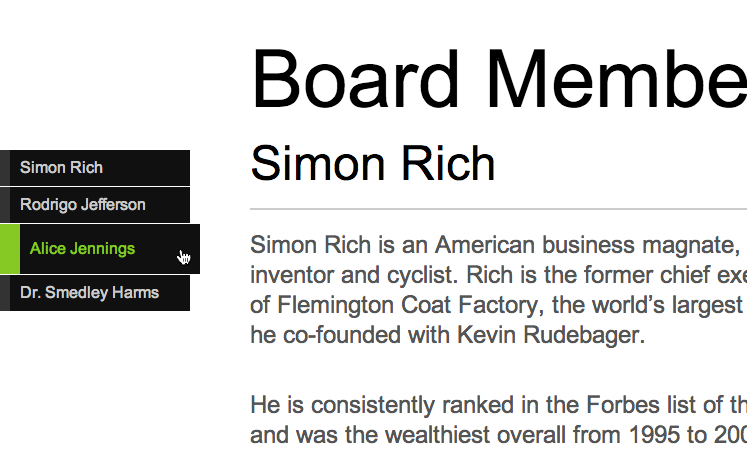
Previewing the Finished Animation
To take a look at the animation we’ll be building, open Google Chrome.
In Chrome, hit Cmd–O (Mac) or CTRL–O (Windows), navigate to Desktop > Class Files > yourname-GSAP Class > Board Members, and double–click on finished.html.
Mouse over (and click on) the navigation bar at the left of the page. Notice that each name scrolls smoothly to the appropriate biography on the page.
Close the page.
Examining the DOM Structure & JavaScript
In your code editor, open yourname-GSAP Class > Board Members > start.html (or the entire Board Members folder if your code editor allows).
Preview start.html in Google Chrome.
The biographies are on the page, and some basic HTML and CSS has the page looking pretty sleek already, but if you try clicking the navigation buttons on the left, you’ll see that they lack any functionality. Leave the page open in Chrome so we can reload it later.
-
Return to your code editor and check out the HTML setup on lines 49–76 (pay particular attention to the code we’ve highlighted below in bold):
<ul>
   <li data-scrollTo="#person1Bio">Simon Rich</li>
   <li data-scrollTo="#person2Bio">Rodrigo Jefferson</li>
   <li data-scrollTo="#person3Bio">Alice Jennings</li>
   <li data-scrollTo="#person4Bio">Dr. Smedley Harms</li>
</ul>
<div id="main">
   <h1>Board Members</h1>
   <div class="section" id="person1Bio">
      <h2>Simon Rich</h2>
Code Omitted To Save Space
</div>
   <div class="section" id="person2Bio">
      <h2>Rodrigo Jefferson</h2>
Code Omitted To Save Space
</div>
   <div class="section" id="person3Bio">
      <h2>Alice Jennings</h2>
Code Omitted To Save Space
</div>
   <div class="section" id="person4Bio">
      <h2>Dr. Smedley Harms</h2>
Code Omitted To Save Space
</div> </div> -
In that code, note the following:
- The buttons are set up as items in an unordered list.
- Each list item has a custom HTML5 data attribute (data-scrollTo) which we made up. We set the value to the CSS selector for the appropriate div (1 of the 4 person#Bio divs).
-
Check out lines 87–97, where we set up wrappers for the jQuery navigation functions click(), mouseenter(), and mouseleave() to save you a little time when we code them later:
$navButtons.click(function(){

});

$navButtons.mouseenter(function(){

});

$navButtons.mouseleave(function(){

});
Using GreenSock’s ScrollTo Plugin
The ScrollTo plugin allows TweenLite and TweenMax to animate the scroll position of a window or the content of a div. For more information, check out the docs at: greensock.com/docs/Plugins/ScrollToPlugin
-
To be able to access this plugin, add the following script on line 79:
<script src="js/gsap/TweenMax.js"></script> <script src="js/gsap/plugins/ScrollToPlugin.js"></script> <script src="js/jquery/jquery-1.10.1.min.js"></script> -
Before we set up the navigation, let’s do a few basic tests of the ScrollTo plugin’s features. Type the following bold code beneath the mouseleave() function, around line 99:
TweenLite.to(window, 2, {scrollTo:600});The target of this tween is the window. We have instructed it to scroll the entire window to a position of 600 over the course of 2 seconds.
-
Save the file and reload the page in Chrome.
As soon as the page loads, it scrolls downwards 600 pixels. Cool!
-
Try reloading the page. It doesn’t restart at the top and move 600 pixels; it just stays at the same position 600 pixels down the page.
This isn’t a bug in our animation; this is part of modern web browser behavior. (Next time you’re reading a long webpage, try reloading it. You’ll be conveniently returned to the same spot you were last viewing!) We’ll have to keep this browser behavior in mind as we build this page.
- Keep the page open in Chrome and return to your code editor.
-
Instead of scrolling to a specific pixel value, let’s try scrolling to an element on the page; for example, the Rodrigo Jefferson biography div (#person2Bio). Change the scrollTo value as shown below in bold:
TweenLite.to(window, 2, {scrollTo:"#person2Bio"}); -
Switch back to Chrome and:
- Manually scroll to the top of the page.
- Reload the page, and it should scroll down to Rodrigo Jefferson.
Adding Functionality to the Navigation Buttons
Let’s apply this scroll behavior to our buttons. Our HTML5 data attributes contain the CSS selector for the element we want to scroll to, so we’ll have to extract that and pass it to our ScrollTo tween.
-
Return to your code editor and delete the line of code you just wrote:
TweenLite.to(window, 2, {scrollTo:"#person2Bio"}); -
Inside the click() function (which starts around line 87), add the following bold code:
$navButtons.click(function(){
   console.log(this);
});
In the code you just typed, the JavaScript keyword this refers to the HTML element that was just clicked.
- Save the file, switch back to Chrome, and reload the page.
- Hit Cmd–Opt–J (Mac) or CTRL–Shift–J (Windows) to bring up the Console tab of Chrome’s DevTools.
-
Click each of the navigation buttons, and in the Console notice that the HTML code for the list item you clicked on is displayed.
In the code displayed in the console, we can see the data-scrollTo attribute and its value. That value is the CSS selector of the element we want to scroll to, so let’s extract that specific part.
-
Return to your code editor and add the following bold code:
$navButtons.click(function(){ console.log(this.getAttribute("data-scrollTo")); }); - Save and reload the browser.
-
Click each of the navigation buttons, and in the Console you should see the value of the data-scrollTo attribute (such as #person1Bio, #person2Bio, etc.).
Now that we have the CSS selector for the div we want to scroll to, we can pass it to a ScrollTo tween.
- Return to your code editor.
-
Delete the console.log line and replace it with the following bold code:
$navButtons.click(function(){ var myScrollPosition = this.getAttribute("data-scrollTo"); TweenLite.to(window, 1, {scrollTo:myScrollPosition}); }); -
Save the file, reload the page in Chrome, and:
- Close the DevTools window.
- Click on the navigation buttons. Excellent, each button should smoothly scroll the page to the correct position!
Adding Rollover Effects Using CSSPlugin’s ClassName Property
Let’s make the navigation menu more exciting to use by adding rollover effects. We will add a CSS rule that will provide styling for the tween’s end value.
Return to your code editor and scroll up to the styles in the head of the document.
-
Below the .section rule, add a new rule to change the active button’s color:
.active { color:#89cd25; } h1 { font-size:80px; } -
Scroll down to the mouseenter() function (around line 95). This controls the mouse-hover property. To apply the new color to the active button, add the following bold code:
$navButtons.mouseenter(function(){
   TweenLite.to(this, 0.2, {className:"+=active"});
});
CSSPlugin’s className property allows you to morph between classes on an element and animate the property differences between classes. Tweening to a className whose value is
"+=active"will add all the properties of the active class to the button and animate them when a user hovers over the button. -
Save the file, reload the page in Chrome, and mouse over the buttons.
The text turns green, but we don’t want them to stay green forever! Let’s remove the active class when the user’s mouse leaves the button area.
-
Return to your code editor and add the following to the mouseleave() function:
$navButtons.mouseleave(function(){
   TweenLite.to(this, 0.2, {className:"-=active"});
});
This is virtually the same code, except we are subtracting the properties in the active class (with a minus sign) instead of adding them with a plus sign, like we did before.
-
Save the file, reload the page in Chrome, and mouse over the buttons. Nice!
To add a little more flair to the rollover, we can give the navigation buttons a bump out to the right with a wider, green border and a larger line-height to increase the height of the button area.
The beauty of this approach (using a CSS property as the end value of a tween), is that we can update the active class and our JavaScript doesn’t need to change.
-
Return to your code editor and, around line 20, add the following bold code to the .active class:
.active {
   color:#89cd25;
   border-left:20px solid #89cd25;
   line-height:30px;
}
NOTE: Some people prefer to keep all these properties in the JavaScript, rather than mix them with the page’s CSS. It’s a matter of personal preference.
Save the file and preview the page in Chrome. That’s much more playful!
Enhancing the Way the Page Loads
As we saw earlier, when you reload a page in a modern browser, you are returned to the last place you were viewing. Let’s create a very quick tween that will run the moment the page loads and move the position back to the top of the page.
-
Return to your code editor and add the following bold code below the mouseleave() function (around line 105):
TweenLite.to(window, 0.01, {scrollTo:0});This tween will run so quickly that we won’t be able to see it happening.
-
Save the file and preview the page in Chrome:
- Scroll down to the biography of Dr. Smedley Harms.
- Reload the page and you should be immediately scrolled to the top. The page reload was completely seamless!
-
Let’s add some tweens to create an elegant page build. Return to your code editor and add the following bold code to the CSS rule for body (around line 10):
body{
   font-family: Arial, sans-serif;
   margin-top:40px;
   visibility:hidden;
}
This will set the entire body div to hidden. (You could save the file and preview the page in Chrome, but the page will be completely white.)
-
Scroll down to around line 107 and add the following bold code, which will fade the whole page in from an autoAlpha of zero:
TweenLite.to(window, 0.01, {scrollTo:0}); TweenLite.from("body", 0.5, {autoAlpha:0}); - Save the file and reload the page in Chrome. The fade-in effect is subtle, but makes the whole page seem more elegant.
-
Return to your code editor and add the following tween to slide in the navigation panel from off-screen left:
TweenLite.from("body", 0.5, {autoAlpha:0});
TweenLite.from("ul", 0.5, {X:-500, delay:0.5});
NOTE: We have been using timelines in the last few exercises, but we won’t add one to this page. For a page with so few tweens, it’s not necessary to build a timeline.
Save the file and preview the page in Chrome. Looks classy!