Master the essential skills of using Figma, an online user interface design tool, in this comprehensive guide that covers creating, editing, and organizing text styles, opening Sketch files, and handling missing fonts.
This exercise is excerpted from Noble Desktop’s Figma training materials and is compatible with Figma updates through 2023. To learn current skills in Figma with hands-on training, check out Noble Desktop's Figma Bootcamp, web design classes, and graphic design classes in-person or live online.
Topics Covered in This Figma Tutorial:
Opening Sketch Files in Figma, Handling Missing Fonts, Creating, Editing, & Organizing Text Styles
Exercise Preview
Exercise Overview
In this exercise, you’ll learn about creating and editing text styles.

Opening Sketch Files & Handling Missing Fonts
-
In Figma, if you’re not on the homescreen (file browser), do the following:
- In the Desktop app: Click the
 Home tab (Mac users can also choose File > Open File Browser).
 - In the Web app: Click the Main menu button
 and choose Back to files.
- In the Desktop app: Click the
- To open a local file, click
 Import file (may be an icon near the top right).
 -
Navigate into Desktop > Class Files > Figma Class and double–click on iTastify Design Done.sketch to choose it.
Once the file has uploaded, click Done and double–click on the file to open it.
NOTE: Notice that this is a Sketch file, and Figma can open it! The conversion may not be perfect, so be sure to inspect your files closely if you’re converting them.
-
If you get a message about missing fonts, choose the replacements as shown below (and then click Replace fonts):
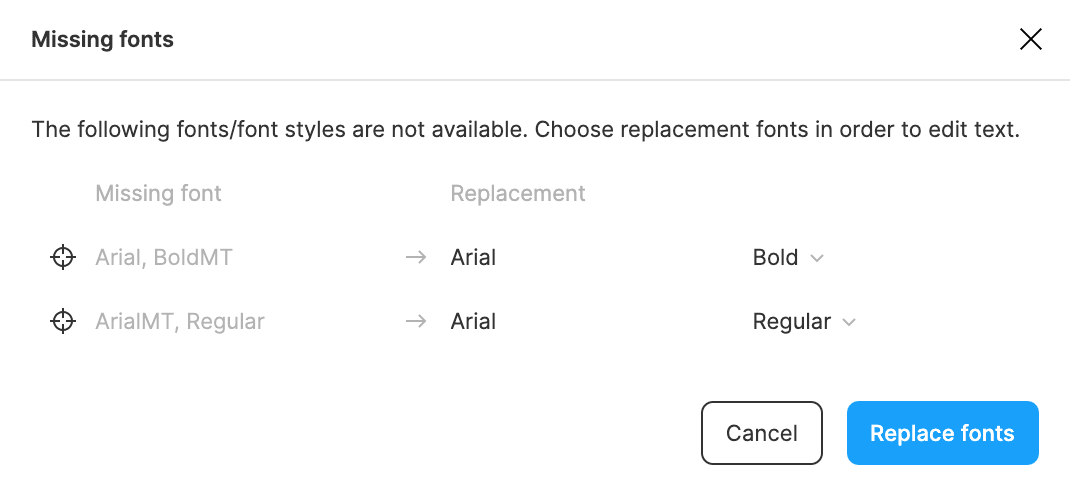
NOTE: If you close this dialog and need to get back to it, at the top right corner of the window click the Missing fonts button
 .
.
Creating Text Styles
- Zoom in on the iTastify Helps You Remember section (below the hand holding an iPhone).
- There are 3 features, each with an icon and 2 lines of text. Try clicking on any of them to see the whole section is grouped.
- CTRL–click (Mac) or Right–click (Windows) on any of them and choose Ungroup.
- Click in an empty area to deselect the text.
- Select the Tag Companions heading of the first feature.
- In the Design panel, to the right of Text click the Style button

- In the Text Styles panel that opens, click the Plus(+) button at the top right.
- Name the text style feature title and click Create style.
Applying Text Styles
- Click on the 2nd heading Add Photos.
- Hold Shift and click on the 3rd heading Take Notes so both headings are selected.
- In the Design panel, to the right of Text click the Style button
- In the Text Styles panel that opens, just below the Search field click the feature title style you just created.
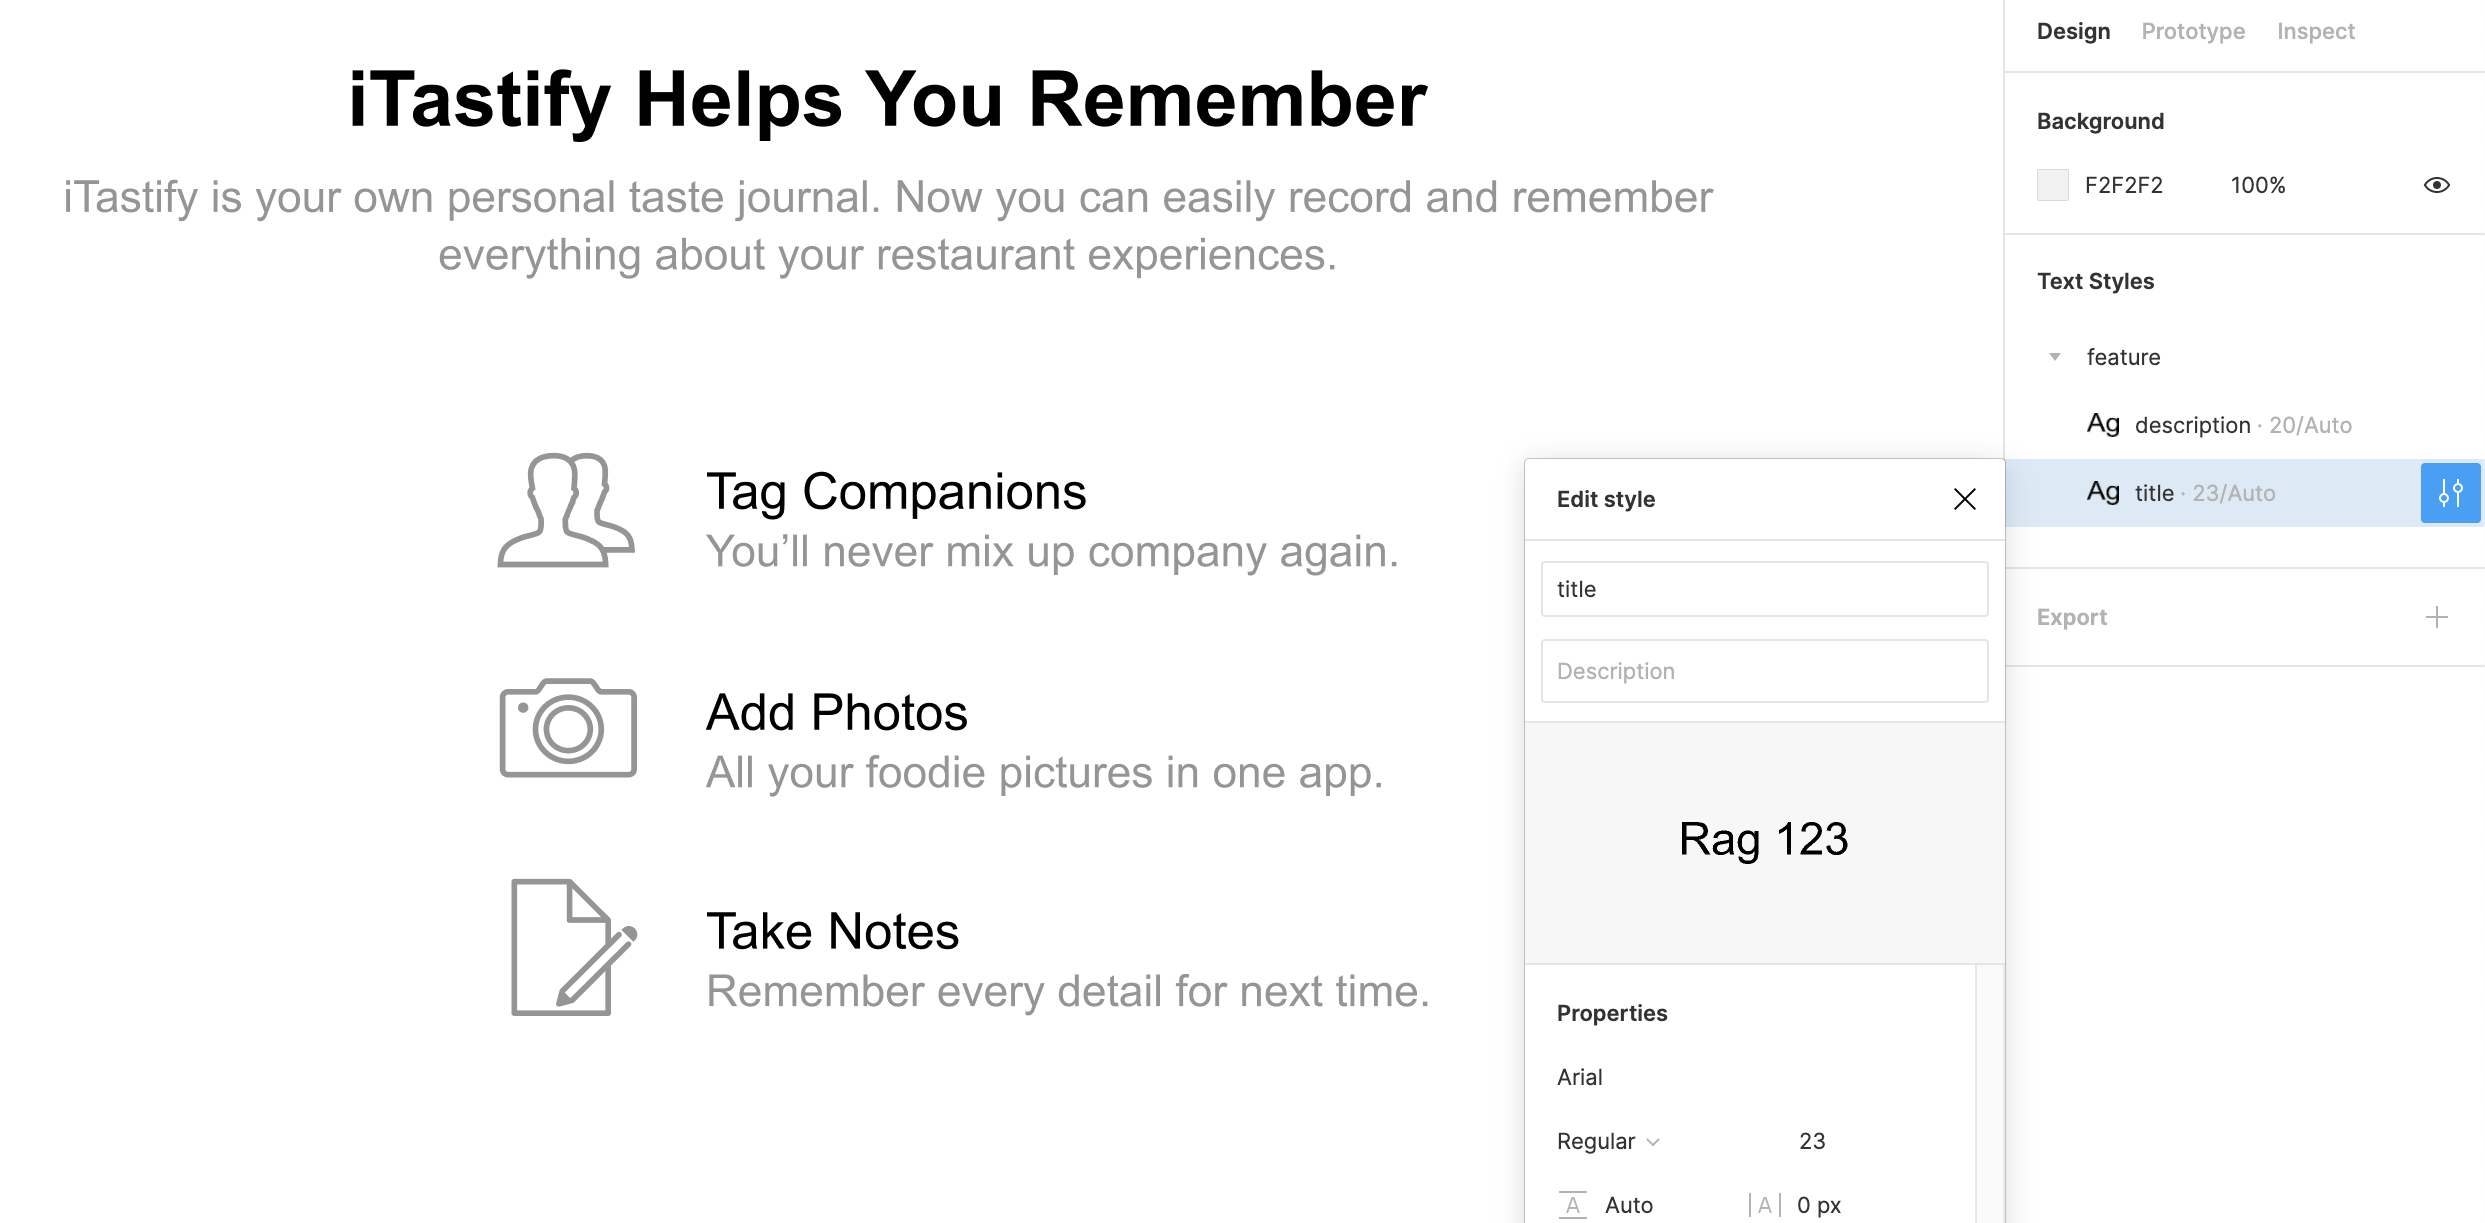
Editing Text Styles
- Click in an empty area so nothing is selected.
- In the Design panel, notice there’s a list of Text Styles.
- Hover over the feature title style and click the Edit Style button
 that appears to the right.
 -
In the Edit style panels that opens:
- Change Bold to Regular.
- Click on the font size number (it’s currently 21 and to the right of the font name).
- Hit the Up Arrow key 2 times to make the text bigger, noticing the text in the file changing as you do this!
NOTE: Text color is not part of text styles, but color styles can be created and applied separately (as you see in a previous exercise).
Close the Edit text style panel.
Managing Text Styles (Using Prefixes to Create Groups)
We can use what Figma calls “prefixes” to organize styles into groups.
- Make sure nothing is selected.
- Below the Tag Companions heading, select You’ll never mix up company again.
- In the Design panel, to the right of Text click the Style button
- In the Text Styles panel that opens, click the Plus(+) button at the top right.
Name the text style feature/description and click Create style.
- Click in an empty area so nothing is selected.
- In the Design panel, under Text Styles notice there’s now a feature group.
- Drag the feature title style into the feature group.
- Hover over the feature title style and click the Edit Style button that appears to the right.
- Change the name from feature title to simply title.
Close the panel.
