Learn to prototype a fully functional slideshow in Figma with this detailed tutorial, covering topics such as adding tap interactions, maintaining custom bezier easing, and more.
This exercise is excerpted from Noble Desktop’s Figma training materials and is compatible with Figma updates through 2023. To learn current skills in Figma with hands-on training, check out Noble Desktop's Figma Bootcamp, web design classes, and graphic design classes in-person or live online.
Topics Covered in This Figma Tutorial:
Creating a Working Slideshow Prototype, Adding Tap Interactions, Adding the Ability to Drag, Adding Keystrokes, Custom Bezier Easing
Exercise Preview
Exercise Overview
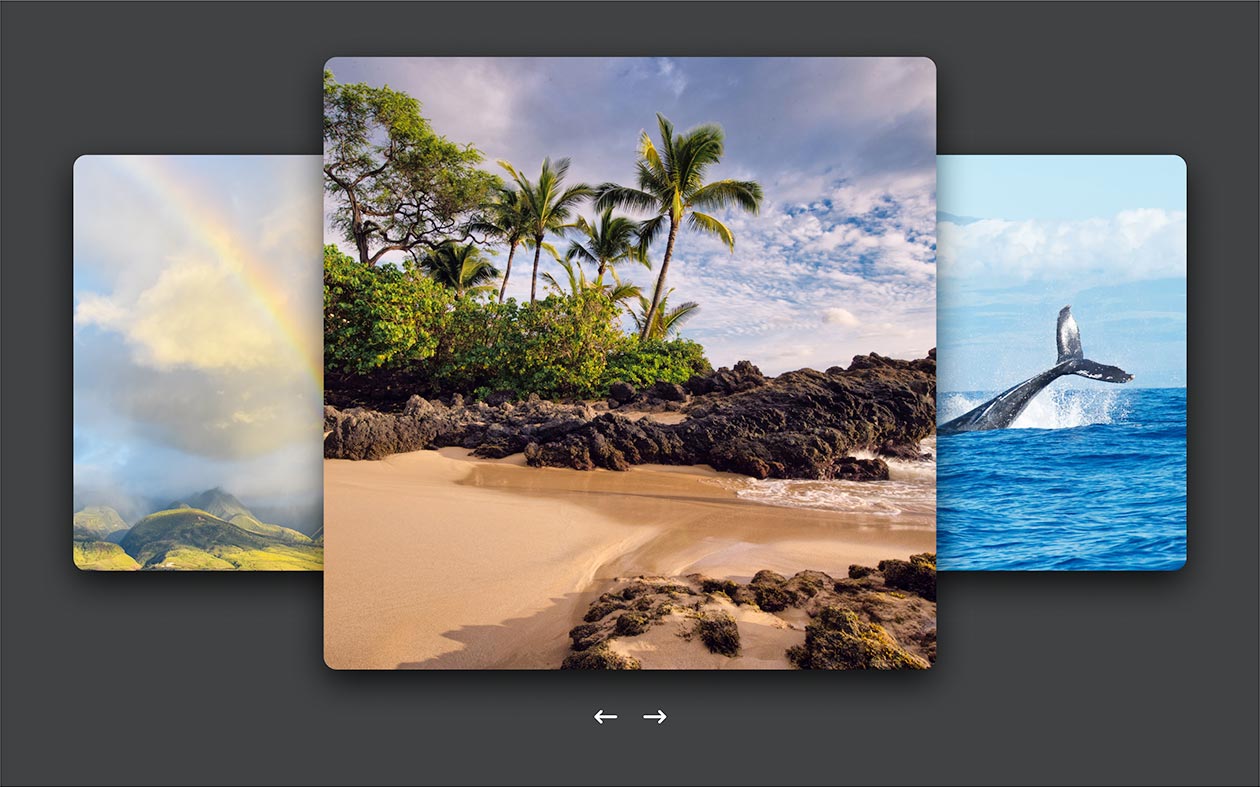
In this exercise, you’ll prototype a slideshow. You’ll add the functionality to make it work with arrow buttons to advance slides, the ability to drag between slides, and keystrokes too!

Opening the File
-
In Figma, if you’re not on the homescreen (file browser), do the following:
- In the Desktop app: Click the
 Home tab (Mac users can also choose File > Open File Browser).
 - In the Web app: At the top left, click the Main menu button
 and choose Back to files.
- In the Desktop app: Click the
- To open a local file, click
 Import file (may be an icon near the top right).
 -
Navigate into Desktop > Class Files > Figma Class and double–click on Slideshow.fig to choose it.
Once the file has uploaded, click Done and double–click on the file to open it.
Setting up the Slides
Scrollable areas like we previously saw are great for simple scrolling, but we want to make a slideshow that animates between slides, uses keystrokes, taps, and scrolls. We’ll need to set up different frames for each state of our slideshow.
- We’re going to the scaling the photos, so before we duplicate the frames, select the 3 photos.
With the 3 photos selected, in the Design panel, to the right of W and H, click the Constrain proportions button
 .
.- Select the frame by clicking on the frame name 1 (at the top left of the frame).
- Duplicate it by hitting Cmd–D (Mac) or CTRL–D (Windows) two times to create a total of 3 frames.
-
Notice that Figma has incremented the numbers for the frame names, so we have:
- 1 for the left frame.
- 2 for the middle frame.
- 3 for the right frame.
-
On frame 1:
- Select the left arrow.
- Press the 3 key on your keyboard to quickly set the Opacity to 30%.
-
On frame 3:
- Select the right arrow.
- Press the 3 key on your keyboard to quickly set the Opacity to 30%.
Adjusting the Design of the First Slide
- On frame 1, select the left rainbow photo.
-
Let’s make this match the size of the center photo. In the Design panel on the right:
Set W to 700 and hit Return (Mac) or Enter (Windows) to apply it. (Because we constrained proportions earlier, H should also change to 700 to keep it square).
Set Y to 65
- On frame 1, select the center beach photo.
-
Let’s make this smaller. In the Design panel on the right:
- Set W to 587
- Let’s center this horizontally in the frame. With the beach photo still selected, at the top of the Design panel, click the Align horizontal centers button
 .
. - Let’s vertically center this to the large photo. With the beach photo still selected, hold Shift and click on the rainbow photo.
- At the top of the Design panel, click the Align vertical centers button
 .
. - Select only the rainbow photo.
- CTRL–click (Mac) or Right–click (Windows) on the rainbow photo and choose Bring to front.
- Select the 3 photos, but do NOT select the arrows!
- In the Design panel set X to 370 (hit Return (Mac) or Enter (Windows) to apply it).
- Oops, that moved them all to the same place! Hit Cmd–Z (Mac) or CTRL–Z (Windows) to undo it.
-
In the Design panel, for X click on the value Mixed, add +286 so you end up with Mixed+286 and hit Return (Mac) or Enter (Windows) to apply it.
All 3 photos should move over as a single unit as shown below:
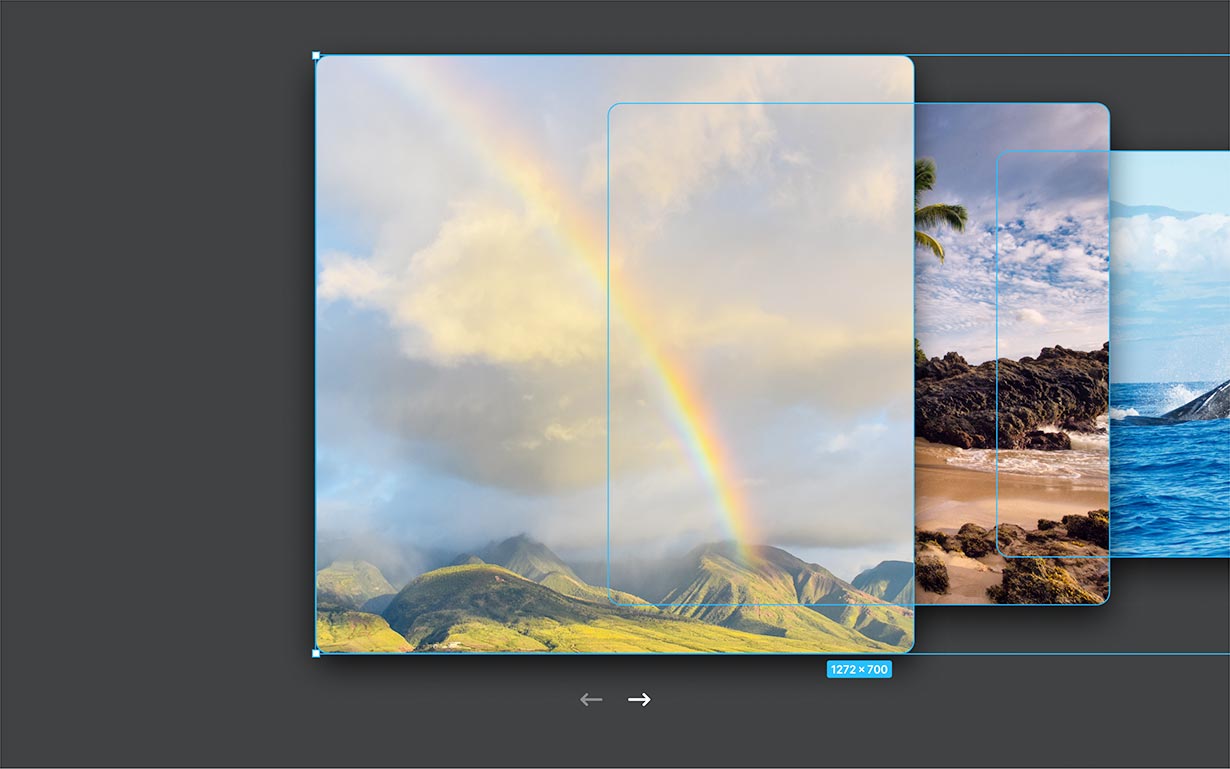
NOTE: How did we come up with those numbers? We used the center align feature to see that X should be 370. The image started at X 84 though, so we subtracted that from our final position… 370-84=286. Of course there are other ways you could do this if you don’t like math. For example, you could use a guide.
Adjusting the Design of the Last Slide
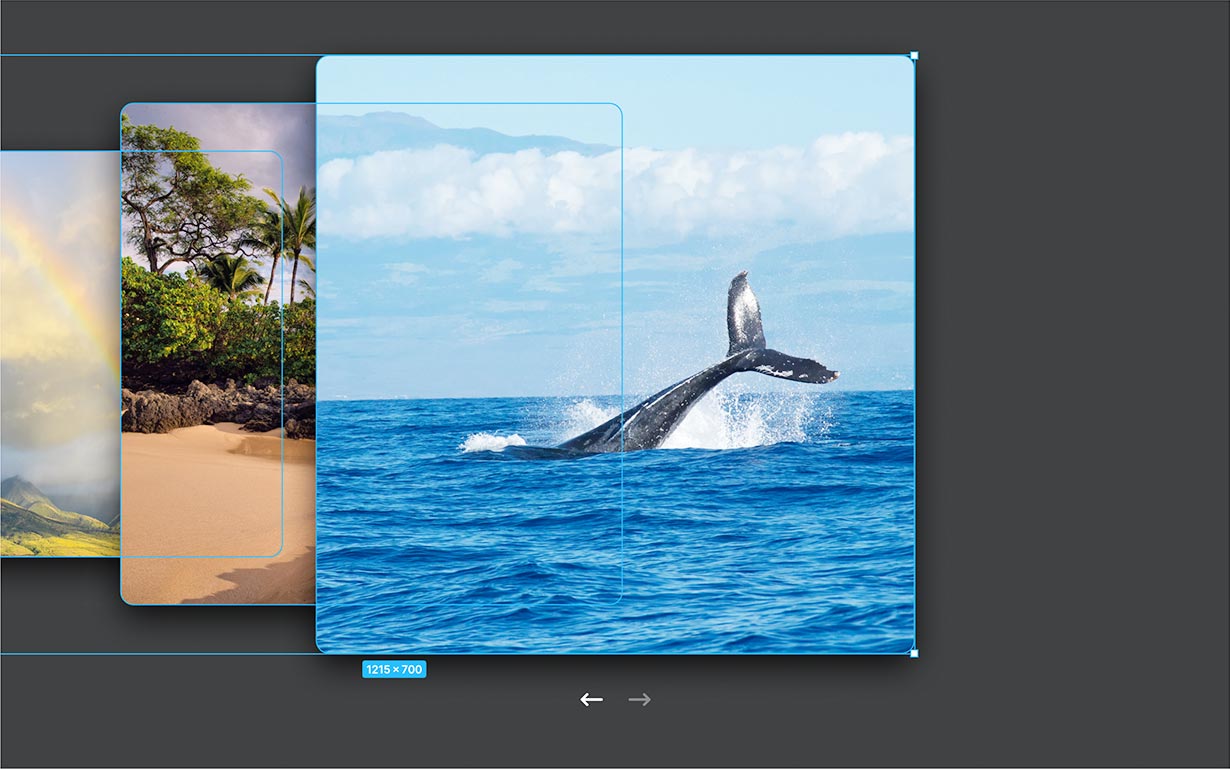
- On frame 3, select the whale photo (on the right).
-
Let’s make this match the size of the center photo. In the Design panel on the right:
- Set W to 700
- Set Y to 65
- On frame 3, select the center beach photo.
-
Let’s make this smaller. In the Design panel on the right:
- Set W to 587
- Let’s align this vertically centered to the large photo. With the beach photo still selected, hold Shift and click on the whale photo.
At the top of the Design panel, click the Align vertical centers button
.- Select only the whale photo.
CTRL–click (Mac) or Right–click (Windows) on the whale photo and choose Bring to front.
-
With the whale photo still selected, in the Design panel on the right:
- Set X to 599
Select the 3 photos, but do NOT select the arrows!
In the Design panel, for X click on the value Mixed, add -229 so you end up with Mixed-229 and hit Return (Mac) or Enter (Windows) to apply it.
-
All 3 photos should move over as a single unit as shown below:
Making an Arrow Button Work
Now that our design is complete, we can make a functioning prototype.
- In the right panel, at the top click on Prototype.
- We’re going to wire up the arrows on frame 1, so make sure you can see the arrows, and at least part of frame 2 (you don’t need to see the whole thing).
- On frame 1, select the right arrow.
- A blue circle will appear on it. Drag the blue circle to frame 2.
-
In the Interaction details panel that opens on the right:
- Change Animation from Instant to Smart animate.
- At the top right of the window, click Present
 or hit Cmd–Option–Return (Mac) or CTRL–ALT–Enter (Windows).
 -
Click the right arrow to see the animation to the next slide.
The effect is cool, but let’s see how other easings change the feeling of the animation.
Close the presentation tab/window.
Custom Easing
- The Interaction details panel should still be open on the right. If not, under Interactions click on the Click interaction.
- The Interaction details panel, change Ease out to Ease out back.
- At the top right of the window, click the Present button .
-
Click the right arrow to see the animation to the next slide.
If you want to see it again, we have not wired up the arrow buttons on screen, but you can press the Left Arrow key on your keyboard to go back to the previous frame and click the arrow button again.
The back easing makes a transition that overshoots a bit past where it wants to go and then comes back. This creates a bounce that adds some liveliness to the animation. It’s a bit of a harsh snap for our tastes though, so let’s try something else.
- Close the presentation tab/window.
The Interaction details panel, change Ease out back to Custom bezier.
-
Adjust the handles to create an easing like this:
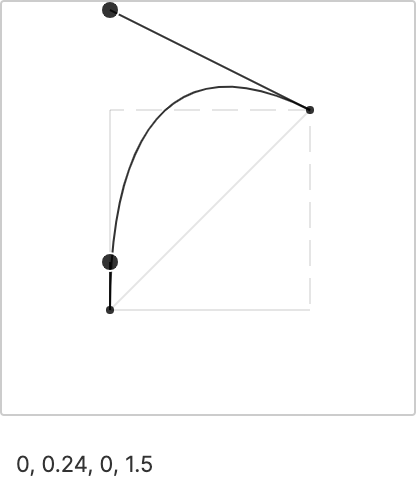
NOTE: The left handle is the speed at the start (in) and the right handle is the speed at the end (out). The steeper the curve the faster the speed. Going above (outside) the top of the of the box make it overshoot the final value and have to come back (creating a custom back ease). TIP: The numbers below the ease let you know the exact ease setting, so you can reuse/recreate it if you want.
- At the top right of the window, click the Present button .
-
Click the right arrow to see the animation to the next slide.
To see it again press the Left Arrow key to go back to the previous frame and click the arrow button again.
This is still a back ease, but the snap is softer (which we like better).
- Close the presentation tab/window.
- Now let’s finish wiring up the arrows. On frame 2 select the left arrow.
- Drag the blue circle to frame 1.
-
On frame 2:
- Select the right arrow.
- Drag the blue circle to frame 3.
-
On frame 3:
- Select the left arrow.
- Drag the blue circle to frame 2.
- Click in an empty area of the canvas to make sure nothing is selected.
- At the top right of the window, click the Present button .
- Test out all the arrows and see the entire slideshow should be working!
Close the presentation tab/window.
Adding Keystrokes
Using keystrokes would make it faster to navigate this slideshow, and we can define them in Figma!
- On frame 1 select the right arrow.
- Drag the blue circle to frame 2.
-
In the Interaction details panel that opens on the right:
- Change On drag to Key/Gamepad
- To the right of that, click on Click to select and press your Right Arrow key.
- Click in an empty area of the canvas to make sure nothing is selected.
- At the top right of the window, click the Present button .
-
Press your Right Arrow key and the slideshow should animate to the second slide.
NOTE: Normally in a prototype the left/right arrow keys work to go to the previous/next slide, but they do so without the smart animate transition we want. Our keystroke should override that normal action.
- Close the presentation tab/window.
-
On frame 2 select the left arrow and then:
- Drag the blue circle to frame 1.
- In the Interaction details panel, change On drag to Key/Gamepad.
- Click on Click to select and press your Left Arrow key.
-
On frame 2 select the right arrow and then:
- Drag the blue circle to frame 3.
- In the Interaction details panel, change On drag to Key/Gamepad.
- Click on Click to select and press your Right Arrow key.
-
On frame 3 select the left arrow.
- Drag the blue circle to frame 2.
- In the Interaction details panel, change On drag to Key/Gamepad.
- Click on Click to select and press your Left Arrow key.
- Click in an empty area of the canvas to make sure nothing is selected.
- At the top right of the window, click the Present button .
- Test out the right and left arrow keys to see that you can keyboard navigate between all the slides!
Close the presentation tab/window.
Adding the Ability to Drag
Lastly, let’s add a drag interaction to let us switch between slides.
- On frame 1 select the rainbow photo.
- Drag the blue circle to frame 2.
-
In the Interaction details panel that opens on the right:
- Change On click to On drag
-
On frame 2:
- Select the beach photo.
- Drag the blue circle to frame 3.
- In the Interaction details panel, change On click to On drag.
- This also needs to be able to go back to the previous frame, so drag the blue circle to frame 1.
- In the Interaction details panel, change On click to On drag.
-
On frame 3:
- Select the whale photo.
- Drag the blue circle to frame 2.
- In the Interaction details panel, change On click to On drag.
- Click in an empty area of the canvas to make sure nothing is selected.
- At the top right of the window, click the Present button .
- Drag right to left on the rainbow photo to go to slide 2.
-
Test out the rest, dragging on the main photo in each slide to go forward or backward.
This slideshow is finished and looking good!
Close the presentation tab/window.
Remember You’re Designing, Not Building
It can be tempting to want to build all the functionality exactly the way you want the website or app work, but remember Figma is only designing it, not building the final product. For if you have 10 slides, you do not have to make them all work. Once people see the first 2–3 slides they get the idea of how they work.
So focus on designing the various appearances, interactions, and animations. Don’t get caught up in the busy work and tediousness of making every little tiny detail work. In the end, the Figma file is only a blueprint for developers to follow when they turn your design into code.
