In this exercise, you will use layer tools and Match Properties to change layer states and move objects between layers by selecting objects instead of using Layer Control. Scrolling through the Layer Control can be more time-consuming than you might think, so using these tools is a great way to work more quickly and efficiently.
This exercise is excerpted from Noble Desktop’s past AutoCAD training materials and is compatible with Photoshop updates through 2020. To learn current skills in AutoCAD, check out AutoCAD Bootcamp and AutoCAD classes in NYC and live online.
Topics Covered in This AutoCAD Tutorial:
Layer Tools, Match Properties
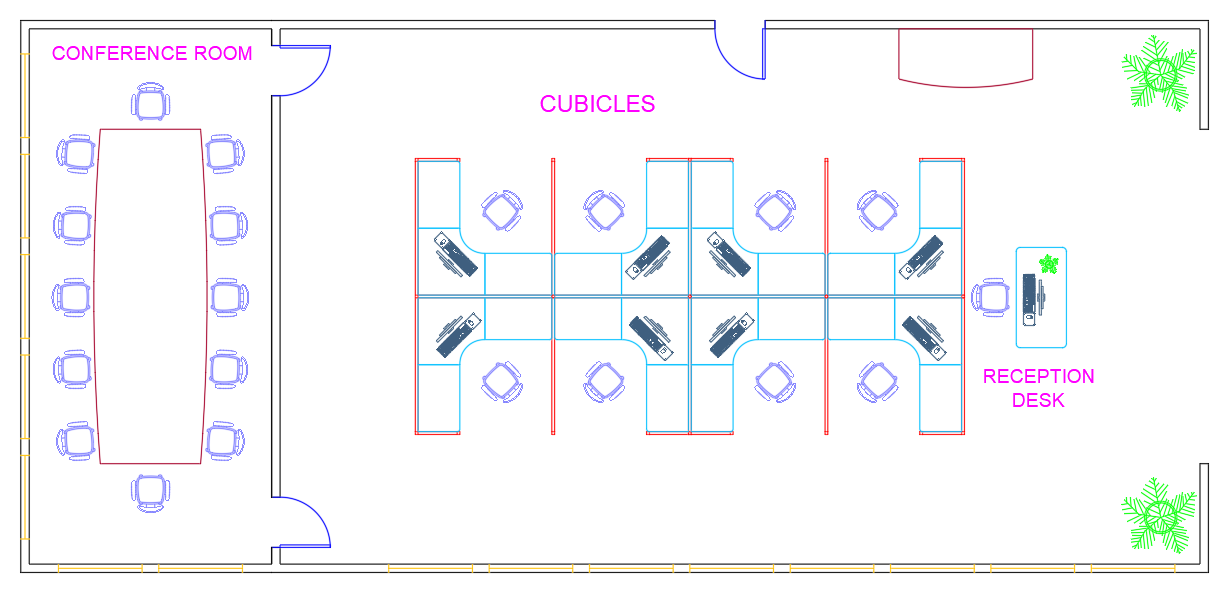
Exercise Preview
Exercise Overview
In this exercise, you will use layer tools and Match Properties to change layer states and move objects between layers by selecting objects instead of using Layer Control. Scrolling through the Layer Control can be more time-consuming than you might think, so using these tools is a great way to work more quickly and efficiently.

Using Layer Tools & Match Properties
Open the file Layer Tools.dwg.
-
You will see that all of the objects are the same color because they are all on Layer 0. Expand the Layer Control. You will see there are several layers that are frozen.
Rather than thaw each layer individually, you can close Layer Control and click the Thaw All Layers button to activate the LAYTHW command. All layers will be thawed at once. You will see new objects appear because they were on the frozen layers. The file should look like the Exercise Preview image at the beginning of the exercise.
-
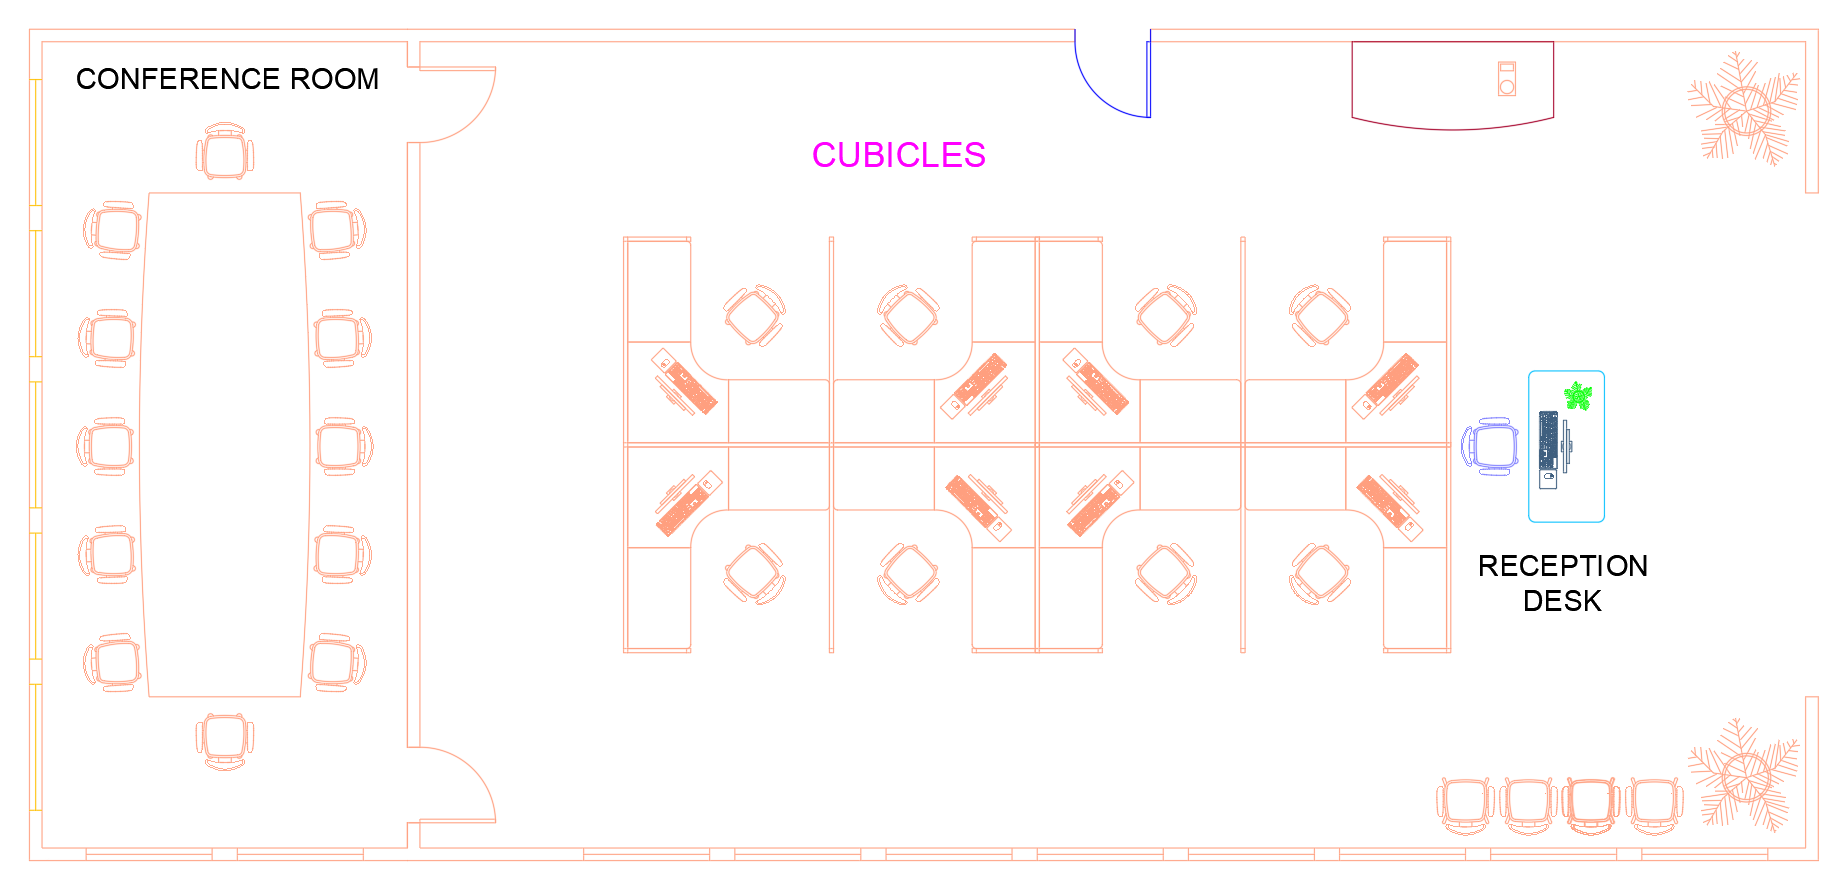
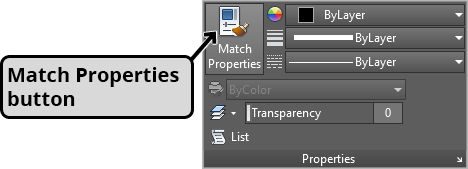
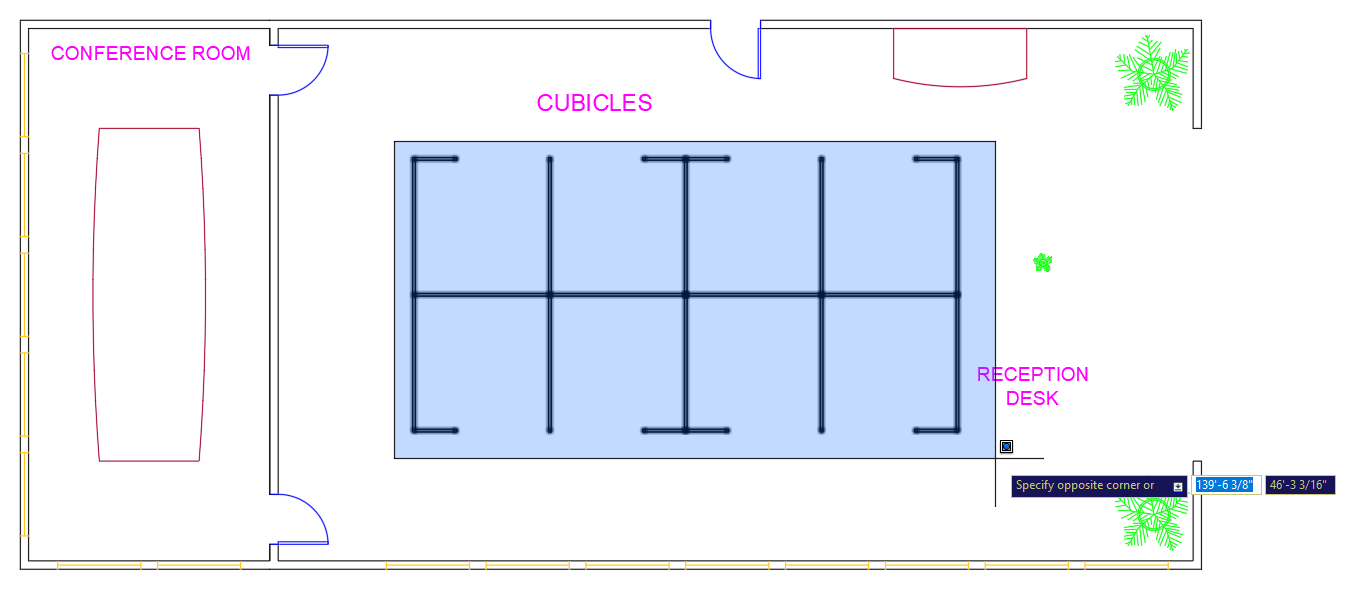
Now you will move all the objects in the drawing to their appropriate layers using Layer Tools and the Match Properties command. The Match Properties command, as implied by the name, will match the properties of objects to that of other objects, including layer. Select the blue door at the top of the drawing. The Layer Control will indicate that it is on the A-Doors layer. Now start the Match Properties command by typing MA ENTER (You can also press the Match Properties button in the Properties Panel or Standard Toolbar. The selection of the door is ignored because the Match Properties command does not allow pre-selection (This will be relevant when we compare Match Properties to Layer Match). In the command line, it will say: Select source object. Once again, click to select the blue door as the source object. Now the command line will say: Select destination object(s). Click on the other 2 doors that are currently on Layer 0. They will be moved to the A-Doors layer and their color will change to blue to match the original door.
The table against the upper wall above the reception desk area is on the A-Tables layer. Use Match Properties and select the table as the Source Object and then click the large table in the conference room so it will be on the same layer as the other table.
Press Enter to repeat the Match Properties command. Select the small plant on the reception desk as the Source Object and match the two large plants at the front of the room so that they will all be on the Plants layer.
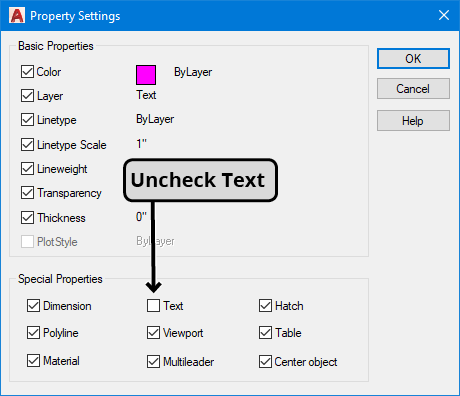
Note the different colors of the text because it is on multiple layers. The color of the Text layer is magenta, so the text CUBICLES is on the correct layer. Repeat the Match Properties command and select CUBICLES as the source object and select CONFERENCE ROOM text as the destination object. The CONFERENCE ROOM text will become too large and intersect the walls. By default, the Match Properties will match text properties as well as layer. Press Escape to exit the command, and then CTRL–Z to undo the Match Properties command. Type MA Enter to start the Match Properties again. Once again select the text CUBICLES for the source object. Once you have selected the source object, the Settings option will appear in the Command Line. Type S Enter to choose the Settings option.
-
In the Property Settings dialog box, uncheck Text under Special Properties, as shown below. Again click the text CONFERENCE ROOM to select it as a destination object. Because Text was unchecked under special properties, only the layer of the text was changed and the size remained the same. Select the text RECEPTION DESK as a second destination object and press Enter to end the Match Properties command.
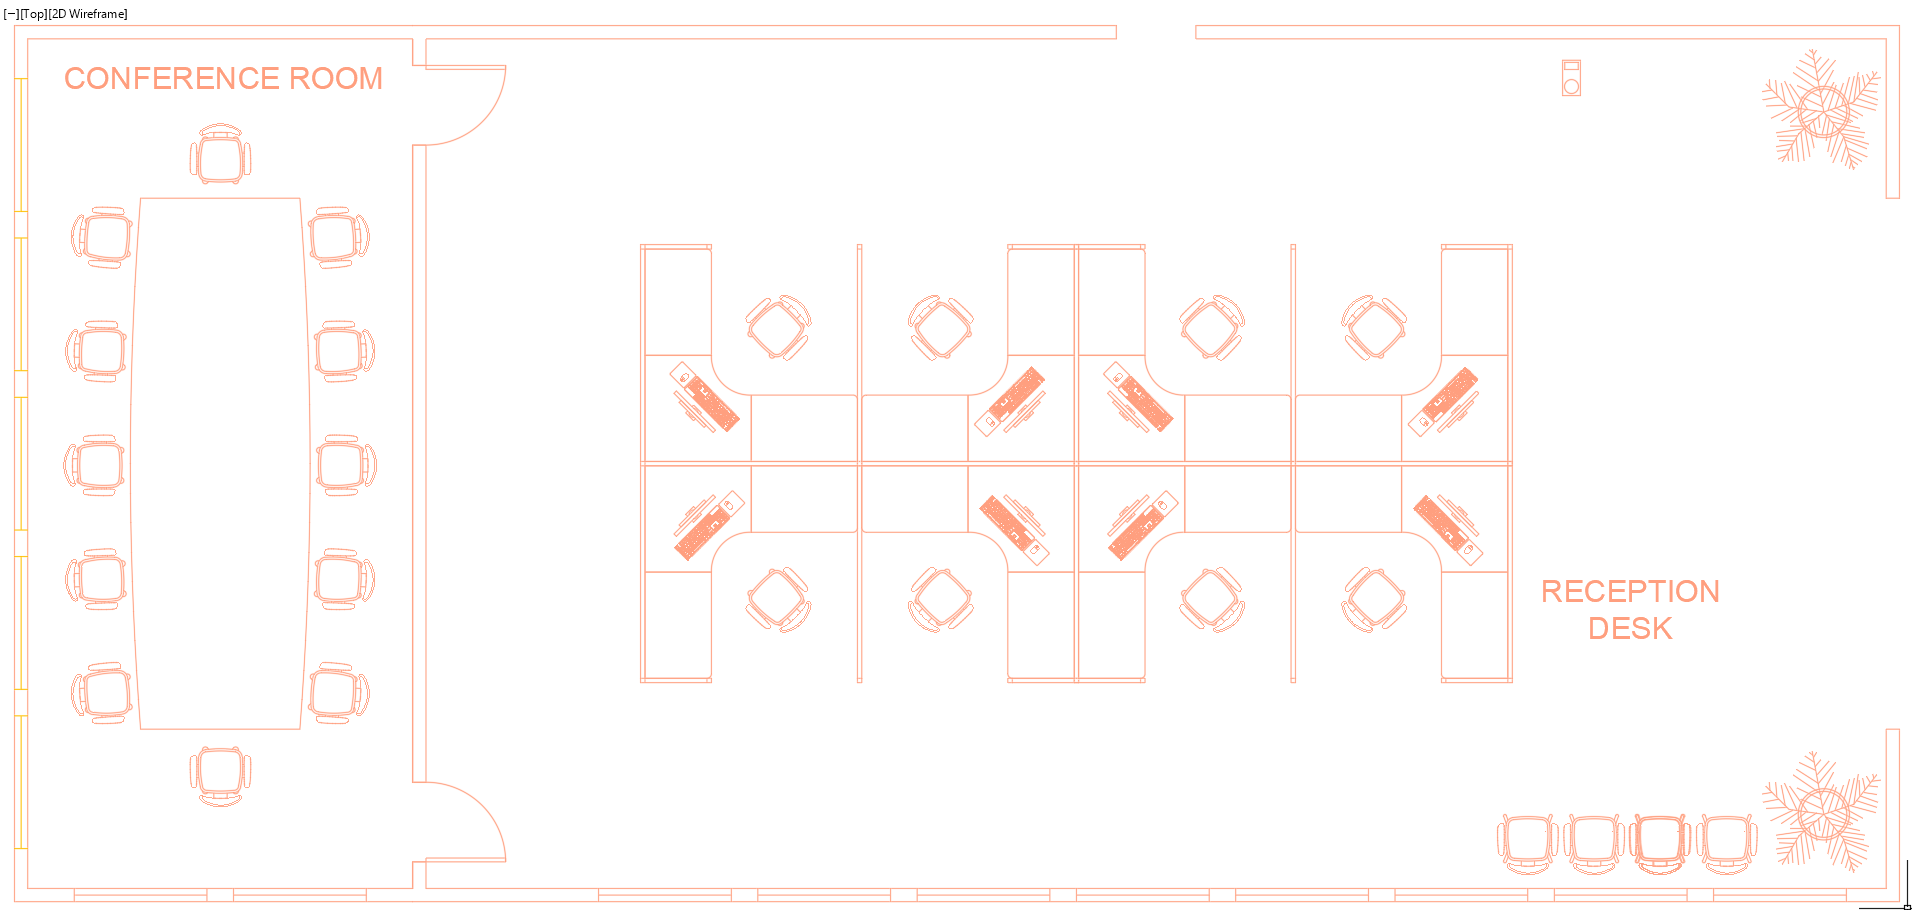
Now you will you use the Match Layer (LAYMCH) tool to move the chairs to the A-Furniture-Chairs layer. Unlike the Match Properties command, the Match Layer allows you to pre-select objects before starting the command. This means you can use Select Similar or Quick Select to select the object to be moved to a new layer. Select any of the chairs except the violet chair by the Reception Desk. Right–click and choose Select Similar. All of the chairs except for the violet chair by the reception desk will be selected because they are all the same block and are on layer 0. Click the Match Layer button in the Layers Panel of the Ribbon. In the Command Line, it will say Select object on destination layer. Click to select the violet chair by the Reception Desk. All of the chairs will now be on the A-Furniture-Chairs layers.
Use Select Similar and Match Layer to match all the desks and computers to the Reception Desk.
Click to select any of the window blocks. Right–click and choose Select Similar to select all the window blocks. Expand Layer Control and select the A-Windows to move all the windows to that layer.
Now all of the objects left on Layer 0 are walls and partitions. Select any of the walls and use Select Similar to select all of the remaining objects on Layer 0. In the Layer Control, select A-Walls to move all of the objects to that layer.
The walls of the cubicles are now on the A-Walls layer, but they need to be moved to the Partitions layer. The objects inside the cubicles will make the cubicle walls very difficult to select, so you will freeze the layers those objects are on. You could use layer control, but it’s much faster and easier to use the Layer Freeze tool (LAYFRZ). Click the Layer Freeze button
 on the Layers Panel. Click on a chair, a desk, and a computer, and the layers those objects are on will freeze. Click on a wall. The walls will not disappear because you can not freeze the current layer, which in this case is A-Walls. That’s OK because we don’t want to freeze the A-Walls layer anyway. Press ENTER to end the Layer Freeze command.
-
Now that the A-Furniture-Desks, A-Furniture-Chairs, and PC layers are frozen, the cubicle partitions will be much easier to select without those objects in the way. Select the partitions and put them on the Partitions layer. Pull left to right for a Window Selection so you won’t accidentally select any text if you touch it.
-
Now you will need to thaw the frozen layers. You can use the Layer Previous (LAYERP) tool to undo layer state changes for Freeze/Thaw, On/Off, or Lock/Unlock. Click on the Layer Previous button
 either in the Layers Toolbar (as shown below) or the expanded Layers Panel in the Ribbon. You may need to press it several times to thaw all the layers.
TIP: Layer Previous
is an often used tool. You have to expand the Layers panel to access the button, but it’s always accessible on the Layers Toolbar. Some users will keep the Layers Toolbar open just for this reason. -
The file should look as shown below. Close and save the file.