In this exercise, you will learn how to hide and lock layers by changing their Layer State. You will also learn how to assign Linetypes to objects by placing them on layers to which those line types are assigned.
This exercise is excerpted from Noble Desktop’s past AutoCAD training materials and is compatible with Photoshop updates through 2020. To learn current skills in AutoCAD, check out AutoCAD Bootcamp and AutoCAD classes in NYC and live online.
Topics Covered in This AutoCAD Tutorial:
Layer States, Layer Properties
Exercise Preview
Exercise Overview
In this exercise, you will learn how to hide and lock layers by changing their Layer State. You will also learn how to assign Linetypes to objects by placing them on layers to which those linetypes are assigned.

Heading
Open the file Layers-Mechanical.dwg. This Drawing file is based on a Mechanical template with layers appropriate for mechanical drafting.
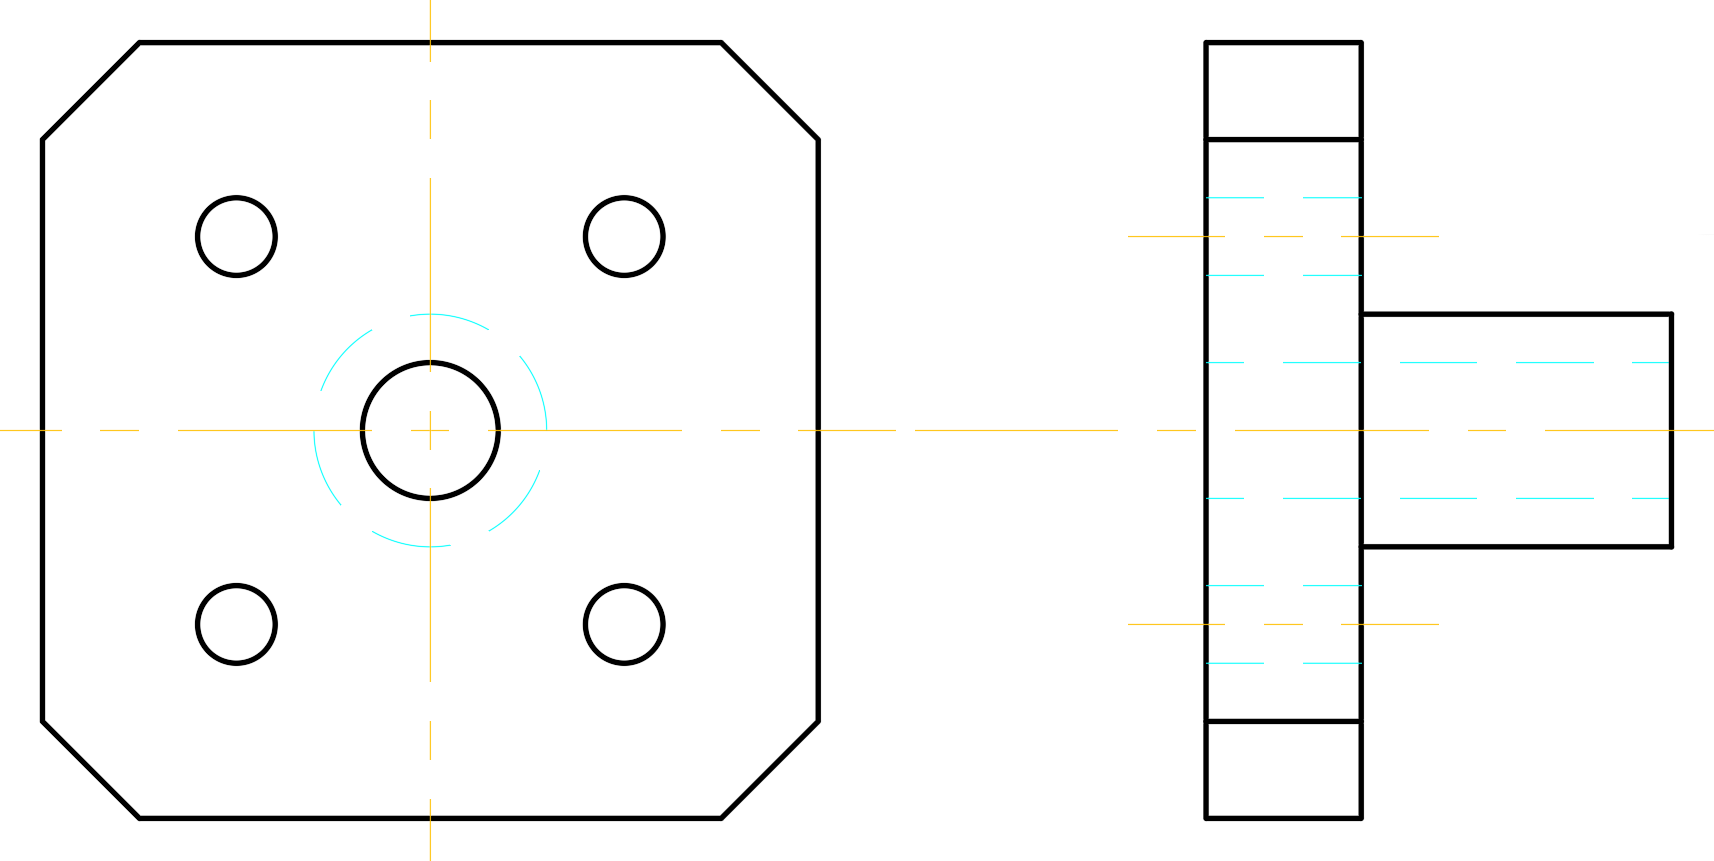
The current layer as indicated in the Layer Control is the Object layer. Select one of the gray dashed lines. The Layer Control will indicate that it’s on the Construction layer. The Construction layer is for making guidelines to help align objects. These lines are meant to be hidden or deleted when you’re finished so that they won’t be part of the final drawing. Press Escape to deselect. The Layer Control will go back to displaying the Object layer because it’s still the current layer.
Now you will draw hidden lines to indicate the edges of the center hole in the side view. In the last exercise, you learned that you can change the current layer by selecting it in the Layer Control. However, if you have objects you can select in your drawing, you can use the Make Current command (LAYMCUR, or Make Objects Layer Current tool in the layer toolbar). Click on the Make Current button to start the command. The Command Line will prompt you to select objects. Click one of the cyan dashed hidden lines indicating the holes on the side view. These lines are on the Hidden layer, so when you selected them with Make Current, it made the Hidden layer the current layer, so that new objects you draw will be on the Hidden layer.
-
There are construction lines aligning the top and bottom of the center hole with the side view, which will make it easy for you to draw the hidden edges for the hole. Press L Enter to start the Line Command. Snap to the Endpoint of the construction for the top of the center hole where it intersects with the left edge of the side view and click to start the line. Pull right along the horizontal tracking line to the leftmost edge of the side view and use the intersect snap to finish the line. Double tap on the Spacebar to end and repeat the Line command and draw the bottom hidden edge of the center hole in the side view in the same way that you did the top edge.

Now you will finish drawing the outer edges of the object on the side view. Start the Make Current command and select any of the solid black lines to make Object the current layer.
-
Use the Line tool
 to draw the edges of the 45˚ cuts on the side view by using Object Snap to start the lines where the construction lines intersect the list view. Because Object is now the current layer, you will create solid black lines.
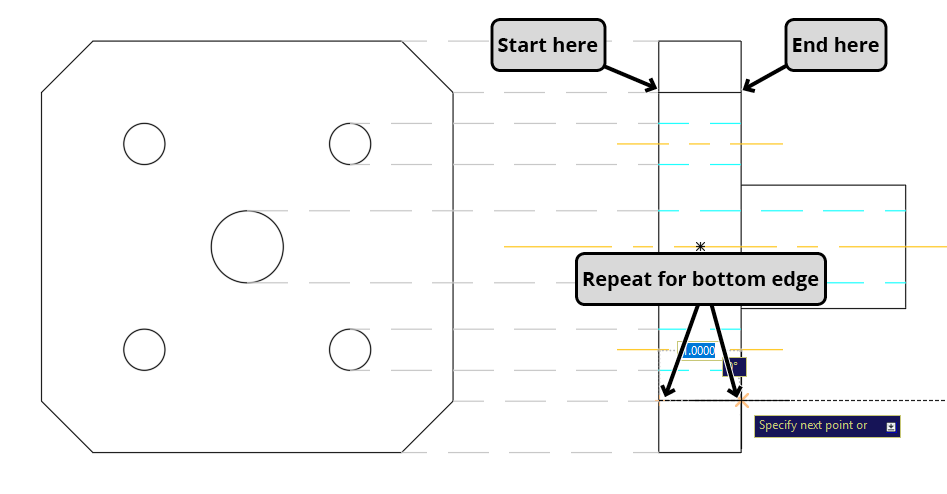
You will no longer need to use the lines on the Construction layer, and you won’t want them in the final drawing. However, in case you want to use the lines later, you will make the objects on the Construction layer invisible by Freezing the layer. When you Freeze a layer, the objects on the layer will not be visible and the computer will not render the object. This is so that no memory will be used to render the objects so your computer can work faster, but it’s possible if you have a very large file or a slow computer, when you unfreeze or Thaw a layer, it may take a few moments to render the objects. Expand the Layer Control. The Sun icons on the layers indicate that they are Thawed. Click the Sun icon
 on the Construction layer. It will turn into a Snowflake
  and the layer will be Frozen.
-
Now that you’ve frozen the Construction layer, the screen is much less cluttered. Now you will make centerlines for the front view. Use the Make Current tool to make Center the current layer by clicking on one of the centerlines on the side view. Now that Center is the current layer, draw a horizontal 6 inch centerline above the object. Select the centerline and click on the middle grip to move the line the center point of the middle circle on the front view with the Center object snap as demonstrated in the diagram below.

-
With the centerline still selected, type RO Enter to start the Rotate command
 . Set the Base Point at the Midpoint of the line. Press C Enter to select the Copy option of the Rotate command. Snap the rotated copy to the vertical tracking line and click to rotate the copy 90˚.
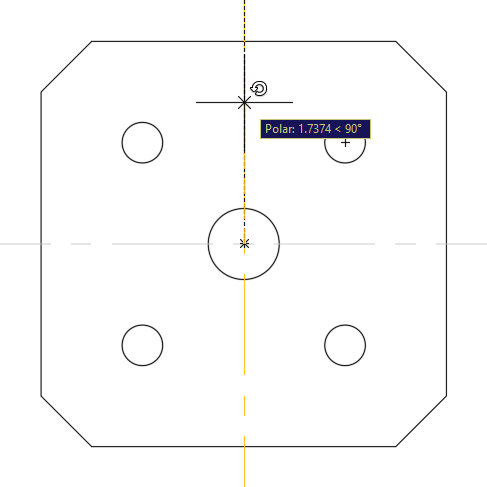
Make Hidden the current layer. Start the Circle command
 . Make the center point of the new circle the same as the center point as the middle circle of the front view.
-
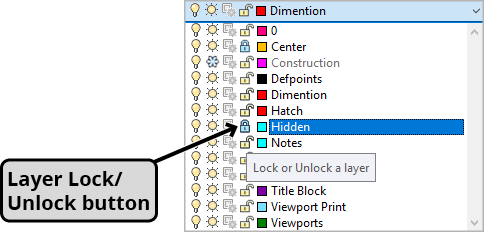
You can also lock layers so you won’t accidentally click or alter any objects on those layers. Expand the Layer Control, you will see a Lock icon on each layer looks like an open padlock. Click the Lock icons on the Center and Hidden layers. You will see that the objects on these layers fade. Click on any of the objects on the Center or Hidden layers. They will be selected so you tell what layer the objects are on, but no grips will appear and you will not be able to change the layer, delete, move, or in any way alter the objects on locked layers.
-
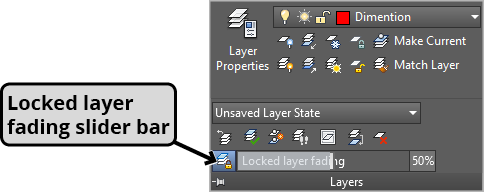
If you expand the Layers Panel, you will see the Locked Layer Fading slider bar. This will allow you to control how much the locked layers will be faded. You can also double–click on the percentage indicated and type in a new one. The higher the percentage number, the more faded the locked layers will be.
-
Turn lineweight visibility on in the Status Bar so see the varying line thicknesses of the different layers.
-
Click on the C-Size Layout tab. Thaw the Dimensions layer. Note the differences between the dimensions of this drawing (as shown below) to those of the tool shed from the tool shed drawing in the previous exercise. Those dimensions were in an architectural style because that drawing was based on the Architectural-Imperial.dwt template, while the dimensioning style of this drawing is mechanical because this drawing was based on the Mechanical-Imperial.dwt template file.

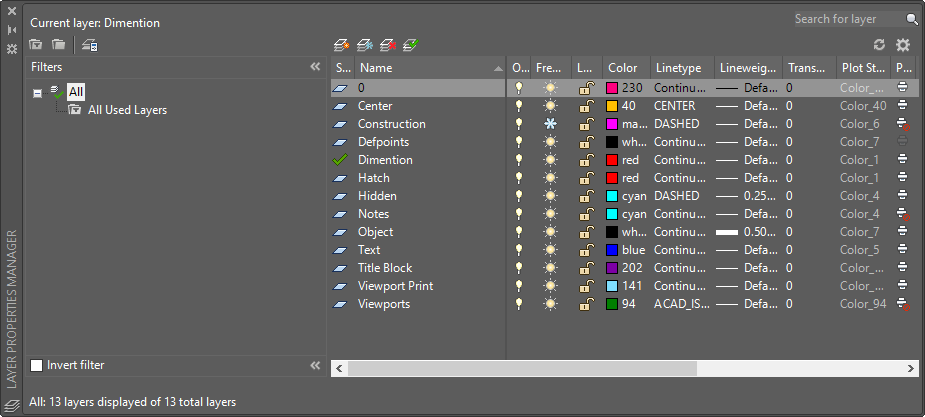
The Layer Properties Manager
Layer Properties are assigned with the Layer Properties Manager, which will be covered in more detail in the Level 2 class. You can activate the Layer Properties Manager (shown below) by entering the LAYER command, or pressing the Layer Properties button  . As explained in this chapter, layer properties are typically assigned to the template files that drawings are based on.