Learn how to effectively use the Insert command in AutoCAD to insert blocks, using a series of step-by-step instructions supported with diagrams in our comprehensive tutorial.
This exercise is excerpted from Noble Desktop’s past AutoCAD training materials and is compatible with Photoshop updates through 2020. To learn current skills in AutoCAD, check out AutoCAD Bootcamp and AutoCAD classes in NYC and live online.
Topics Covered in This AutoCAD Tutorial:
Inserting Blocks, the Insert Command
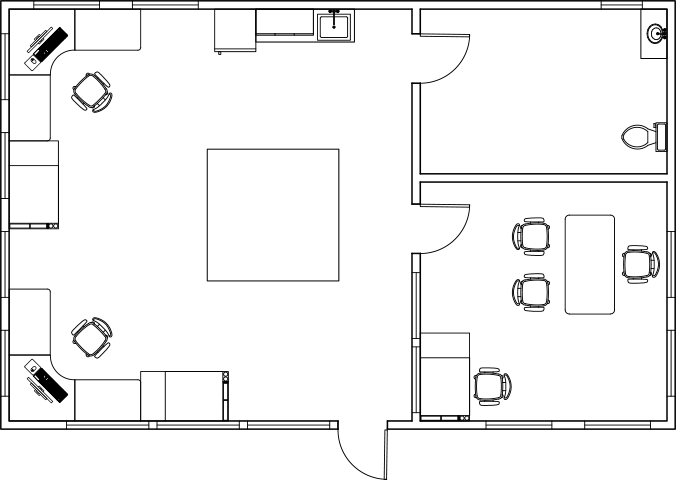
Exercise Preview
Exercise Overview
In this exercise you’ll learn how to insert blocks with the Insert command.

Inserting Blocks with the Insert Command
Open the file Blocks-Studio.dwg.
-
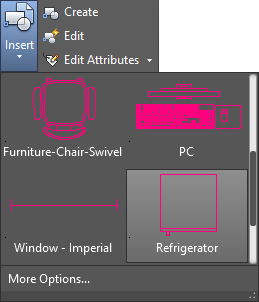
In the Block Panel in the Home Tab of the Ribbon, expand the Insert drop down menu. You will see blocks that have already been inserted in the drawing. A block remains attached to a drawing file even if it’s been deleted from the drawing itself. Choose the Refrigerator block.
-
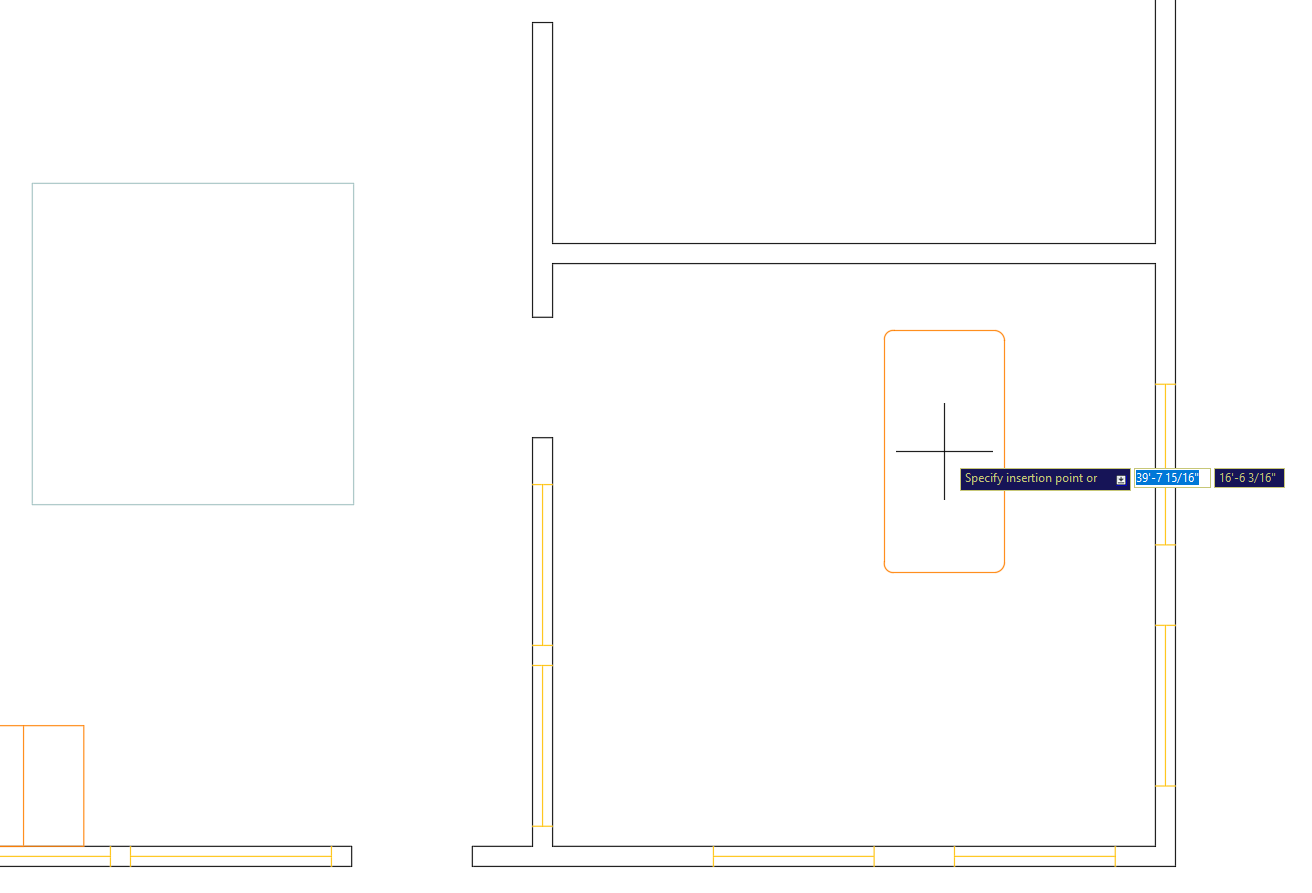
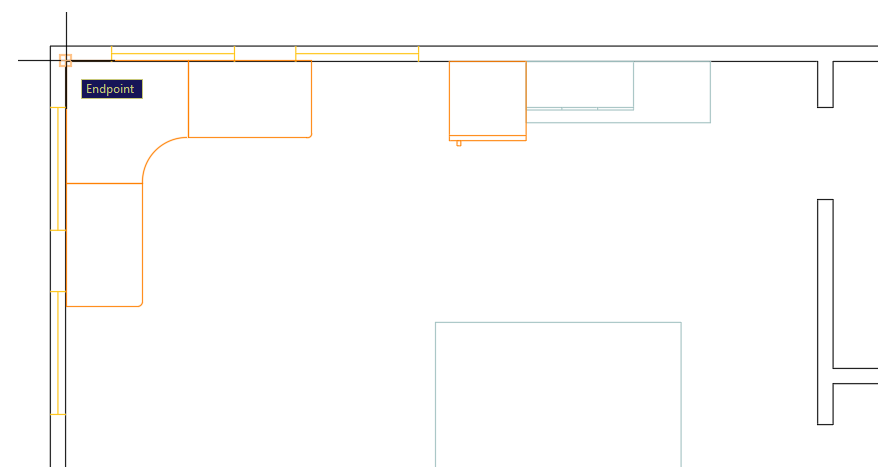
When a block is created, a base point is established. The base point of the refrigerator block is in the upper-right corner of the object. You will see options in the command line if you need to change the orientation. Click to place the refrigerator base point at the upper-left corner of the counter in the upper-right corner of the studio as shown in the diagram.
-
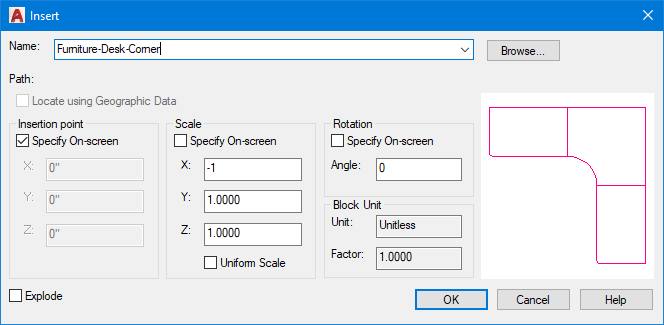
Now you will place a wrap-around desk in the upper-left corner of the studio. Expand the Insert menu again. You will see a block called Furniture-Desk-Corner, but it’s not oriented correctly. At the bottom of the expanded panel, click the More Options button. The Insert dialog box will appear.
-
Expand the Name drop down menu and select Furniture-Desk-Chair. The desk is not oriented correctly to go in the upper-left corner. Under Scale, enter an X value of –1. The desk will flip on the X axis without changing scale. Click OK. Place the desk in the upper-right corner of the studio.
-
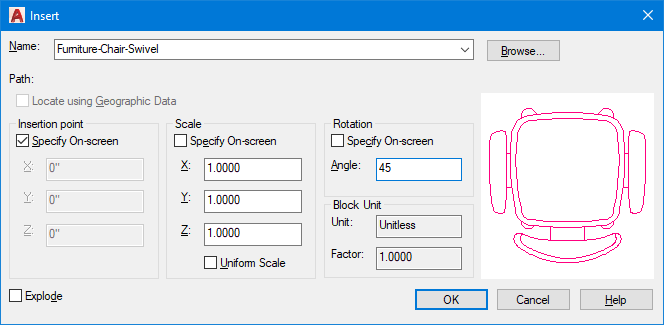
You can also insert a block using the keyboard with the Insert command. Press I Enter (the Insert Alias). The Insert dialog box will open again. Select Furniture-Chair-Swivel from the Name list.
-
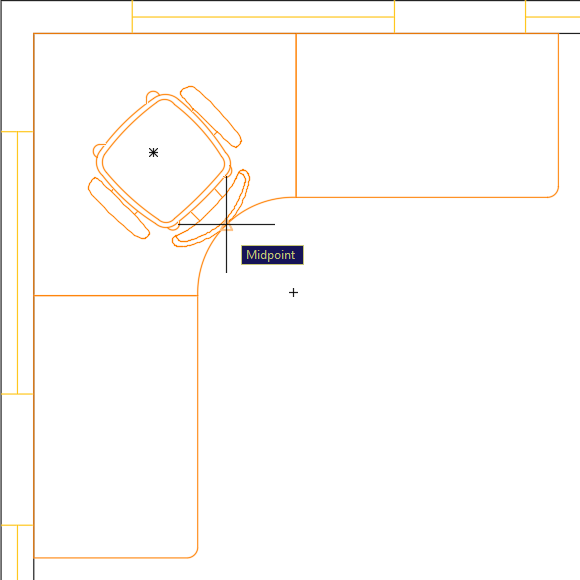
Place the base point of the chair at the midpoint of the inner curved edge of the desk as shown in the diagram below. This will make it easer center the chair with the desk using the Move tool.
-
Make sure the Polar Angle is set to 45˚. Start the Move tool
 and select the chair. For the base point, click the Geometric Center of the seat cushion. Move the chair along the 45˚ Polar Tracking line as shown in the diagram below. The chair will be centered with the desk.
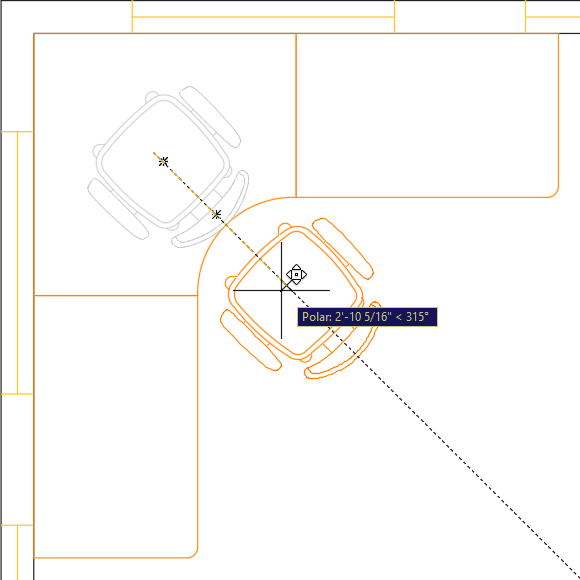
-
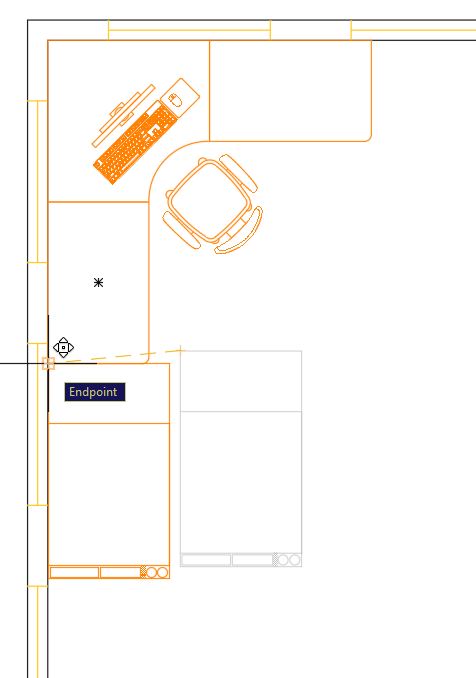
Start the Mirror command
 to duplicate mirrored copies of the desk and chair on the other side of the studio. Use the midpoint of the left wall as the first point of a horizontal mirror line.
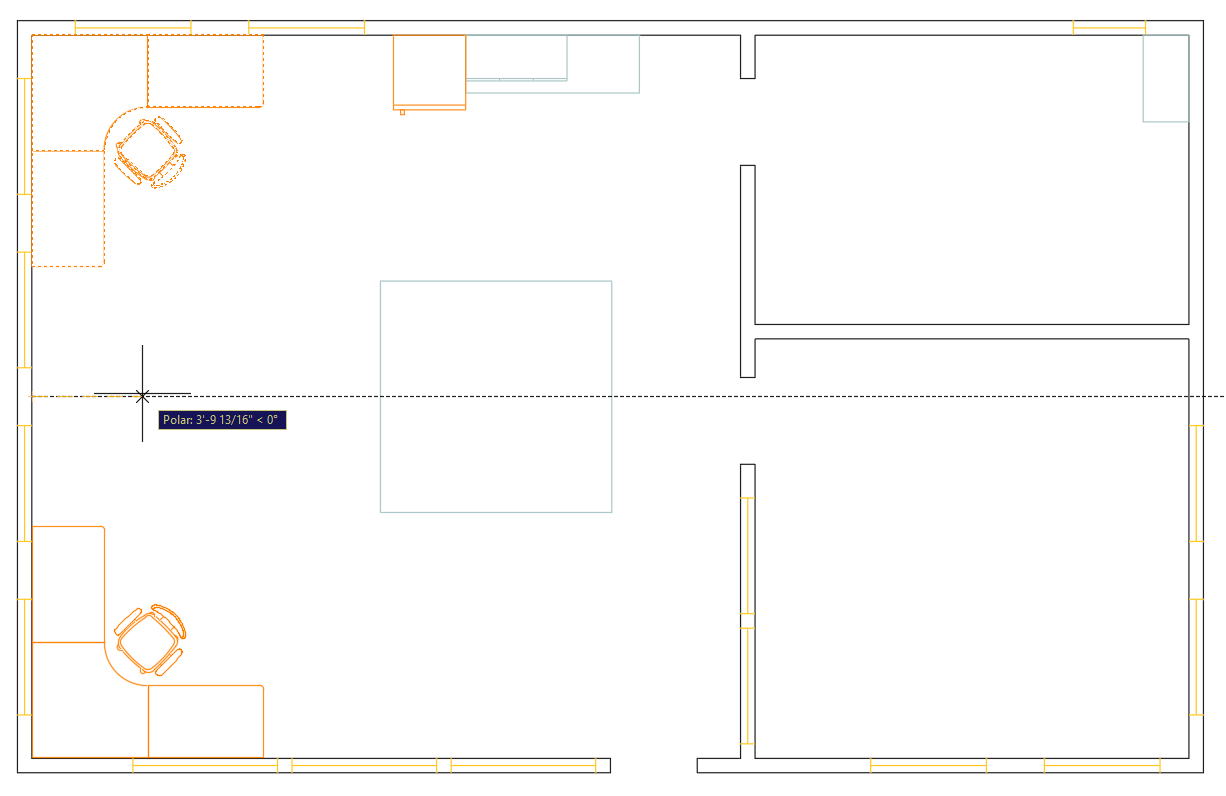
-
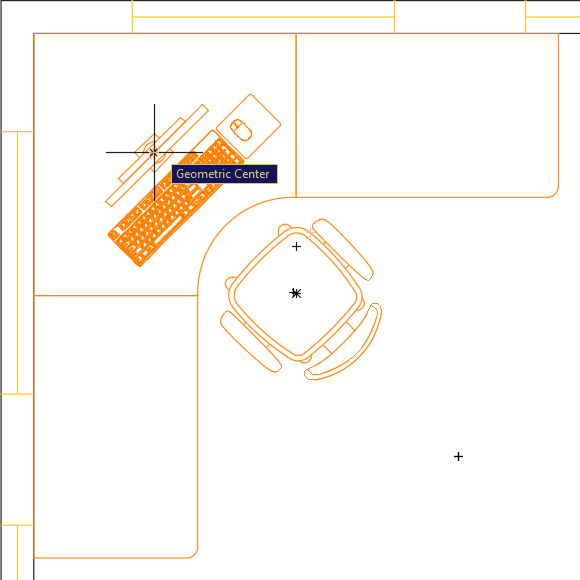
Use the Insert command the PC block upper desk. Set the Rotation angle to 45˚ and place the base point at the Geometric Center of the desk.
-
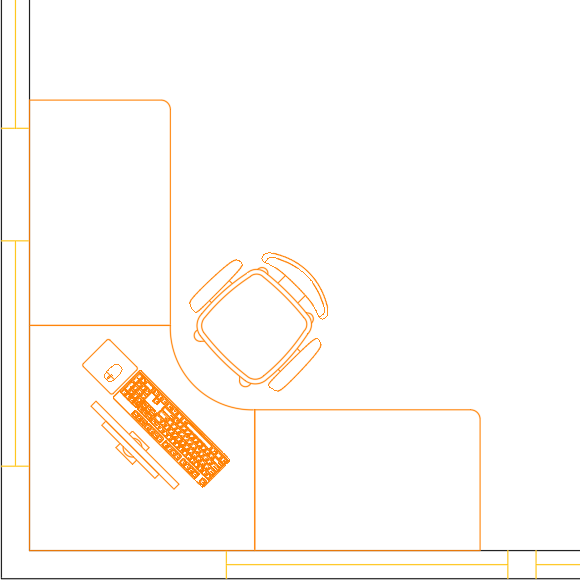
Repeat the process on the lower desk with a rotation angle of 135˚. You wouldn’t be able use the Mirror command to duplicate the PC because the block is asymmetrical.
-
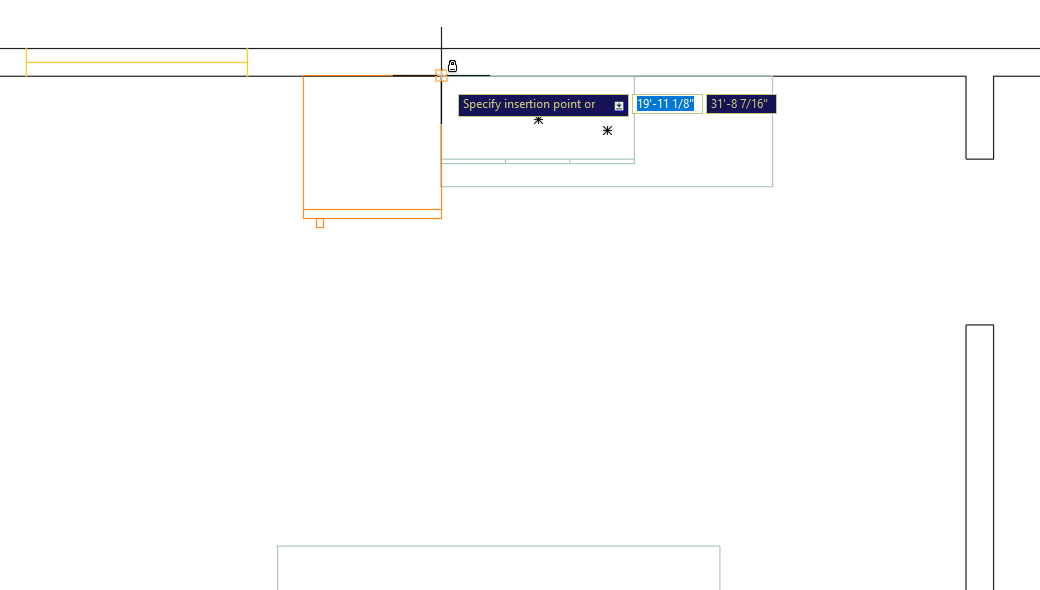
Now you will insert a drafting table. You won’t find it in the list of available blocks because it hasn’t been inserted yet. Blocks only exist attached to drawing files, so when you import a block, what you’re really doing is choosing a.dwg file to be inserted as a block into whatever drawing you’re working in. Start the Insert command. Click the Browse button in the Insert dialog box. Navigate to the Class Files folder and choose Furniture-Drafting Table.dwg and then click the Open button. In the Insert dialog box, type in 180˚ for the Rotation angle and click OK. You’ll need to place the table against the lower wall and the right side of the desk, but the base point isn’t in the right place to position it properly. Place it near the desk and use the Move tool
so you can put the base point at the lower-left corner of the Drafting Table and put it next to the desk as shown below.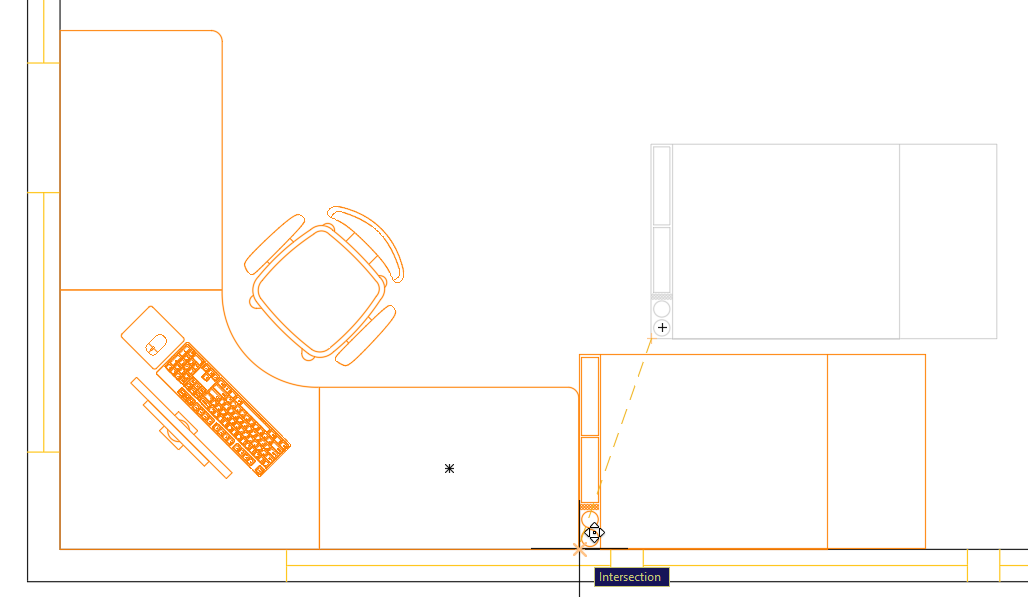
-
Repeat the process to place another Drawing Table next to the other desk using a rotation angle of 90˚ as shown.
TIP: Place the drafting table blocks near the desks with the Insert command and then use the Move tool to complete the process. You will often use modify tools in conjunction with the Insert command to place blocks.
-
Now you will insert another.dwg file as a block. Press I Enter to start the Insert command and click the Browse button. Select Furniture-Desk.dwg from the Class Files folder and click Open. In the Insert dialog box click OK. You’ll notice that the desk is very far from the base point, which will make it difficult to place. Also, the desk is white (or black if you’re using a light screen color) which doesn’t match the color of the current layer, A-Furniture. This is because the Furniture-Desk.dwg file was not set up properly to be used as a block. Press Escape to exit the Insert command. Delete the desk if you accidentally placed it.
-
Now you will set up the desk drawing so it can be used as a block. Open the file Furniture-Desk.dwg. The reason the base point of the desk was so far from the object is because of how the desk is placed in this drawing. When you insert a.dwg file as a block, the Origin Point at 0,0 is used as the base point of the block. You will need to move the desk so that point 0,0 is where you want the base point to be relative to the objects in the drawing. Press M Enter to start the Move tool
. Select the desk and click on its Geometric Center for the base point. When prompted to specify a second point, press # (Shift–3). You will see the pound sign # appear in the dynamic prompt. Pressing # will temporarily set the coordinate system to Absolute, so if you type in an XY coordinate, the base point will be moved to that position on the absolute XY grid. Type 0,0 and press Enter. The center of the desk will be moved to the Origin Point at 0,0, so that when the desk is inserted as a block, the base point of the block will be at the center of the desk.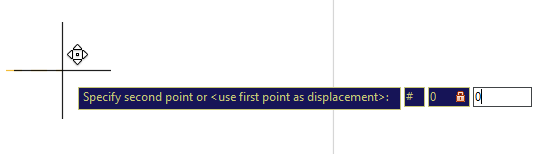
-
The other issue with this drawing that will cause a problem when it’s inserted as a block is that the desk is on the wrong layer. If objects that make up a block are on any layer other than 0, the block will keep the properties of that layer no matter what layer the block is placed on in the drawing. The desk is on the layer A-Walls, which is white, so the Furniture-Desk block will be white no matter what layer it’s on, which will make it likely that it will be placed on the wrong layer. That’s why the desk was white when it was placed on the A-Furniture Layer in the Blocks-Studio drawing.
If you place the objects that make up a block on layer 0 however, the block will be Property by Layer, so that the block will take on the properties of whatever layer it’s placed on. Select the desk and change its layer to 0.
NOTE: When you set an object’s color to White, the object will appear to be black if your screen background is set to a light color so you can always see the objects clearly. However, White objects will always print as black. This is because when AutoCAD was created, all computer screens were black, so the objects were made white so they could be seen clearly, but as it is today, most drawings were printed in black. This is why the primary drawing layer in most drawings is set to White. For the making of this book, the background color was set to white so screen captures would be clearer on the printed page, and white objects appear as black. You can change the screen background color in the Display tab of the Options dialog box (OP Enter).
The primary reason for assigning colors in AutoCAD is so that you can tell which layers objects are on, so color should be assigned by layer. However you may decide that you want the Linetype and/or Lineweight of a block to be consistent regardless of layer. This is one of the few cases when you might want to assign Property by Object, rather than By Layer. Select the desk and open the Properties Panel (CTRL–1). In the Properties Panel, change the Linetype to Continuous, and change the Lineweight to .30. Now the line type and line thickness will stay the same no matte what layer the block is placed on, but the color will change with the layer. Close and save the Furniture-Desk.dwg file.
-
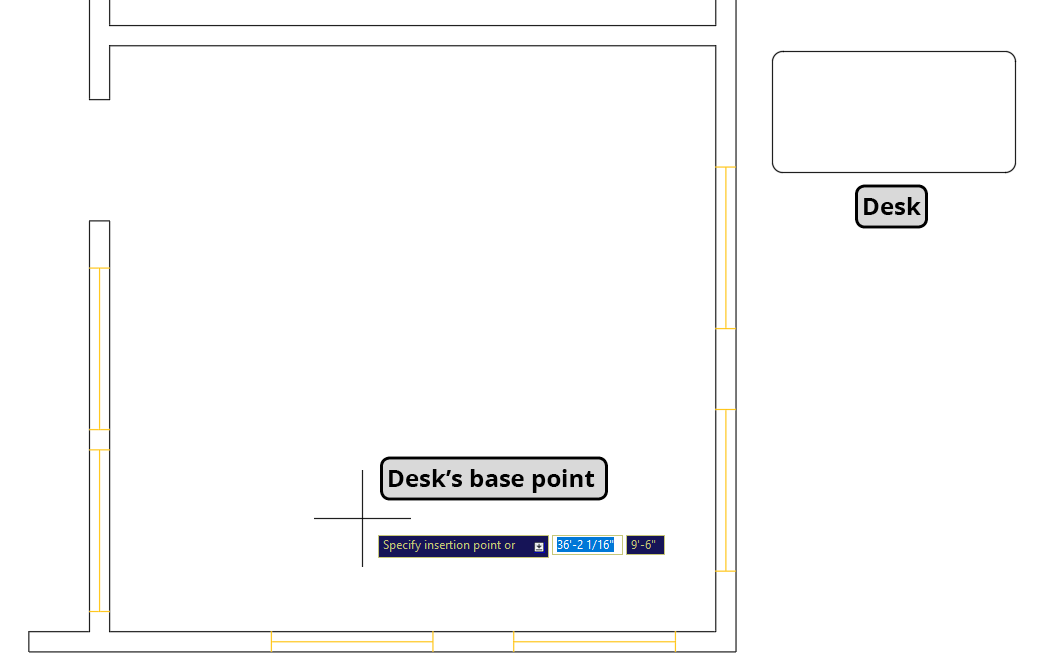
In the Block-Studio.dwg, press I Enter to start the Insert command. Click the Browse button, select the Furniture-Desk.dwg, and click Open. Because you already inserted this file as a block earlier, a dialog box will appear asking if you want to redefine the block. Click the Redefine button to update the block with the new file you corrected. In the Insert dialog box, enter 90˚ for the Rotation angle and click OK. Now the base point will be at the center of the desk making it much easier to place. Also, the color will be the same as the A-Furniture layer. Place the desk in the lower right room, which will be the office. Put it in the slight upper-right corner of the room as shown below.