Learn how to apply basic flooring patterns to rooms in AutoCAD with this step-by-step tutorial, including an overview of the Hatch command, layer modification, and how to save specific settings for future use.
This exercise is excerpted from Noble Desktop’s past AutoCAD training materials and is compatible with Photoshop updates through 2020. To learn current skills in AutoCAD, check out AutoCAD Bootcamp and AutoCAD classes in NYC and live online.
Topics Covered in This AutoCAD Tutorial:
Hatch Flooring
Exercise Preview
Exercise Overview
In this exercise, you will learn how to use the Hatch command to apply basic flooring patterns to rooms.

Hatch Flooring
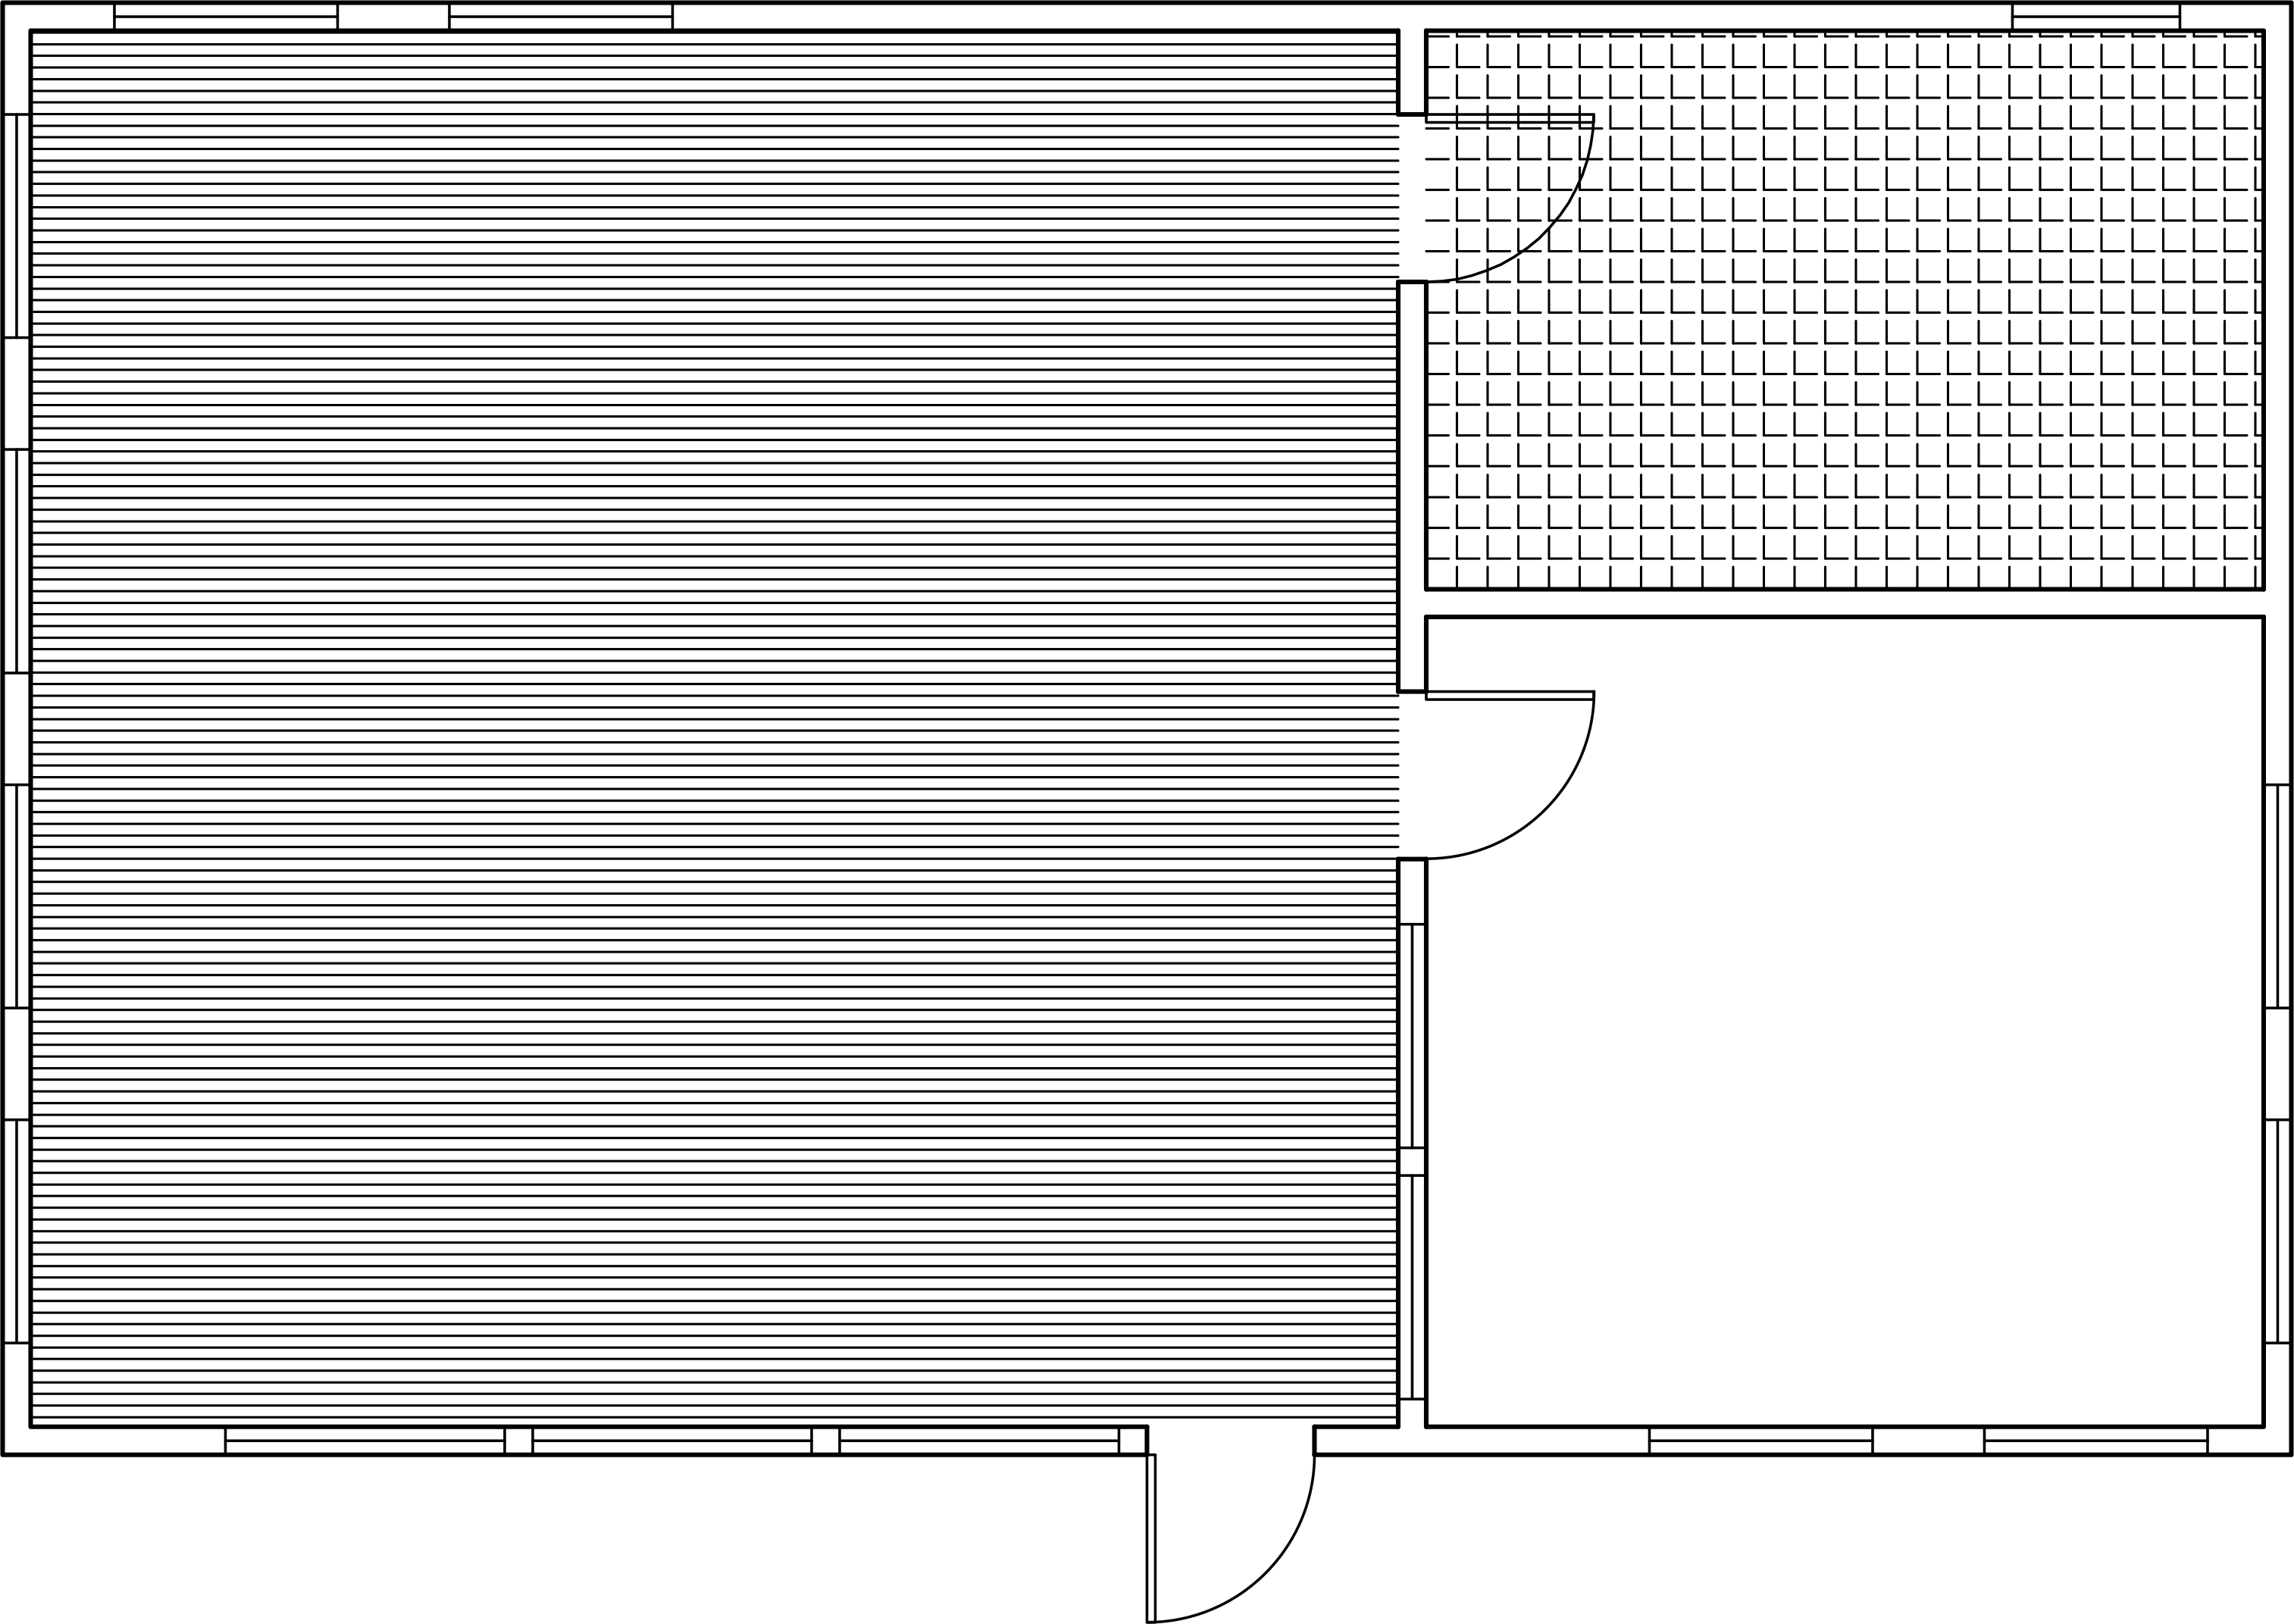
Open the file Hatch-Architectural.dwg.
Start the Layer Freeze (LAYFRZ) tool and click on any of the doors to freeze the A-Doors layer so that the doors will not interfere with the hatches.
Start the Hatch command by pressing H Enter. Expand the Properties panel of the Hatch Creation tab and change the layer to Hatch.
-
By default, you can only hatch closed areas, but in this drawing you need to hatch rooms with door openings. You can close the rooms by drawing lines on the hatch layer to close the opening, or you can enter a Gap Tolerance. If the of the openings of an area are within the Gap Tolerance, the hatch will fill the area. If there are too many gaps or the boundaries are too irregular, the hatch area may not be recognized or the hatch may be incorrect. In these cases you will need to create objects to close the hatch area. Note that if you hatch and open area by setting a Gap Tolerance, the hatch will NOT be associative.
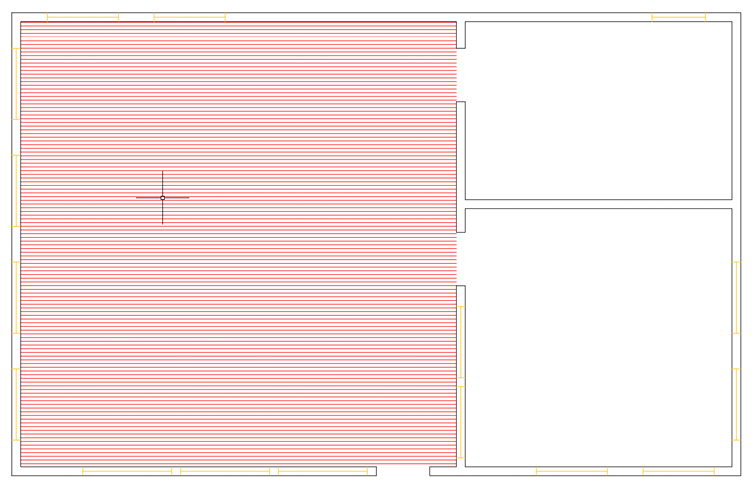
Expand the Options panel in the Hatch Creation Ribbon, enter a Gap Tolerance of 4’. Click inside the largest room on the left side of the structure. The Open Boundary Warning dialog will appear telling you that the boundary is not closed. Click Continue hatching this area. The hatch will fill the room up to the open doorway.
The hatch will appear to be a solid color. This is because this pattern was originally intended for small objects is in not big enough in proportion the room. If you zoom in close you will see the line pattern. In the Properties panel of the Hatch Creation tab, change the Scale to 20. The Cross Section hatch pattern will be visible, simulating a hardwood floor.
-
The pattern is at a 45˚ angle by default. In the Properties panel, change the Angle to -45 so the lines will be horizontal and press Enter to accept the settings and close the Hatch Creation Tab.
-
When you used the cross section hatch (ANSI31) to make hardwood flooring, you increased the scale so it would fit the room. If you apply a hatch in a scaled viewport on a layout, you can automatically scale the hatch in proportion to the paper size of the layout, making it easier to use small hatch patterns on large objects, like architectural structures.
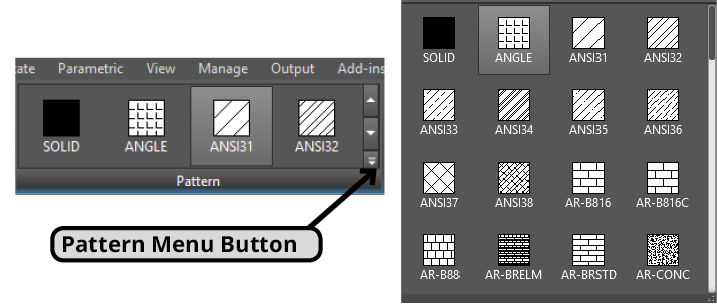
Switch to the D-Size Layout and change to Model Space. Start the Hatch command. Press the drop down menu button in the Pattern panel of the Hatch Creation tab to see all the available hatch patterns as shown below. Click to select the ANGLE pattern. In the Properties panel of the Hatch Creation Tab, change the Angle to 0 and the Scale to 1. For the internal point to place the hatch, click inside the small room in the upper right corner. When the Open Boundary Warning dialog appears, click Continue hatching this area.
Once again the hatch will appear to be a solid color because it is too densely packed. Expand the Hatch Creation Properties panel and click the Relative To Paper Space button. Press Enter to complete the hatch creation. The scale of the hatch will change scale in proportion with the layout to adequately represent floor tiling.
-
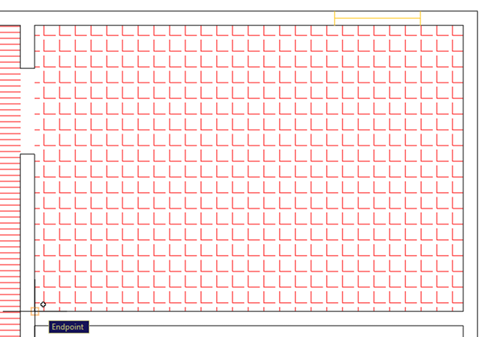
Now you will reposition the hatch. Select the tile hatch you just created and press the Set Origin button in the in the Hatch Editor Ribbon tab. Zoom in on the hatch and click on the Endpoint at the lower left corner of the room as shown below. This will become the new origin point for the hatch and the pattern will reposition to better match the area.
Press the Set Origin button and click on the Endpoint at the lower left corner of the room:
The Repositioned Hatch:

-
Once you have created a hatch with specific settings, you can save them in a Tool Pallet so you can use them at any time without having to reenter the same options.
Press CTRL–3 to open the Tool Pallet Window. Click on the Hatches tab. The Pallet Tab contains preset hatches that can be used in any drawing. You can also add your own custom hatches.
-
Make sure the tile hatch is still selected. Without clicking on any of the grips, click and hold on the hatch and drag it into the Hatch Pallet. If you move the hatch with the grip, you’ll move the hatch without putting it in the pallet.
Repeat the process with hardwood floor pattern in the large room so you can use both hatches in the next exercise.
Save and close the file.